
1. Introduction
This manual provides comprehensive instructions for the PLUGGEDSOLAR 800-Watt Plug and Play Solar Panel System. This grid-tied system is designed to generate electricity from sunlight and feed it into your home's electrical grid, helping to reduce your electricity bill. The system includes four 200-watt solar panels and a micro-inverter with built-in WiFi monitoring capabilities, offering a straightforward installation process.
2. Safety Information
Please read and understand all safety instructions before installing or operating the PLUGGEDSOLAR 800-Watt Solar Panel System. Failure to follow these instructions may result in electric shock, fire, or serious injury.
- Grid-Tied System: This system is designed to operate in conjunction with the utility grid. The micro-inverter complies with UL 1741 code for anti-islanding safety protection, meaning it will automatically shut down if the utility grid power is interrupted (e.g., during a power outage). This prevents electricity from being fed back into the grid during an outage, protecting utility workers.
- Electrical Connections: All electrical connections must be secure and free from damage. Ensure the plug-in cord is properly inserted into a functional 110/120V wall socket.
- Dedicated Circuit: It is recommended to connect this device to a dedicated electrical circuit to prevent exceeding the current rating of your home's wiring. Consult a qualified electrician if you are unsure about your home's electrical capacity.
- Water and Moisture: Keep all electrical components, including the inverter and connections, dry. Avoid installation in areas prone to flooding or excessive moisture.
- Handling Solar Panels: Solar panels can be heavy and fragile. Handle them with care to avoid damage. Do not step on or apply excessive pressure to the panels.
- Children and Pets: Keep children and pets away from the solar panel system during installation and operation.
3. Package Contents
Verify that all components are present and undamaged upon receipt:
- 4 x 200 Watt Solar Panels (total 800 Watt)
- 1 x Micro Grid Tie Inverter with built-in WiFi Power Monitor
- 1 x 50 ft Plug-in Cord (ready to connect to a 110/120V wall socket)
4. Setup and Installation
The PLUGGEDSOLAR system is designed for a straightforward, two-step installation. Ensure you have a suitable outdoor location with ample sunlight exposure for the solar panels.
Step 1: Connect Solar Panels to Inverter
- Connect the positive cord (marked with '+') of the first solar panel to the negative cord of the second solar panel.
- Connect the negative cord of the first solar panel to the micro-inverter.
- Connect the positive cord (marked with '+') of the second solar panel to the micro-inverter.
- Repeat this process for the remaining two solar panels and the second input on the micro-inverter.
Refer to the connection diagram below for visual guidance:

Image Description: A detailed diagram illustrating the electrical connections between two solar panels and a micro-inverter. The diagram shows positive and negative terminals on the solar panels connecting to the inverter inputs, with clear labels for each connection point. The inverter is labeled 'NEP NORTHERN ELECTRIC'.
Step 2: Position Panels and Plug into Wall
- Position the solar panels to face the sun, optimizing for maximum sunlight exposure throughout the day.
- Plug the 50 ft cord from the micro-inverter into a standard 110/120V wall socket.
- Wait approximately 6 minutes for the inverter to initialize and begin power generation.
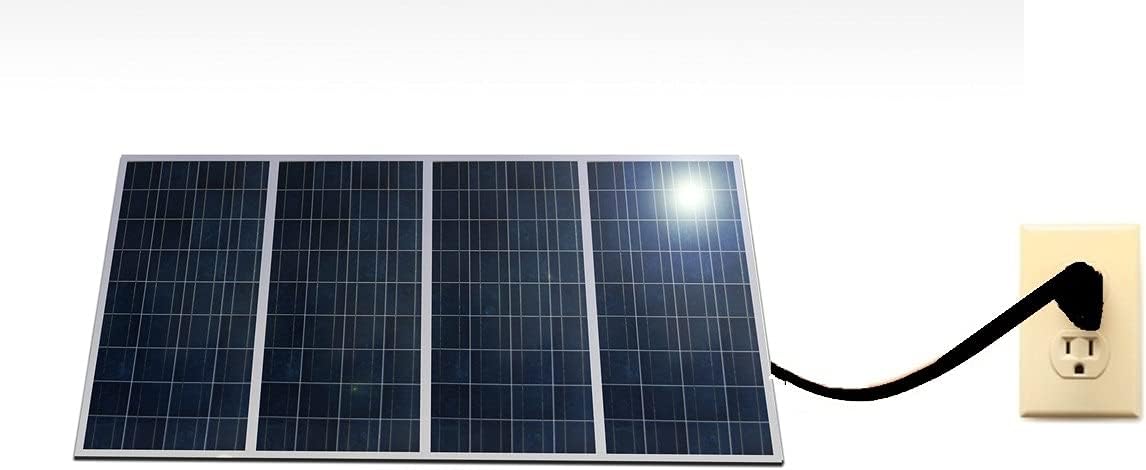
Image Description: An illustration showing a solar panel connected via a cable to a standard electrical wall outlet, demonstrating the 'plug and play' nature of the system.
5. Operating Instructions
Once installed and plugged in, the PLUGGEDSOLAR system operates automatically when exposed to sunlight.
- Power Generation: When the sun shines on the solar panels, they produce DC voltage. The micro-inverter then converts this DC voltage into AC voltage, synchronizing it with your utility grid. This AC power is fed into your home's electrical system, reducing the amount of electricity drawn from the utility company.
- Inverter Status: A blinking red light on the inverter indicates that it is operating correctly and the Maximum Power Point Tracking (MPPT) function is active, optimizing power output.
6. WiFi Monitoring Setup
Monitor your system's performance and energy generation using the dedicated mobile application.
- Download the App: Scan the QR code below or visit emporiaenergy.com/app to download the Emporia Energy app onto your smartphone or tablet from the Apple App Store or Google Play.
- Create Account: Open the app and create a new user account.
- Add Device: Choose 'Smart Outlet' to begin the setup process for your micro-inverter's WiFi power monitor.
- Existing Users: If you already have an account, navigate to 'Settings' > 'Manage Devices' > '+ Add a Device' and then choose 'Smart Outlet' to begin the setup process.
- WiFi Requirement: During setup, ensure your WiFi network is operating on the 2.4GHz frequency.
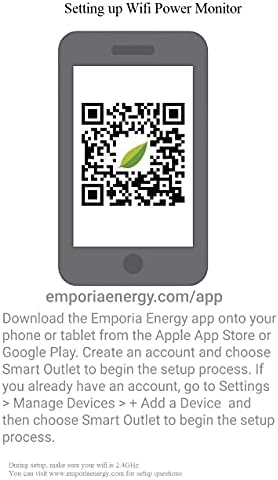
Image Description: A QR code displayed on a smartphone screen, which links to the Emporia Energy app download page. Below the QR code, instructions for downloading and setting up the app are provided.

Image Description: A white smart plug device positioned next to a smartphone displaying an energy monitoring application interface. The app shows real-time and historical energy usage data, including lifetime usage, current usage, and graphs of power generation over time.
7. Maintenance
Regular maintenance helps ensure optimal performance and longevity of your solar panel system.
- Panel Cleaning: Periodically clean the surface of the solar panels to remove dust, dirt, leaves, or other debris that may obstruct sunlight. Use a soft cloth and water; avoid abrasive cleaners or harsh chemicals.
- Visual Inspection: Regularly inspect the panels, wiring, and inverter for any signs of damage, corrosion, or loose connections. Address any issues promptly.
- Clear Obstructions: Ensure no new obstructions (e.g., growing trees, new structures) are shading the solar panels, as this can significantly reduce power output.
8. Troubleshooting
If you encounter issues with your PLUGGEDSOLAR system, consider the following basic troubleshooting steps:
- No Power Generation: Ensure the solar panels are receiving direct sunlight and are not shaded. Verify that the inverter's plug is securely inserted into the wall socket.
- Inverter Status Light: A blinking red light on the inverter indicates normal operation. If there is no light or a solid red light, consult the inverter's specific manual or contact support.
- System Reset: If the system is not performing as expected, try unplugging the inverter from the wall socket, waiting a few minutes, and then plugging it back in. This can sometimes resolve minor operational glitches.
- WiFi Monitoring Issues: Ensure your smartphone is connected to a 2.4GHz WiFi network during setup. Check your home's internet connection.
- Professional Assistance: For persistent issues or complex electrical problems, it is recommended to contact a qualified electrician or the manufacturer's support.
9. Specifications
Detailed technical specifications for the PLUGGEDSOLAR 800-Watt Solar Panel System:
| Feature | Specification |
|---|---|
| Brand | PLUGGEDSOLAR |
| Model Number | PluggedSolar 640 |
| Total Solar Power | 800 Watts (4 x 200 Watt Panels) |
| Panel Material | Monocrystalline Silicon |
| Panel Dimensions (each) | Approx. 54"L x 26"W (4.5 ft x 2.2 ft) |
| System Dimensions | 16"L x 16"W x 4"H (Packaging/Inverter) |
| Item Weight | Approx. 5 Pounds (System components, panels shipped separately) |
| Efficiency | High Efficiency PV cells |
| Maximum Voltage | 120 Volts (AC Output) |
| Included Components | 4 Solar Panels, 1 Micro-Inverter, 50ft Plug-in cord |
| Special Feature | Plug and Play capability, WiFi Power Monitor |
| Power Source | Solar Powered (Grid-Tied) |
| UPC | 610079382909 |
Note: The dimensions for individual solar panels are approximately 4.5 ft x 2.2 ft (54 inches x 26.4 inches). The 'Product Dimensions' of 16"L x 16"W x 4"H likely refer to the inverter or packaged components.
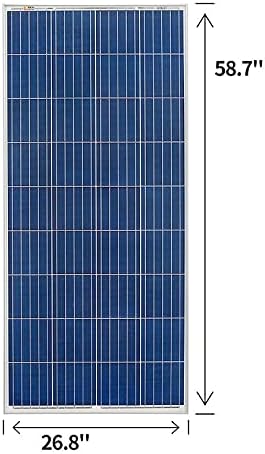
Image Description: A single solar panel with its length labeled as 58.7 inches and width as 26.8 inches, providing a visual reference for the panel's physical size.
10. Warranty and Support
For information regarding product warranty, please refer to the documentation included with your purchase or contact PLUGGEDSOLAR directly through their official website or the seller from whom the product was purchased. Support for the WiFi monitoring app is provided by Emporia Energy.