
1. Introduction
This manual provides essential information for the safe and efficient operation, installation, and maintenance of your sloHEXtted Q400 4 Button Wireless Crane Remote Control Kit. This kit includes one transmitter and one receiver, designed for AC 110V applications. Please read this manual thoroughly before installation and use to ensure proper functionality and safety.
2. Safety Information
WARNING: Failure to follow these safety instructions may result in serious injury or equipment damage.
- Always ensure the emergency stop button is accessible and functional. Activate it immediately in case of an emergency.
- Only qualified personnel should install, operate, and maintain this equipment.
- Verify that the power supply matches the receiver's voltage requirements (AC 110V).
- Do not operate the remote control if it is damaged or malfunctioning.
- Maintain a clear line of sight to the controlled equipment whenever possible.
- Avoid operating the equipment in conditions beyond its specified IP65 dust-proof and waterproof rating.
- Ensure all connections are secure and properly insulated to prevent electrical hazards.
3. Package Contents
Carefully unpack the box and verify that all items listed below are present and undamaged.
- 1x Transmitter
- 1x Receiver
- 1x Transmitter Button Sticker Sheet
- 1x Transmitter Dust Sleeve
- Installation Hardware (screws, nuts, washers)
- User Manual (this document)
Note: 2 AA batteries are required for the transmitter and are not included in the package.

Figure 3.1: Package Contents
4. Product Features
- 4-Button Momentary Control: Provides precise control for various applications.
- EU Standard Emergency Stop: A prominent red push-button for immediate system shutdown.
- Robust Construction: Transmitter and receiver are made from nylon reinforced fiberglass, offering strong anti-pressure, waterproof, anti-corrosion, and insulation properties.
- Ergonomic Design: The lightweight transmitter is designed for comfortable handling.
- High Signal Stability: Advanced processor with multi-bit Hamming code ensures fast, secure, and error-free coding and decoding.
- Extended Control Range: Operates effectively up to 100 meters (328 feet) with 360-degree barrier-free remote control.
- IP65 Rated: Dust-proof and waterproof, suitable for harsh industrial environments with high oil pollution, humidity, and dust.
- Quality Components: Features solid silicone-wrapped buttons for durability and a high-performance metal contact circuit board.

Figure 4.1: Transmitter Features
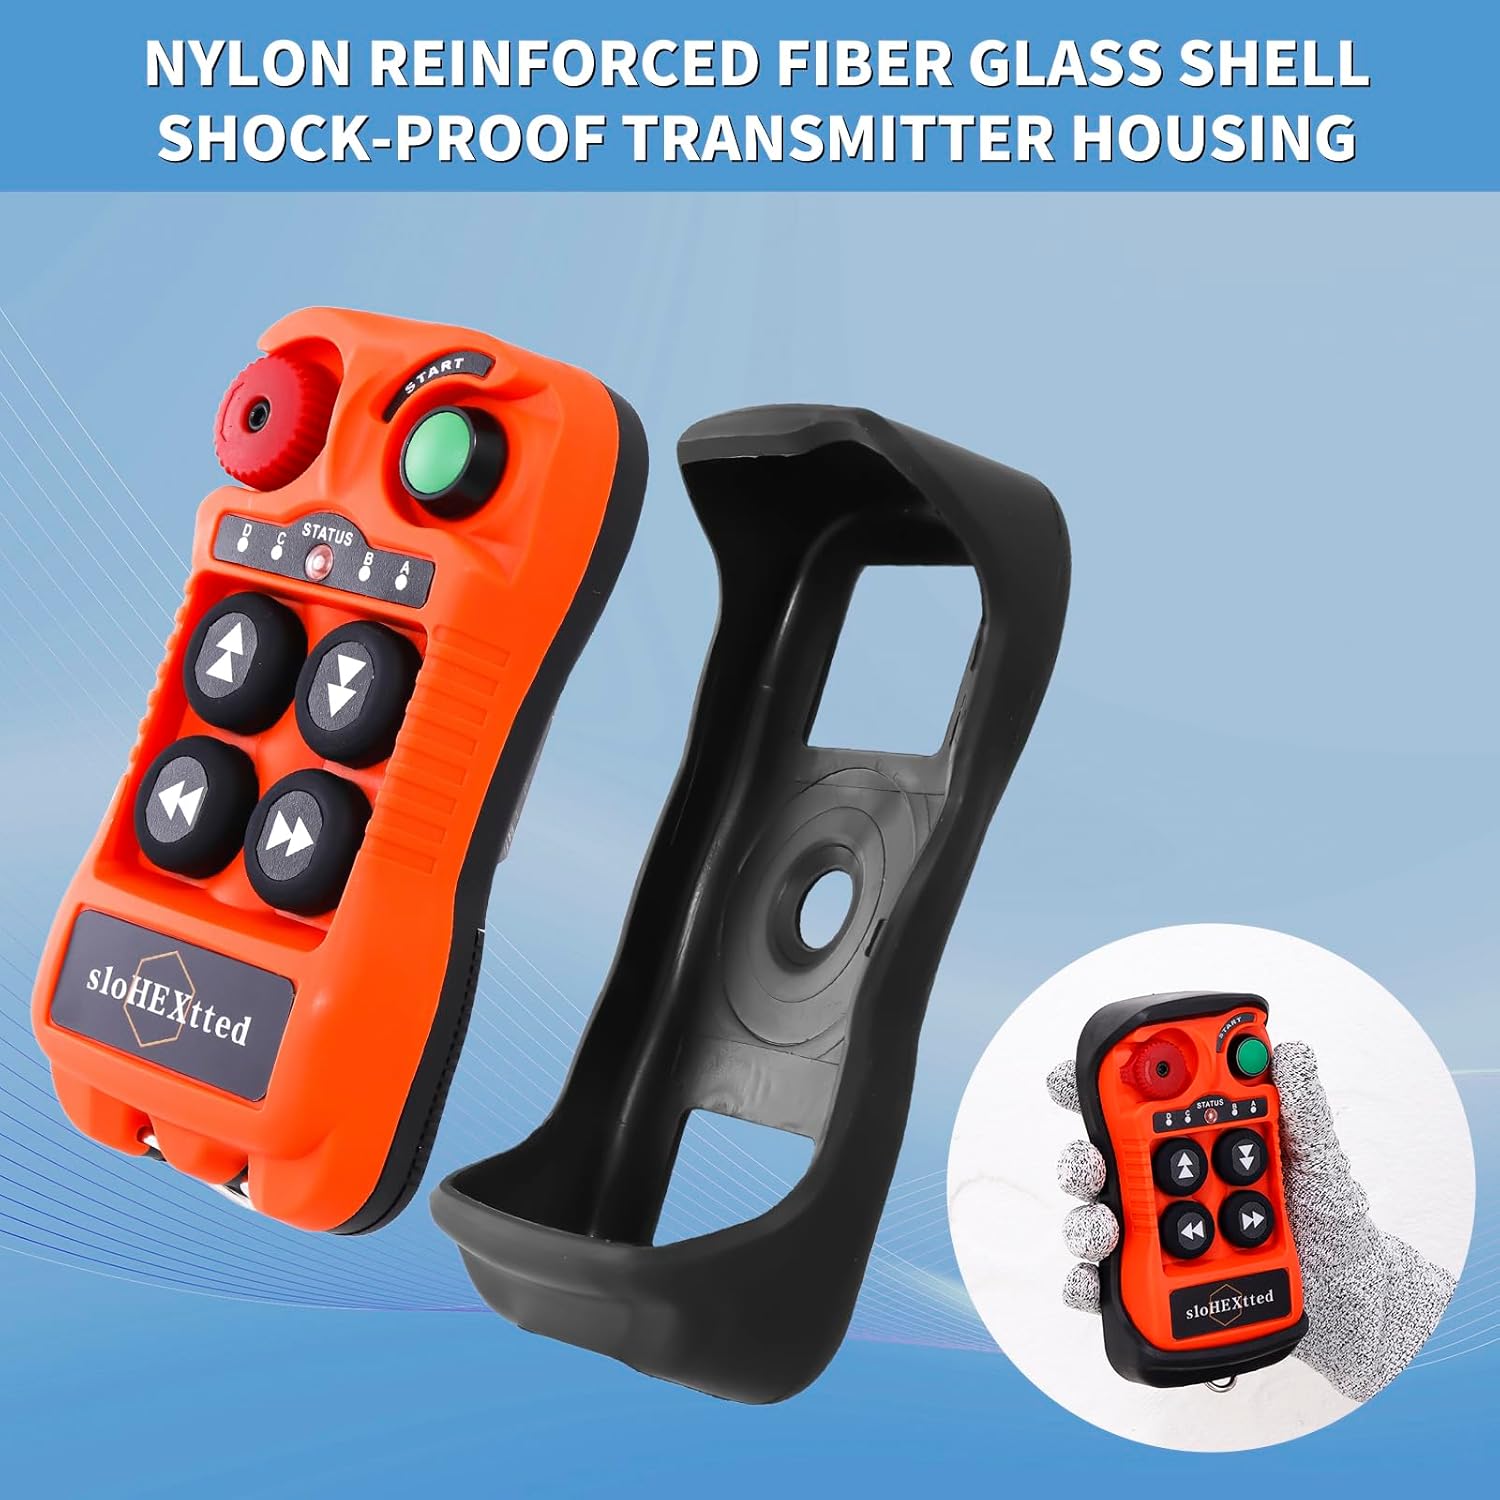
Figure 4.2: Transmitter Housing and Shell

Figure 4.3: Emergency Stop Button

Figure 4.4: Efficient Control Capabilities
5. Setup and Installation
5.1 Transmitter Battery Installation
- Locate the battery compartment on the back of the transmitter.
- Open the battery compartment cover.
- Insert two (2) AA batteries, ensuring correct polarity (+/-).
- Close the battery compartment cover securely.
5.2 Receiver Wiring and Mounting
The receiver is designed for surface-mounted installation. Ensure the mounting location is secure, free from excessive vibration, and allows for proper antenna reception.
- Mount the receiver securely using the provided installation screws.
- Connect the receiver to the power supply (AC 110V) and the control circuit of your equipment according to the wiring diagram provided with the product or on the receiver unit itself. Consult a qualified electrician for wiring if you are unsure.
- Ensure the antenna is properly connected and positioned for optimal signal reception.
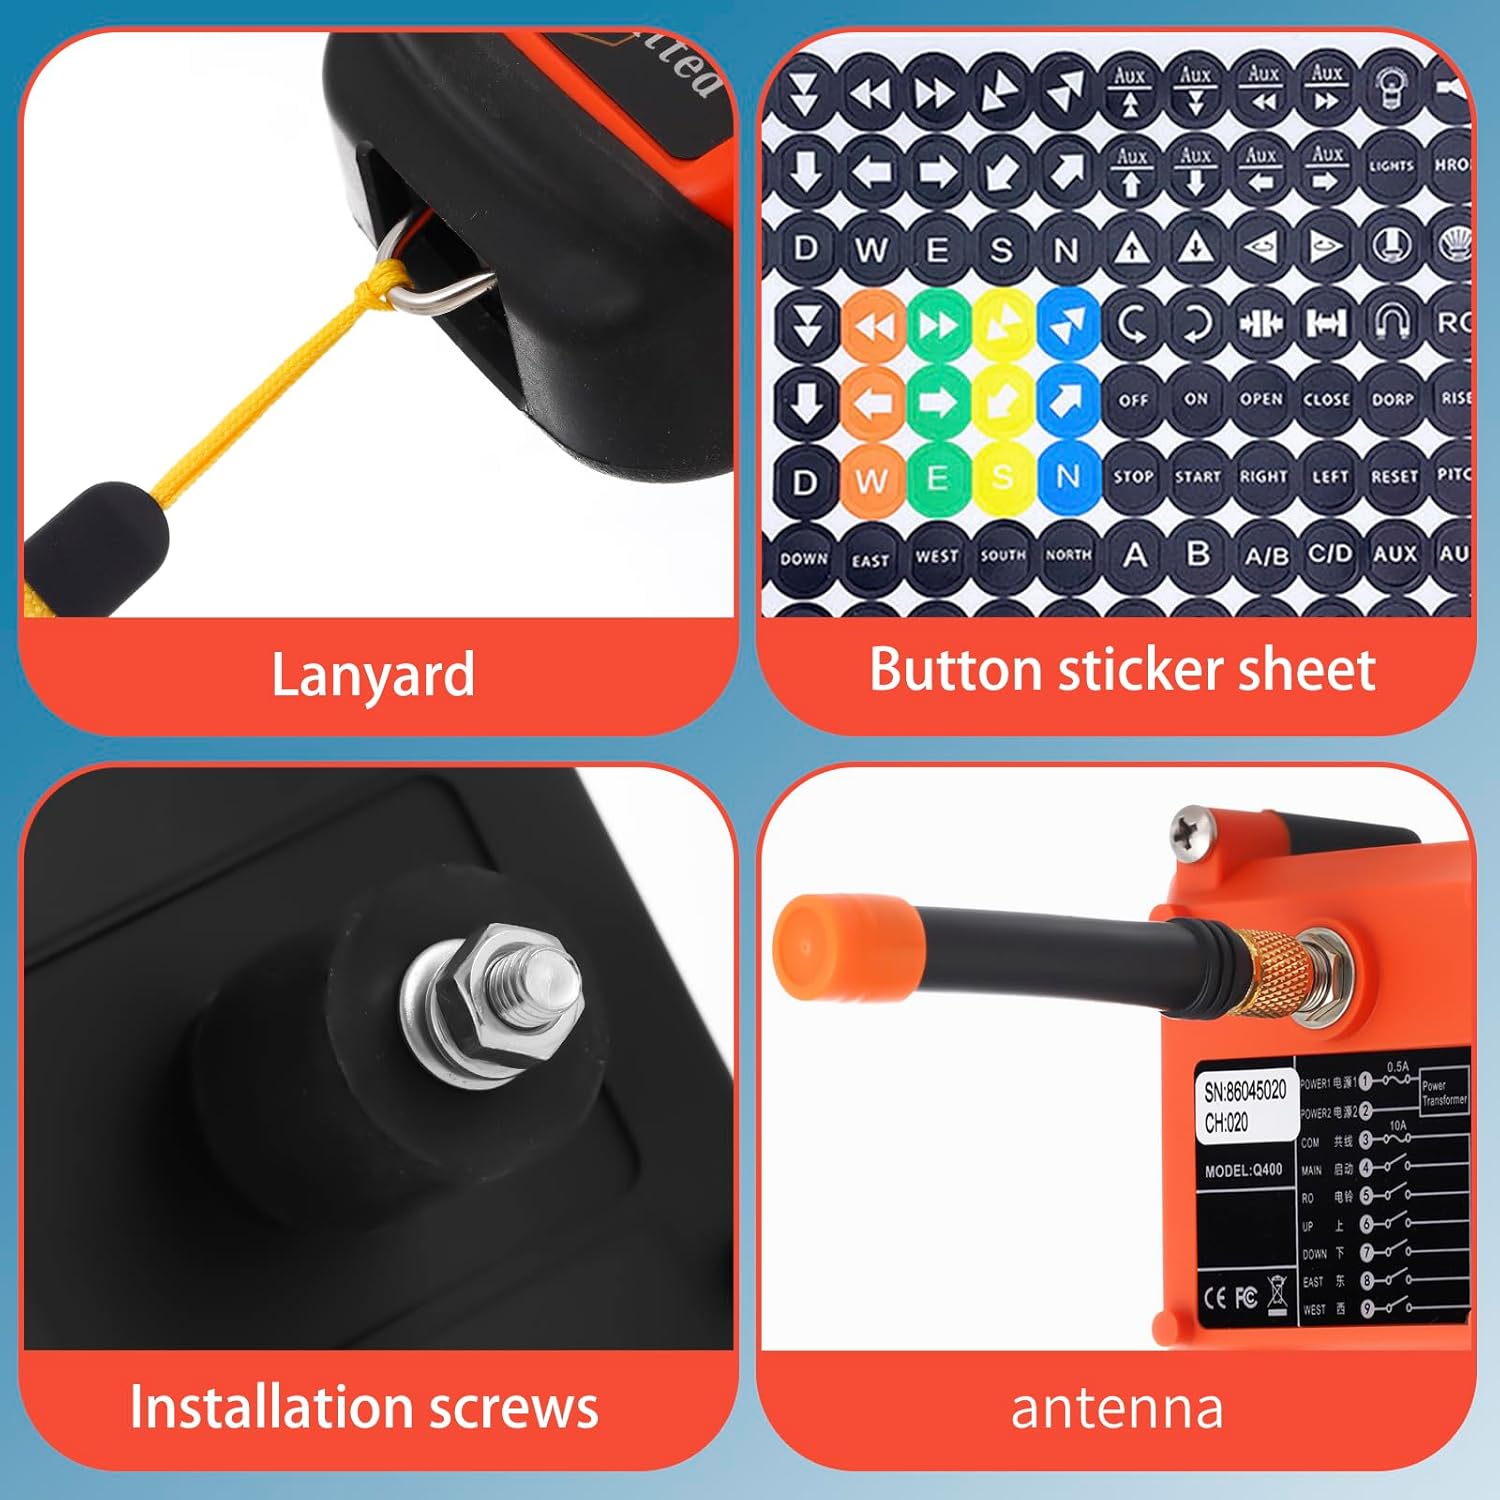
Figure 5.1: Installation Details (Lanyard, Stickers, Screws, Antenna)

Figure 5.2: Transmitter and Receiver Overview
6. Operating Instructions
6.1 Transmitter Controls
- Emergency Stop Button (Red, Top Left): Twist to release. Press firmly to immediately cut power to the controlled equipment. Always ensure this button is functional before operation.
- ON/HORN Button (Green, Top Right): Press to power on the transmitter or activate the horn function if wired.
- Status LED (Above control buttons): Indicates transmitter status (e.g., power on, signal transmission).
- Control Buttons (4 Black Buttons): These are momentary buttons. Press and hold to activate the corresponding function (e.g., Up, Down, Left, Right). Release to stop the function. Use the provided sticker sheet to label buttons according to your application.
6.2 Basic Operation Sequence
- Ensure the receiver is powered on and correctly wired to the equipment.
- Release the Emergency Stop button on the transmitter by twisting it clockwise.
- Press the Green ON/HORN button to power on the transmitter. The Status LED should illuminate.
- Press and hold the desired control button to operate the equipment. Release the button to stop.
- In an emergency, press the Red Emergency Stop button.
- When finished, press the Emergency Stop button and/or power off the receiver if required by your system's safety protocols.
7. Maintenance
- Cleaning: Due to its IP65 rating, the remote control can be cleaned with a damp cloth. Avoid harsh chemicals or abrasive materials. Ensure no moisture enters the battery compartment.
- Battery Replacement: Replace transmitter batteries (2 AA) when the Status LED indicates low power or when control becomes intermittent. Always use fresh, high-quality batteries.
- Inspection: Regularly inspect the transmitter and receiver for any signs of physical damage, wear, or loose connections. Pay close attention to the antenna, buttons, and wiring.
- Emergency Stop Test: Periodically test the Emergency Stop button to ensure it functions correctly and immediately halts equipment operation.
8. Troubleshooting
| Problem | Possible Cause | Solution |
|---|---|---|
| Transmitter does not power on. | Dead or incorrectly installed batteries. | Replace batteries (2 AA) and ensure correct polarity. |
| Equipment does not respond to transmitter. |
|
|
| Intermittent control or delayed response. |
|
|
| Receiver lights are on, but no output voltage to equipment. | Internal relay issue or incorrect wiring to equipment. | Verify wiring connections from receiver to equipment. If problem persists, contact customer support. |
9. Specifications
| Feature | Detail |
|---|---|
| Manufacturer | sloHEXtted |
| Part Number | Q400 |
| Item Model Number | Q400 |
| Power Supply | AC 110V |
| Control Type | 4-Button Momentary |
| Control Distance | Up to 100 meters (328 feet) |
| Protection Rating | IP65 Dust-proof and Waterproof |
| Transmitter Batteries | 2 AA (not included) |
| Item Weight | 2.2 pounds (approx. 1 kg) |
| Product Dimensions | 9.13 x 7.8 x 2.99 inches (approx. 23.2 x 19.8 x 7.6 cm) |
| Installation Method | Surface-Mounted |
| Material | Nylon Reinforced Fiberglass |
Figure 9.1: Product Dimensions
10. Warranty Information
Specific warranty details for the sloHEXtted Q400 Wireless Crane Remote Control Kit are typically provided with the product packaging or can be obtained directly from the manufacturer. Please refer to the documentation included with your purchase or contact sloHEXtted customer service for comprehensive warranty information.
11. Support
For technical assistance, troubleshooting guidance beyond this manual, or any other product-related inquiries, please contact sloHEXtted customer service. Contact information can usually be found on the product packaging, the manufacturer's official website, or through your point of purchase.