1. Product Overview
The WOBANE Motion Sensor Stair Strip Lights provide convenient, automatic illumination for various indoor spaces. These rechargeable LED strip lights feature dual operating modes (manual and automatic) and are designed for easy installation with adhesive backing and magnetic control boxes. They are ideal for enhancing visibility and safety in areas such as stairways, closets, pantries, and cabinets.

Image: Complete kit of WOBANE Motion Sensor Stair Strip Lights, including two control boxes, two LED strips, and charging cables.
2. What's in the Box
- Control Boxes (2 units)
- LED Strips (2 units, 6.56ft each)
- USB Cables (2 units for charging)
- Cable Holders
- Iron Plates (for magnetic mounting)
- User Manual
3. Specifications
| Feature | Detail |
|---|---|
| Brand | WOBANE |
| Model Number | WBE015 |
| Color | White |
| Material | Plastic |
| Light Source Type | LED |
| Number of LEDs | 60 |
| Brightness | 200 Lumen (Max) |
| Color Temperature | 6000 Kelvin (Daylight White) |
| Power Source | Battery Powered (2 Lithium Polymer batteries included) |
| Voltage | 5 Volts |
| Wattage | 5 watts |
| Control Method | Motion sensor, Push Button |
| Installation Type | Adhesive (for strip), Magnetic (for controller) |
| Indoor/Outdoor Usage | Indoor |
| Water Resistance Level | Not Water Resistant |
| Product Dimensions | 4"L x 1.5"W x 4"H (Control Box) |
| Item Weight | 10.5 ounces |
4. Setup and Installation
The WOBANE Motion Sensor Stair Strip Lights are designed for simple installation without the need for tools, screws, or nuts. Follow these steps for optimal placement and functionality.
4.1 Preparing the Surface
- Clean the Surface: Ensure the surface where the LED strip and control box will be attached is clean, dry, and free of dust or grease. Use a dry wipe followed by a cleaning solution if necessary, and allow it to dry completely.
4.2 Installing the LED Strip
- Plan Placement: Determine the desired path for your LED strip. For stairways, consider placing it along the underside of the handrail or along the edge of the steps for optimal illumination.
- Peel and Stick: Carefully peel the backing from the adhesive tape on the LED strip. Press the strip firmly onto the prepared surface, ensuring good contact along its entire length.
- Cutting the Strip (Optional): The LED strip can be cut to length at designated black lines marked along the strip. Use scissors to cut precisely on these lines. If cutting, use the included connectors to re-establish electrical contact between cut sections if needed.

Image: Visual guide for cleaning the surface, peeling the adhesive, and sticking the LED strip during installation.
4.3 Installing the Control Box
- Magnetic Mounting: The control box features strong magnets on its back. You can directly attach it to any magnetic surface.
- Adhesive Mounting: For non-magnetic surfaces, use the provided iron plates with adhesive backing. Peel the backing from the iron plate and stick it to the desired location. Then, the control box can be magnetically attached to the iron plate.
- Connect LED Strip: Plug the LED strip's connector into the appropriate port on the control box.
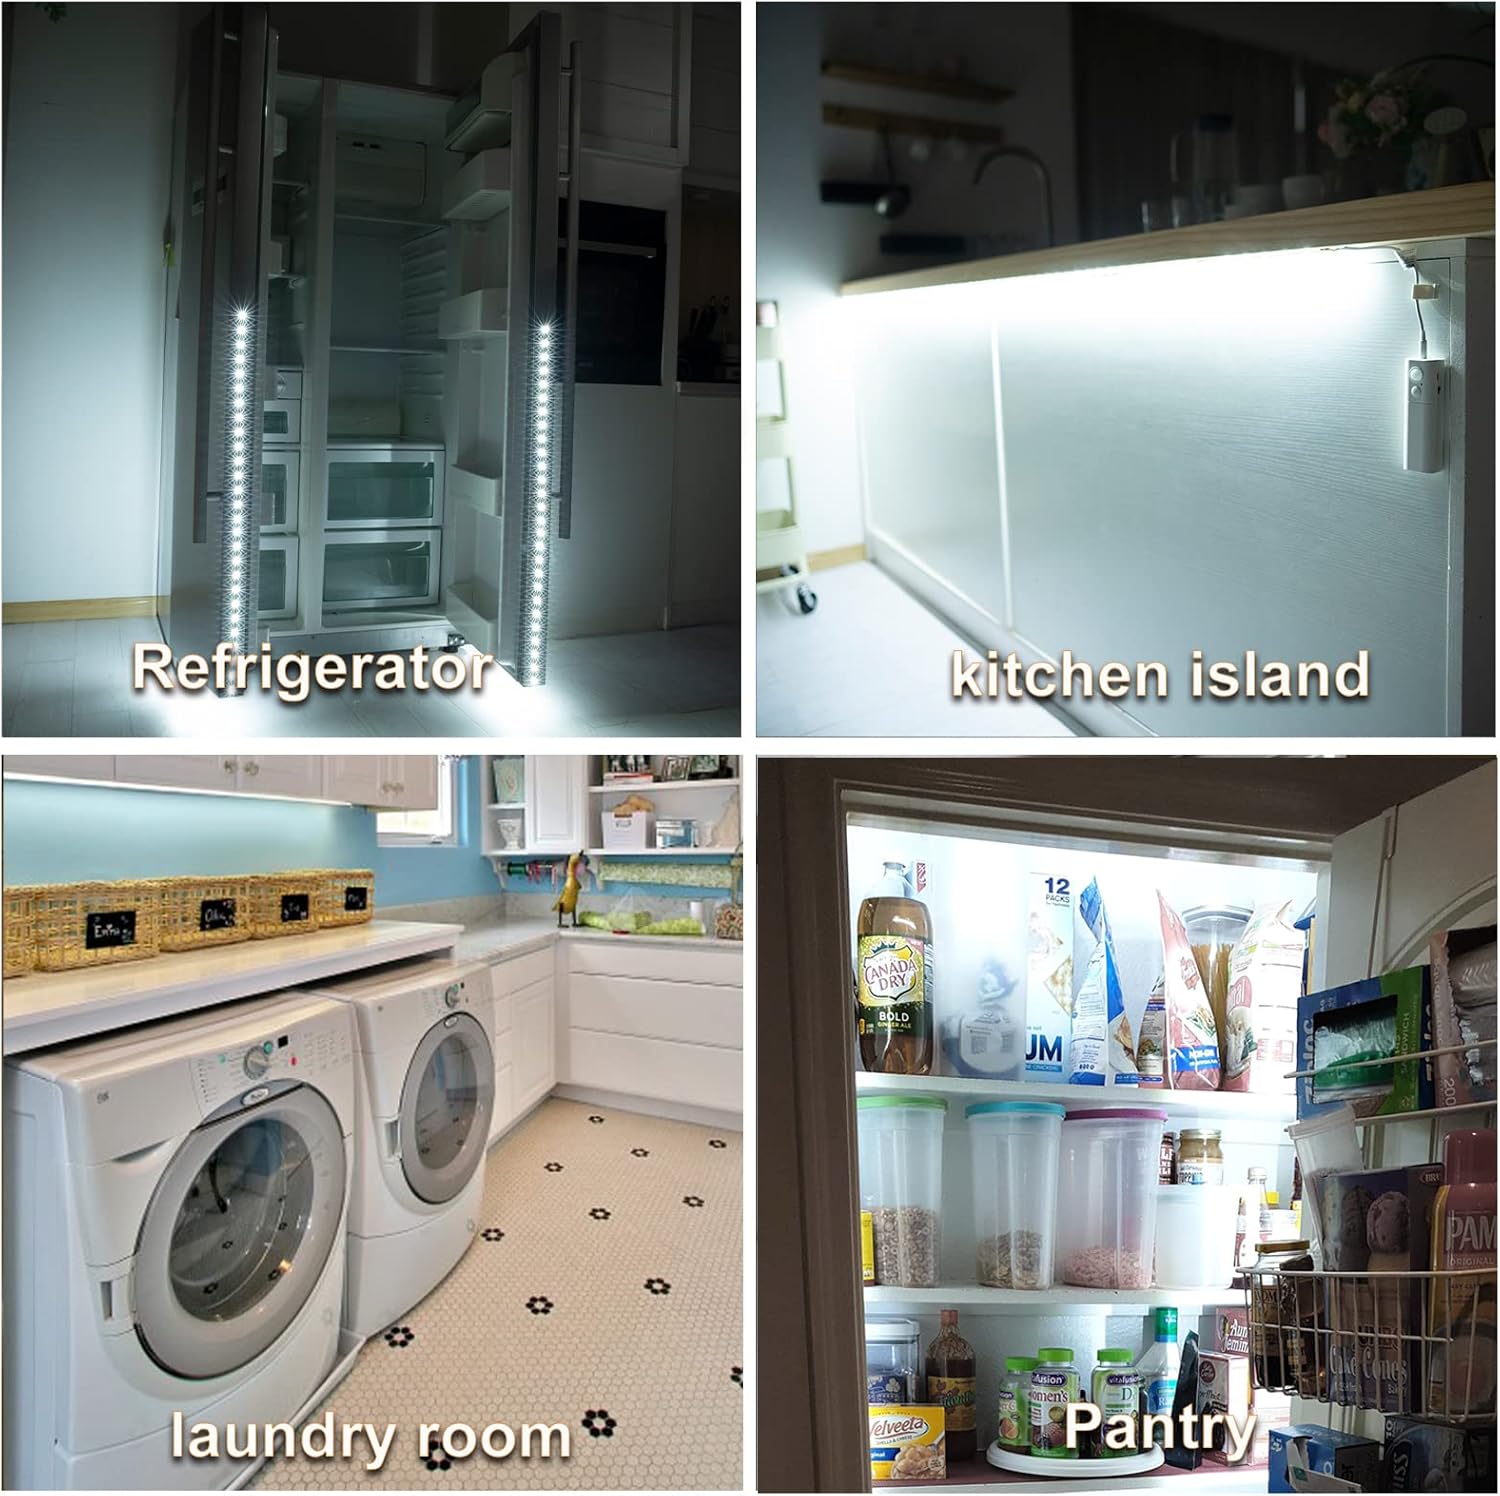
Image: Illustration of control box installation methods, including direct magnetic attachment and using adhesive iron plates.
5. Operating Modes
The WOBANE Motion Sensor Stair Strip Lights offer two operating modes: Manual and Automatic.
5.1 Manual Mode (M)
- To activate Manual Mode, slide the switch on the control box to the "M" position.
- In this mode, the lights are turned ON or OFF by pressing the button on the control box.
- The lights will remain on until manually switched off. This mode does not utilize the motion or light sensor.
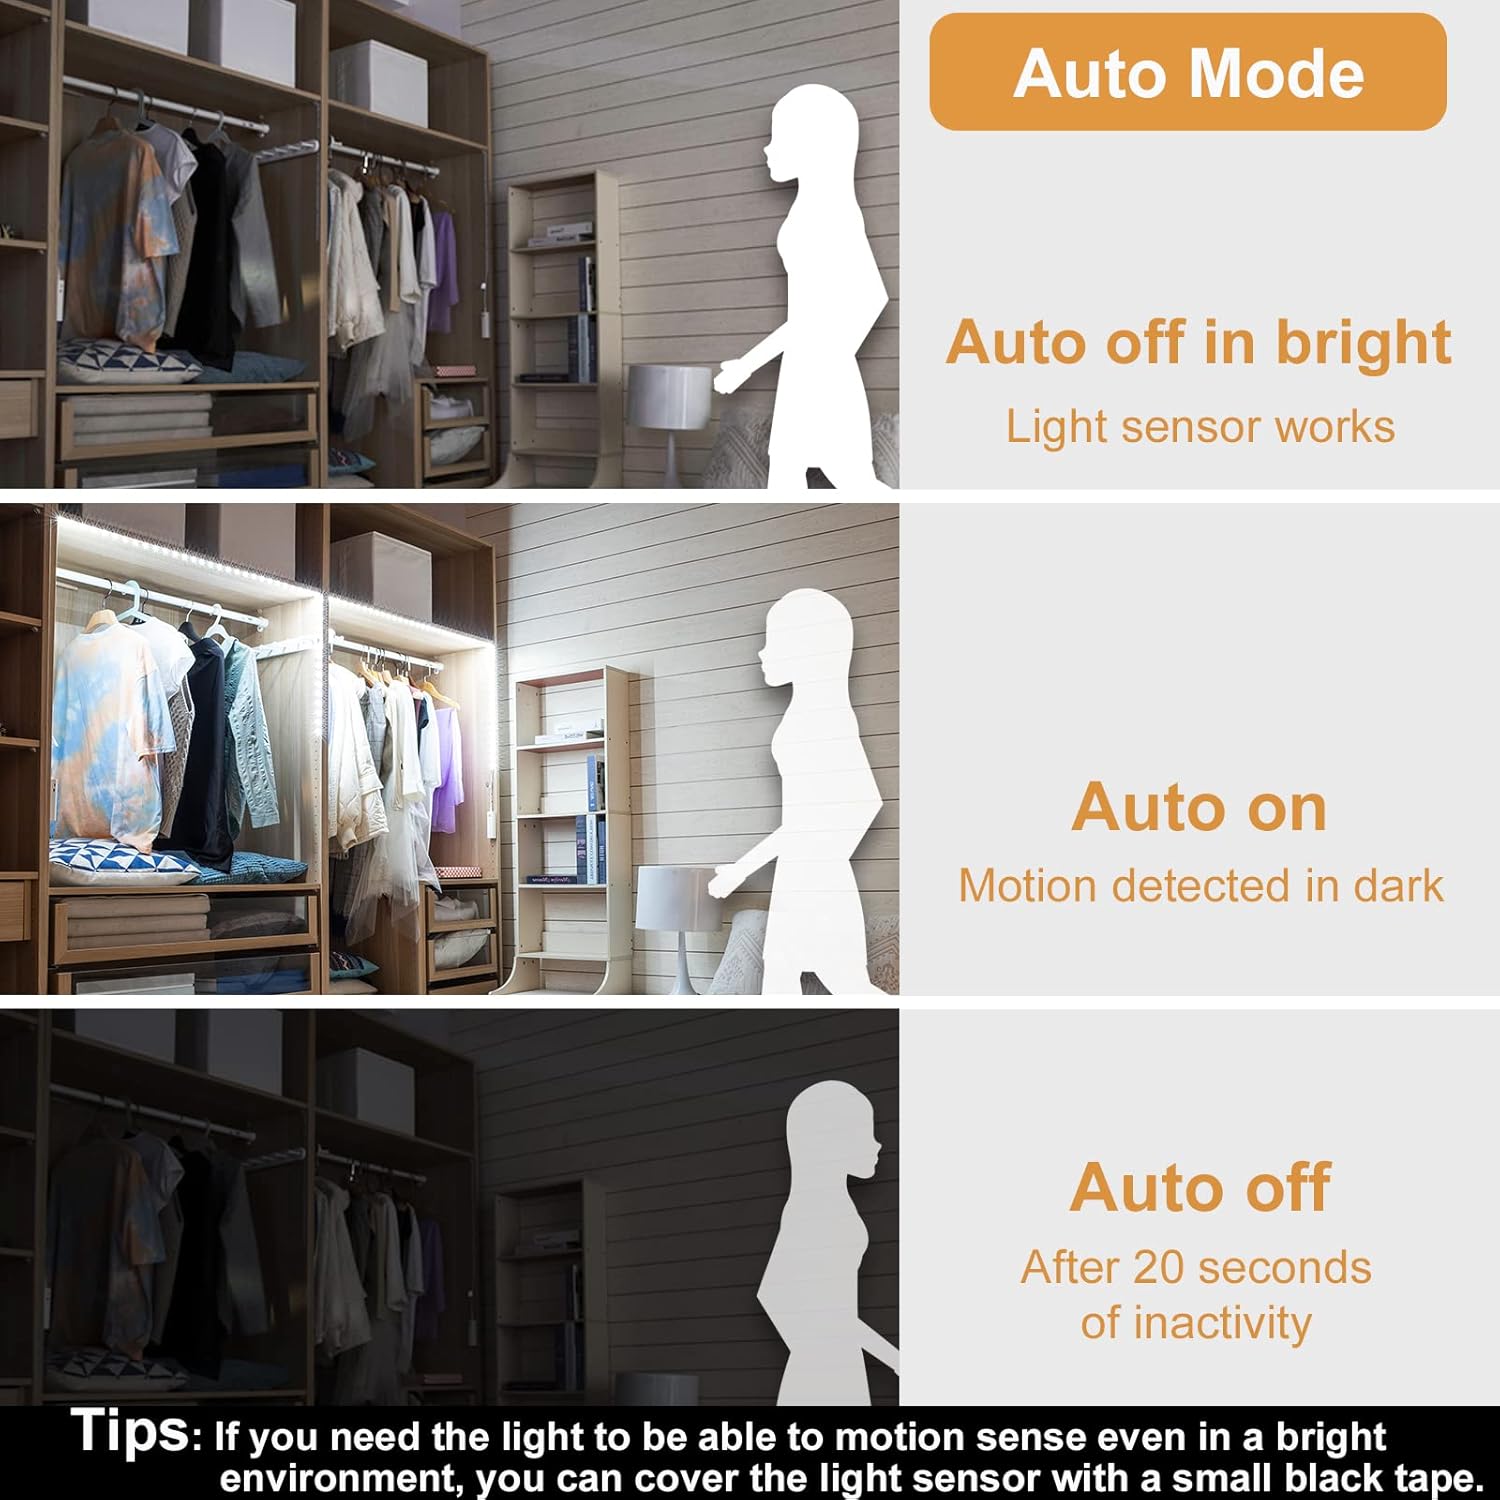
Image: Detail of the control box, highlighting the switch for Manual mode and the manual ON/OFF button.
5.2 Automatic Mode (A)
- To activate Automatic Mode, slide the switch on the control box to the "A" position.
- In this mode, the lights will automatically turn ON when human motion is detected within approximately 10 feet in a dark environment.
- The lights will automatically turn OFF after approximately 20 seconds of no movement or if the environment becomes bright.
- Tip: If you require motion sensing even in a bright environment, you can cover the light sensor with a small piece of black tape.

Image: Visual explanation of Automatic mode functionality, showing light sensor and motion detection behavior.
6. Charging the Control Box
The control box contains a built-in 2200 mAh rechargeable battery. When the battery is low, the indicator light will show red. To charge:
- Carefully detach the control box from its magnetic mounting.
- Connect the provided USB charging cable to the micro-USB port on the control box.
- Plug the other end of the USB cable into a standard USB power adapter (not included), computer USB port, or power bank.
- The indicator light will glow red during charging and turn green when fully charged. Charging typically takes 2-4 hours.
- Once charged, reattach the control box to its magnetic mounting.

Image: Charging status indicators on the control box, showing red for charging and green for fully charged.
7. Maintenance
- Cleaning: Wipe the LED strips and control box with a soft, dry cloth. Avoid using abrasive cleaners or solvents.
- Battery Care: To prolong battery life, avoid fully discharging the battery frequently. Recharge when the indicator light shows red.
- Storage: If storing the lights for an extended period, ensure the battery is partially charged (around 50%) and store in a cool, dry place.
8. Troubleshooting
| Problem | Possible Cause / Solution |
|---|---|
| Lights do not turn on in Automatic Mode. |
|
| Lights do not turn off. |
|
| Battery not holding charge or charging port issue. |
|
| LED strip not lighting up. |
|
9. Warranty and Support
WOBANE products are designed for quality and reliability. For any issues or questions regarding your Motion Sensor Stair Strip Lights, please refer to the contact information provided with your purchase or visit the official WOBANE store on Amazon for support.
Each item is verified by Transparency with a unique code before shipping, ensuring product authenticity.
