
GODOX D195081
Contents
Godox VING V860IIIS TTL Li-Ion Flash Kit for Sony Cameras User Manual
Model: V860IIIS (D195081)
Introduction
This manual provides detailed instructions for the safe and effective use of your Godox VING V860IIIS TTL Li-Ion Flash Kit for Sony Cameras. Please read this manual thoroughly before using the product to ensure proper operation and to prevent damage to the unit or injury to yourself or others. Keep this manual for future reference.
The Godox VING V860IIIS is a high-performance, shoe-mount flash designed for Sony Alpha cameras, offering advanced features such as TTL auto-flash, manual flash, multi-flash, high-speed sync, and a built-in 2.4G wireless X system. Its powerful Li-ion battery ensures fast recycling and a high number of full-power flashes.
Safety Precautions
- Do not disassemble or modify this product. If the product fails, it must be repaired by an authorized maintenance center.
- Keep this product dry. Do not handle with wet hands or immerse in water.
- Do not use the flash unit in the presence of flammable gases, chemicals, or other materials.
- The flash unit contains a lithium-ion battery. Use only the specified charger for recharging. Do not short-circuit, incinerate, or expose the battery to high temperatures.
- Do not touch the flash tube after continuous firing to avoid burns.
- Keep out of reach of children.
- Do not point the flash directly at human eyes, especially infants, from a close distance. This may cause visual impairment.
Product Overview
Control Panel and Hot Shoe
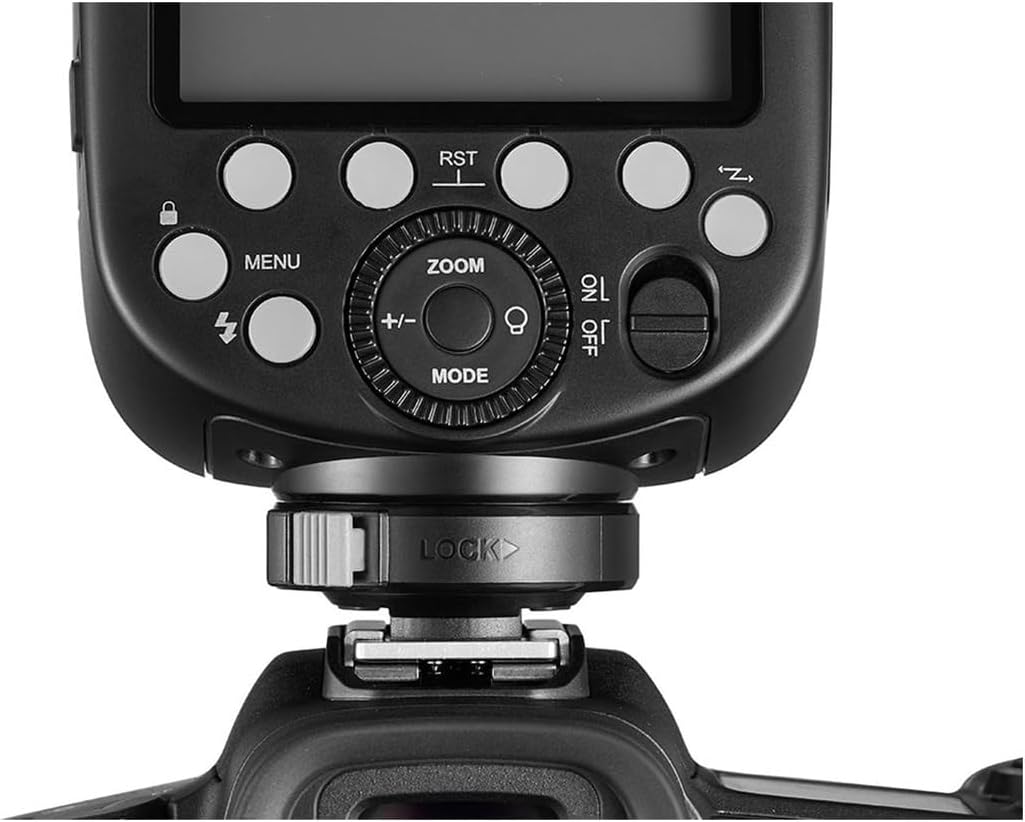
This image displays a close-up of the Godox V860IIIS flash unit's control panel and hot shoe. Key elements visible include the LCD screen (not illuminated), various function buttons such as MENU, ZOOM, MODE, and a power switch (ON/OFF). A central dial with +/- controls is present for adjustments. The locking mechanism for the hot shoe mount is clearly visible at the base, labeled "LOCK". This panel allows users to adjust flash settings and navigate menus.
Flash Head with Built-in Diffuser

The image shows the Godox V860IIIS flash unit with its head tilted upwards and a built-in wide-angle diffuser panel extended. The main flash tube is visible, along with the auxiliary light for focusing. The "Godox" logo is prominently displayed on the front. This configuration is typically used for softening light or bouncing it off a ceiling or wall.
Side View and Battery Compartment

This side view of the Godox V860IIIS flash unit highlights its sleek profile. The battery compartment door is visible on the side of the main body, indicating where the Li-ion battery is inserted. The flash head is positioned straight forward, and the hot shoe mount is at the bottom.
Front View of Flash Head
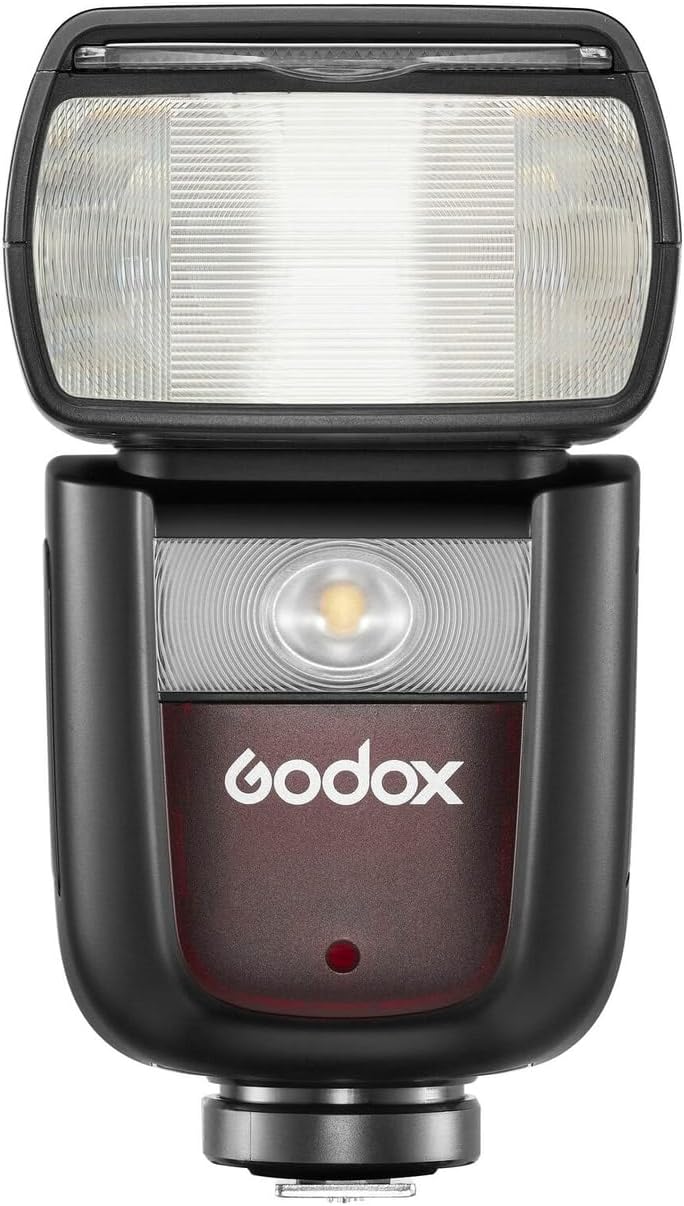
A direct front view of the Godox V860IIIS flash head. The main flash tube is visible, along with the LED modeling lamp or auxiliary focus assist beam. The "Godox" branding is clearly visible below the flash head. This view emphasizes the light-emitting components of the flash.
Li-ion Battery (VB26)

This image shows the Godox VB26 Li-ion battery pack, specifically designed for the V860IIIS flash. The battery specifications are visible: DC 7.2V, 2.6Ah, 18.72Wh. Important warning labels regarding handling and charging are also present, emphasizing the use of the original charger and avoiding short circuits or exposure to water/fire.
Setup
1. Battery Installation
- Open the battery compartment cover on the side of the flash unit.
- Insert the Godox VB26 Li-ion battery (as shown in the Product Overview) into the compartment, ensuring the contacts align correctly.
- Close the battery compartment cover securely.
- Before first use, fully charge the battery using the provided charger.
2. Mounting to Camera
- Slide the flash hot shoe into the camera's hot shoe mount.
- Rotate the locking ring on the flash hot shoe clockwise until it is securely tightened. Ensure the flash is firmly attached to prevent accidental detachment.
Operating Instructions
1. Power On/Off
To power on the flash, slide the ON/OFF switch to the "ON" position. The LCD panel will illuminate. To power off, slide the switch to the "OFF" position.
2. Flash Modes
Press the MODE button to cycle through the available flash modes:
- TTL Auto-Flash Mode: The flash output is automatically adjusted by the camera's metering system. This is ideal for quick shooting in varying light conditions.
- Manual Flash Mode (M): Allows you to manually set the flash power output from 1/1 to 1/256 in 1/3 stop increments. Use the dial to adjust the power.
- Multi Flash Mode (Stroboscopic): Fires a series of rapid flashes during a single exposure to capture multiple movements of a subject. You can set the frequency (Hz), flash count, and flash power.
3. Zoom Function
Press the ZOOM button to adjust the flash coverage. You can choose between auto-zoom, where the flash matches the lens focal length, or manual zoom, allowing you to set the coverage from 20mm to 200mm.
4. High-Speed Sync (HSS)
When shooting at shutter speeds faster than the camera's maximum flash sync speed, HSS allows the flash to synchronize with the shutter. This is useful for freezing action or using wide apertures in bright conditions. Activate HSS through the flash menu or camera settings.
5. Wireless Flash Function (2.4G X System)
The V860IIIS features a built-in 2.4G wireless X system for master or slave operation. Refer to the detailed instructions in the full manual for setting up wireless groups, channels, and modes (e.g., controlling other Godox X system flashes).
Maintenance
- Cleaning: Use a soft, dry cloth to clean the flash unit. For stubborn dirt, use a slightly damp cloth with a mild detergent, then wipe dry. Do not use organic solvents like thinner or benzene.
- Battery Care: Store the Li-ion battery in a cool, dry place. If not used for an extended period, charge it to approximately 50% every three months to prolong its lifespan.
- Storage: Store the flash unit in a dry, well-ventilated area, away from direct sunlight and high temperatures. Remove the battery if storing for long periods.
Troubleshooting
| Problem | Possible Cause | Solution |
|---|---|---|
| Flash does not fire. |
|
|
| Flash output is too dark/bright. |
|
|
| Flash recycling time is slow. |
|
|
Specifications
- Model: VING V860IIIS
- Compatible Mountings: Sony Alpha
- Camera Flash Type: External, Shoe Mount
- Flash Sync Speed: Up to 1/8000s (High-Speed Sync)
- Power Source: Godox VB26 Li-ion Battery (DC 7.2V, 2.6Ah, 18.72Wh)
- Product Dimensions: 9.1 x 9.1 x 9.1 inches
- Item Weight: 1 pound
- Included Components: Flash Diffuser Softbox, Flash Color Filters, Velcro Strap, Pergear Clean Kit
Warranty and Support
For warranty information and technical support, please refer to the warranty card included with your product or visit the official Godox website. If you encounter any issues not covered in this manual, please contact Godox customer service or your authorized dealer for assistance.
You can find more information and support at the GODOX Store on Amazon.
Ask a question about this manual
Ask about setup, troubleshooting, compatibility, parts, safety, or missing instructions. Manuals+ will review the question and use this page’s manual context to help answer it.