
Introduction
Thank you for choosing the VIPEK V10 Wire Garment Rack. This heavy-duty, 5-tier clothing rack is designed to provide extensive storage and organization for your garments, accessories, and footwear. Featuring four hanging rods, six wire shelves, and two sliding baskets, it offers a versatile solution for bedrooms, cloakrooms, laundry rooms, and walk-in closets. This manual provides essential information for proper assembly, operation, maintenance, and troubleshooting to ensure optimal performance and longevity of your product.
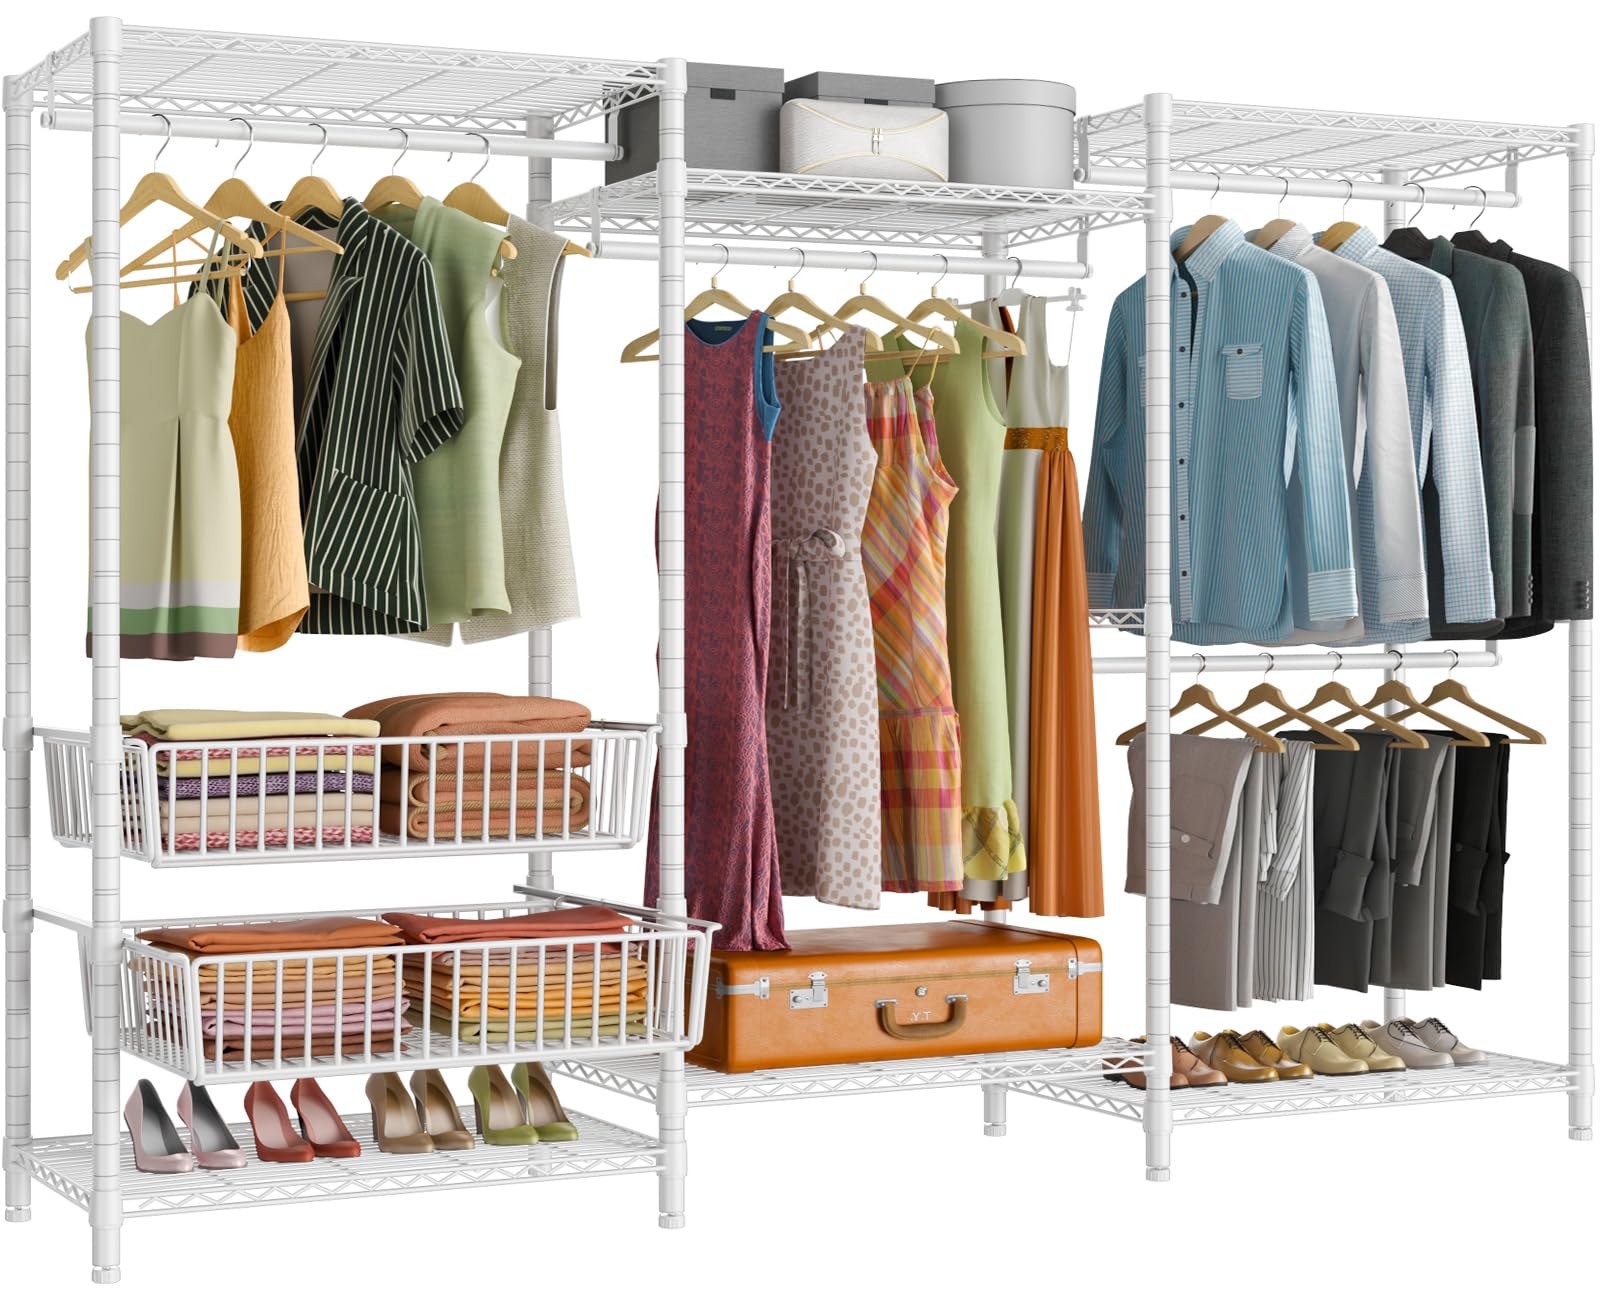
Figure 1: Fully assembled VIPEK V10 Wire Garment Rack in a living space.
Setup and Assembly
The VIPEK V10 Garment Rack requires assembly. Please read all instructions carefully before beginning. Ensure all parts are present and accounted for. A rubber mallet (not included) may be helpful for securing shelves.
Assembly Steps:
- Attach legs with provided screws.
- Secure the legs to the base.
- Insert vertical poles into the base.
- Secure horizontal rails to the poles using provided bolts.
- Attach hooks to the top of the poles.
- Place shelves on the rails. Repeat for each tier.
Important: When assembling a shelf, keep it parallel to the floor and slide it down slowly until all four sleeves fit snugly onto the poles. Refer to the visual guide below for proper sleeve and shelf direction.

Figure 2: Visual guide for shelf assembly and adjustment.
Installation Video:
Video 1: Official installation guide for the VIPEK V10 Clothes Rack, demonstrating step-by-step assembly.
Operating Instructions
The VIPEK V10 Garment Rack is designed for versatile storage. Utilize the various sections to organize your wardrobe efficiently.
- Hanging Rods: Use the four hanging rods for coats, shirts, dresses, and trousers. Each rod can support up to 75 lbs.
- Wire Shelves: The six wire shelves are ideal for folded clothing, bags, hats, and storage boxes. The top shelves can hold luggage or seasonal items.
- Sliding Baskets: The two sliding baskets provide convenient access for smaller items like socks, underwear, or accessories.
- Shoe Storage: The bottom shelves are suitable for organizing shoes.

Figure 3: Sectioned storage design for optimal organization.

Figure 4: Detail of the convenient sliding baskets.
Feature Video:
Video 2: Demonstration of the VIPEK V10 Clothes Rack, showcasing its features including the slid storage baskets.
Maintenance
To maintain the appearance and functionality of your VIPEK V10 Garment Rack, follow these simple maintenance guidelines:
- Cleaning: Wipe down the carbon steel frame and wire shelves with a soft, damp cloth. Avoid abrasive cleaners or harsh chemicals that could damage the powder-coated finish.
- Inspection: Periodically check all connections and bolts to ensure they remain tight. Retighten if necessary to maintain stability.
- Load Capacity: Do not exceed the maximum weight recommendation for the entire unit or individual hanging rods to prevent damage or collapse.
- Placement: Place the rack on a level surface to ensure stability. Avoid placing it in excessively humid environments to prevent potential rust, although the powder coating offers protection.
Troubleshooting
If you encounter any issues with your VIPEK V10 Garment Rack, refer to the following common troubleshooting tips:
- Rack is Unstable/Wobbly: Ensure all poles are fully inserted into their connectors and all sleeves are securely snapped into place. Double-check that shelves are level and all bolts are tightened. Verify the rack is on a flat, even surface.
- Difficulty Assembling Shelves: Make sure the plastic sleeves are correctly oriented (arrow pointing up) and fully seated in the grooves on the poles before sliding the shelf down. Apply even pressure when lowering the shelf.
- Missing Parts: If any parts are missing upon unboxing, please contact VIPEK customer support immediately for assistance.
- Baskets Not Sliding Smoothly: Check for any obstructions in the basket tracks. Ensure the baskets are correctly aligned and not overloaded.
Specifications
| Feature | Detail |
|---|---|
| Brand | VIPEK |
| Model Number | V10 |
| Overall Dimensions | 68.9" L x 15.7" W x 76.4" H |
| Material | Carbon Steel (Frame: Alloy Steel, Iron) |
| Color | White |
| Maximum Weight Recommendation | 920 Pounds (Each hanging rod: 75 lbs) |
| Number of Tiers | 5 |
| Hanging Rods | 4 |
| Wire Shelves | 6 |
| Sliding Baskets | 2 |
| Installation Type | Free Standing |
| Required Assembly | Yes |
| Item Weight | 38.1 Pounds |
| UPC | 192840692818 |

Figure 5: Product Dimensions and Weight Capacity.
Warranty and Support
For any questions, concerns, or support needs regarding your VIPEK V10 Wire Garment Rack, please contact VIPEK customer service. While specific warranty details are not provided in this manual, most products come with a manufacturer's warranty against defects in materials and workmanship. Please retain your proof of purchase for any warranty claims.
You can visit the official VIPEK store for more information and support: VIPEK Store