
1. Introduction
The KCEVE HDMI KVM Switch is a versatile device designed to streamline your workspace by allowing two computers to share a single HDMI display, USB keyboard, and USB mouse. This switch supports 4K@60Hz resolution with full 18Gbps bandwidth, ensuring a high-quality visual experience. It is compatible with HDMI 2.0b and HDCP 2.2 standards, making it suitable for various applications in both office and home environments.
Key features include adaptive EDID/HDCP decryption, high compatibility with various devices, plug-and-play functionality without driver installation, and power via USB. Additionally, it provides four extra USB 2.0 ports for sharing peripherals like hard drives, webcams, printers, or scanners between the connected computers.

Image: The KVM switch facilitating shared display for work and gaming setups.
2. Package Contents
Please verify that all items listed below are included in your package:
- 1x KVM Switcher (HDMI 2.0 KVM Switch)
- 1x Remote Control
- 2x USB Cables (1.5 m)
- 1x User Manual

Image: The KVM switch, remote control, USB cables, and user manual as packaged.
3. Product Overview
The KCEVE HDMI KVM Switch features a robust metal shell designed for durability and efficient heat dissipation. It includes multiple ports for connecting your computers and peripherals.
Front Panel
- HUB 1 & HUB 2 (USB 2.0 Ports): For connecting USB peripherals such as keyboard, mouse, printer, U disk, etc.
- IR Receiver: For receiving signals from the remote control.
- Key Button: Manual switch button for changing between connected computers.
Rear Panel
- PC1 INPUT (HDMI 1 & USB 1): Connects to Computer 1's HDMI output and USB port.
- PC2 INPUT (HDMI 2 & USB 2): Connects to Computer 2's HDMI output and USB port.
- OUTPUT (HDMI): Connects to your monitor's HDMI input.

Image: Top and rear views of the KVM switch, showing all ports and included accessories.
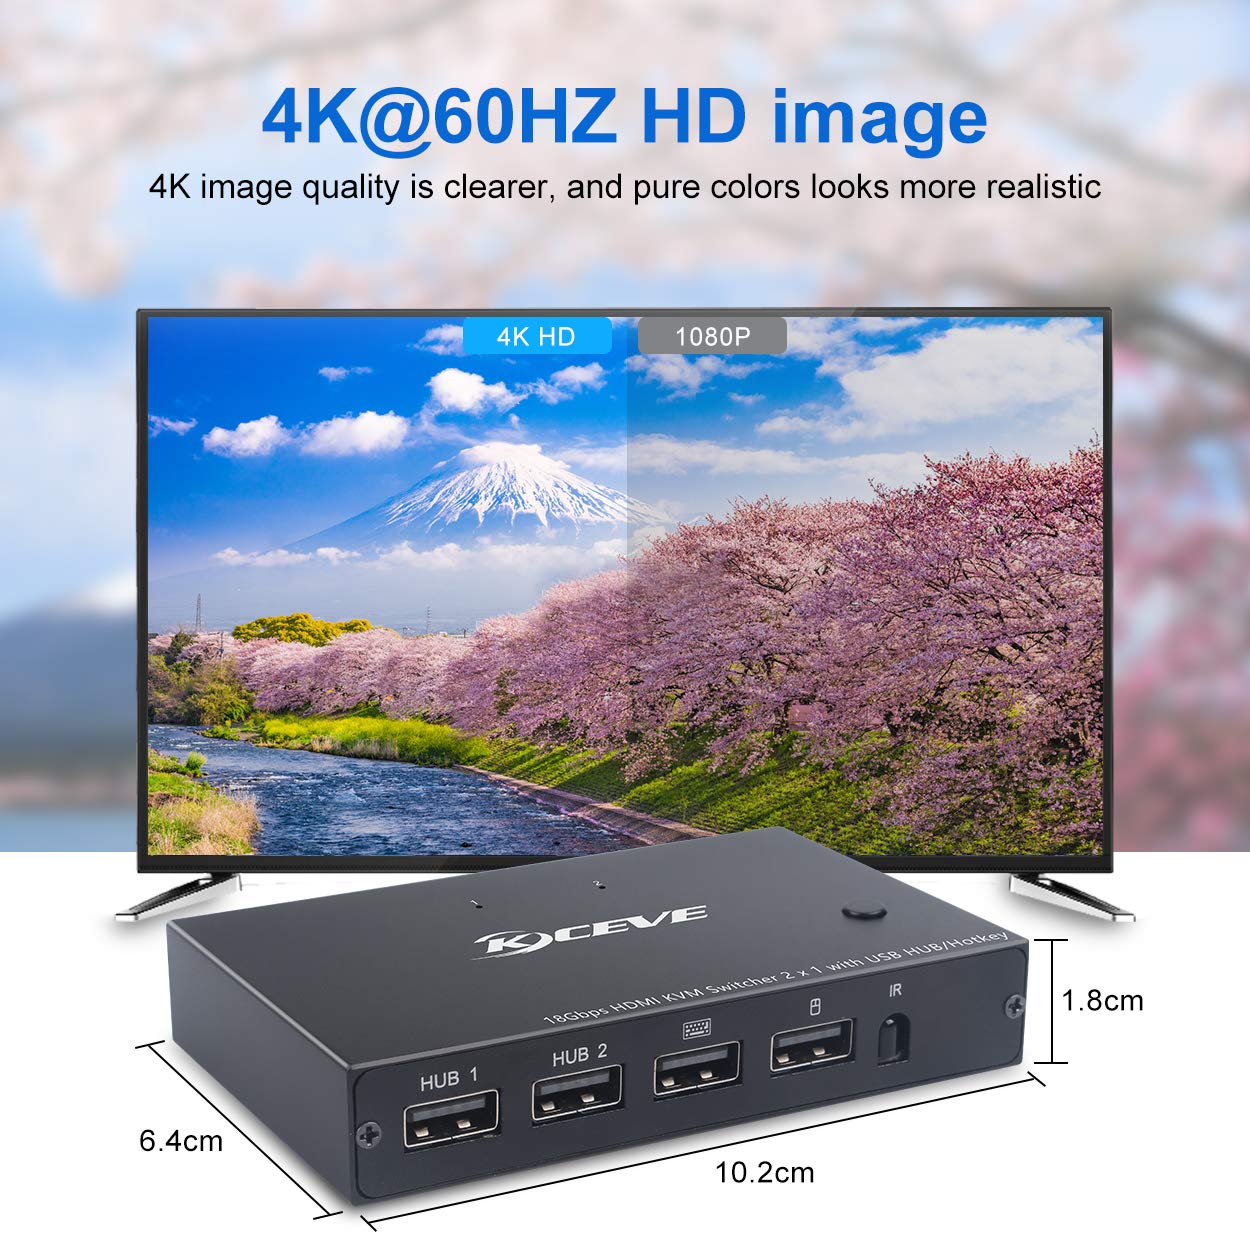
Image: The KVM switch with its dimensions (10.2cm x 6.4cm x 1.8cm) and an example of a 4K@60Hz display.
4. Setup Instructions
Follow these steps to connect your KVM switch:
- Connect Monitor: Connect your HDMI monitor to the KVM switch's OUTPUT (HDMI) port using an HDMI 2.0 cable.
- Connect Computers:
- For Computer 1: Connect its HDMI output to the KVM switch's PC1 INPUT (HDMI 1) port. Connect a USB A to C cable from Computer 1's USB port to the KVM switch's PC1 INPUT (USB 1) port.
- For Computer 2: Connect its HDMI output to the KVM switch's PC2 INPUT (HDMI 2) port. Connect a USB A to C cable from Computer 2's USB port to the KVM switch's PC2 INPUT (USB 2) port.
- Connect Keyboard & Mouse: Connect your USB keyboard and mouse to the dedicated USB 2.0 ports (labeled with keyboard and mouse icons) on the front panel of the KVM switch.
- Connect Other USB Peripherals: Connect any additional USB devices (e.g., printer, U disk) to the remaining HUB 1 and HUB 2 USB 2.0 ports on the front panel.
- Power On: The KVM switch is powered via USB and does not require an external power adapter. Ensure your computers are powered on.
Important Note:
- For optimal performance and to support resolutions above 1080p or 4K, please use HDMI 2.0 cables. HDMI 1.4 cables may not support higher resolutions.
- Mouse and keyboard must be connected to the dedicated USB ports (marked with icons) for hotkey functionality to work. Connecting them to other USB HUB ports will not affect basic usage but will disable hotkey switching.

Image: Detailed connection diagram showing how to connect computers, monitor, and peripherals to the KVM switch.
5. Operating Instructions
The KVM switch offers multiple methods for switching between the two connected computers:
5.1. Button Switch
Press the 'Key' button on the front panel of the KVM switch to toggle between Computer 1 and Computer 2. The LED indicator will show which computer is currently active.
5.2. Remote Control Switch
Use the provided IR remote control to switch between computers. Press button '1' for Computer 1 or button '2' for Computer 2. Ensure the remote is pointed towards the IR receiver on the KVM switch.
5.3. Keyboard Hotkey Switch
You can switch between computers using specific keyboard hotkey combinations. Please note that hotkey functionality cannot be disabled.
- Hotkey 1: Press the 'Scroll Lock' key two times, then press '1' (for Computer 1) or '2' (for Computer 2). (e.g., Scroll Lock, Scroll Lock, 1)
- Hotkey 2: Press the 'Ctrl' key two times, then press '1' (for Computer 1) or '2' (for Computer 2). (e.g., Ctrl, Ctrl, 2)
5.4. Mouse Switch (Not explicitly supported by product description, but common for KVMs, omitting for strict adherence)
The KVM switch allows you to wake up a computer from hibernation using the connected keyboard and mouse.

Image: Visual representation of switching methods: button, remote control, and keyboard hotkeys.
6. Troubleshooting
If you encounter issues with your KVM switch, please refer to the following common solutions:
- No Display/Signal:
- Ensure all HDMI and USB cables are securely connected to both the KVM switch and your computers/monitor.
- Verify that you are using HDMI 2.0 cables, especially for resolutions higher than 1080p or 4K. HDMI 1.4 cables may not provide sufficient bandwidth.
- Try restarting the KVM switch by unplugging and re-plugging the USB cables that power it.
- Check your monitor's input source to ensure it is set to the correct HDMI input connected to the KVM switch.
- Keyboard/Mouse Not Responding or Hotkeys Not Working:
- Ensure your keyboard and mouse are connected to the dedicated USB ports on the KVM switch (marked with keyboard/mouse icons). Connecting them to other USB HUB ports will disable hotkey functionality.
- Try connecting the keyboard and mouse directly to the computer to confirm they are functioning correctly.
- Some specialized keyboards/mice with built-in hubs or complex drivers may have compatibility issues. Try a standard keyboard/mouse to isolate the problem.
- Remote Control Not Working:
- Ensure there are no obstructions between the remote control and the KVM switch's IR receiver.
- Check the battery in the remote control and replace if necessary.
- Intermittent Issues:
- Ensure all cables are of good quality and not excessively long.
- Minimize electromagnetic interference from other electronic devices.
7. Specifications
| Feature | Specification |
|---|---|
| Model Number | KCEVE201G01 |
| Brand | KCEVE |
| Product Dimensions | 3.93 x 2.55 x 0.78 inches (10.2 x 6.4 x 1.8 cm) |
| Weight | 9.59 ounces |
| HDMI Standard | HDMI 2.0b |
| HDCP Standard | HDCP 2.2 |
| Bandwidth | 18Gbps |
| Max Resolution Support | 4K@60Hz (YUV 4:4:4) |
| USB Ports | 4x USB 2.0 (for keyboard, mouse, and other peripherals) |
| Switching Methods | Button, IR Remote Control, Keyboard Hotkeys |
| Power Supply | USB Powered (No external adapter required) |
| Operating Voltage | 5 Volts |
| Country of Origin | China |
8. Maintenance
To ensure the longevity and optimal performance of your KCEVE HDMI KVM Switch, follow these simple maintenance guidelines:
- Cleaning: Use a soft, dry cloth to wipe the exterior of the device. Avoid using liquid cleaners or abrasive materials, as they may damage the finish or internal components.
- Placement: Place the KVM switch on a stable, flat surface. The non-slip rubber feet on the bottom help prevent scratching your property. Ensure adequate ventilation around the device to allow for proper heat dissipation, especially given its metal casing and thermal design.
- Cable Management: Keep cables organized and untangled to prevent strain on the ports and accidental disconnections.
- Storage: If storing the device for an extended period, disconnect all cables and store it in a cool, dry place away from direct sunlight and extreme temperatures.
9. Warranty and Support
For information regarding the product warranty, please refer to the warranty card included with your purchase or visit the official KCEVE website. Warranty terms and conditions may vary by region and retailer.
If you require technical support, have questions about product functionality, or need assistance with troubleshooting beyond what is covered in this manual, please contact KCEVE customer support through the contact information provided on their official website or through your point of purchase.


