Introduction
Thank you for choosing the NEARPOW Multifunctional Programmable Outlet Timer. This device is designed to provide precise and automated control over your electrical appliances, enhancing convenience and energy efficiency in your home or office. With its versatile programming options, including daily timing, countdown, and continuous cycle functions, you can easily manage various devices such as lights, heating systems, and more. Please read this manual thoroughly before operation to ensure proper use and to maximize the benefits of your new timer.
Product Overview
The NEARPOW T329C timer features a clear digital display and intuitive button layout for easy programming. It is designed for standard 3-prong electrical outlets.

Figure 1: Front view of the NEARPOW T329C Programmable Outlet Timer, showing the digital display, control buttons, and the 3-prong outlet.

Figure 2: Key features of the NEARPOW T329C, highlighting its 19 ON/OFF programs and 8 distinct functions.

Figure 3: The 2.6-inch large LCD screen and user-friendly buttons for easy programming.
Key Features
- Multifunctional: Daily Timing for multiple groups per day, Countdown for delayed ON/OFF, Digital Infinite Repeat Cycle Intermittent for short cycles down to seconds.
- Easy to Program: Direct setting for week, hour, minute, and second. Minimum setting time is 1 second.
- Up to 19 ON/OFF Programs: Offers up to 19 individual schedules for automatic appliance control.
- 7-Day Programmable: Provides up to 15 choices for week setting.
- Additional Functions:
- 12/24 Hours System display.
- Always ON/OFF quick setting.
- Daylight Saving Time (DST) adjustment.
- Random Vacation Mode for home security.
- Child Lock Function to protect saved programs.
- Widely Used: Ideal for lights, cooling/heating systems, indoor sprinklers, humidifiers, aquariums, nebulizers, ventilators, and more.
Setup
- Initial Charge: Before first use, plug the timer into a live outlet for at least 30 minutes to charge the internal backup battery. This ensures settings are retained during power outages.
- Clear All Settings: Press the RESET button (usually a small recessed button, use a pen tip) to clear all previous settings and programs. The screen will show "0:00".
- Set Current Time:
- Press and hold the CLOCK button.
- While holding CLOCK, press WEEK to select the current day of the week (SU, MO, TU, WE, TH, FR, SA).
- While holding CLOCK, press HOUR to set the current hour (12/24 hour format).
- While holding CLOCK, press MIN to set the current minute.
- Release the CLOCK button. The current time is now set.
- 12/24 Hour Format: To switch between 12-hour (AM/PM) and 24-hour format, press the CLOCK and MODE buttons simultaneously.
- Daylight Saving Time (DST): To activate or deactivate DST, press the CLOCK and DST buttons simultaneously. The clock will adjust by one hour forward or backward.
Operating Instructions
Programming ON/OFF Schedules (Daily Timing)
The timer allows for up to 19 ON/OFF programs. Each program consists of an ON time and an OFF time.
- Press the MODE button repeatedly until "PROG" appears on the display, indicating program setting mode. The display will show "1 ON".
- Press WEEK to select the day(s) for this program. You can choose individual days, weekdays, weekends, or all 7 days.
- Press HOUR and MIN to set the desired ON time for Program 1.
- Press MODE again. The display will show "1 OFF".
- Press WEEK, HOUR, and MIN to set the desired OFF time for Program 1.
- Repeat steps 2-5 for additional programs (up to 19). Press MODE to cycle through "2 ON", "2 OFF", etc.
- After setting all desired programs, press the CLOCK button to exit programming mode and return to the current time display.

Figure 4: Example of setting a daily ON/OFF schedule, such as turning on a light for 30 minutes every morning.
Countdown Function
This function allows the timer to turn ON or OFF after a specified countdown period.
- Press the MODE button repeatedly until "COUNTDOWN" appears on the display.
- Press HOUR, MIN, and SEC to set the desired countdown duration.
- Press SET to toggle between "ON" (timer turns on after countdown) and "OFF" (timer turns off after countdown).
- Press CONFIRM to start the countdown. The display will show the remaining time.

Figure 5: Using the Countdown function to turn a device ON after a set time (e.g., 30 minutes) or OFF after a set time (e.g., 3 hours).
Continuous Intervals (Cycle Intermittent)
This function allows for repetitive ON/OFF cycles, useful for applications like pumps or fans.
- Press the MODE button repeatedly until "TIMING CYCLE" appears on the display.
- Press HOUR, MIN, and SEC to set the ON duration.
- Press MODE again to set the OFF duration using HOUR, MIN, and SEC.
- Press CONFIRM to start the continuous cycle.
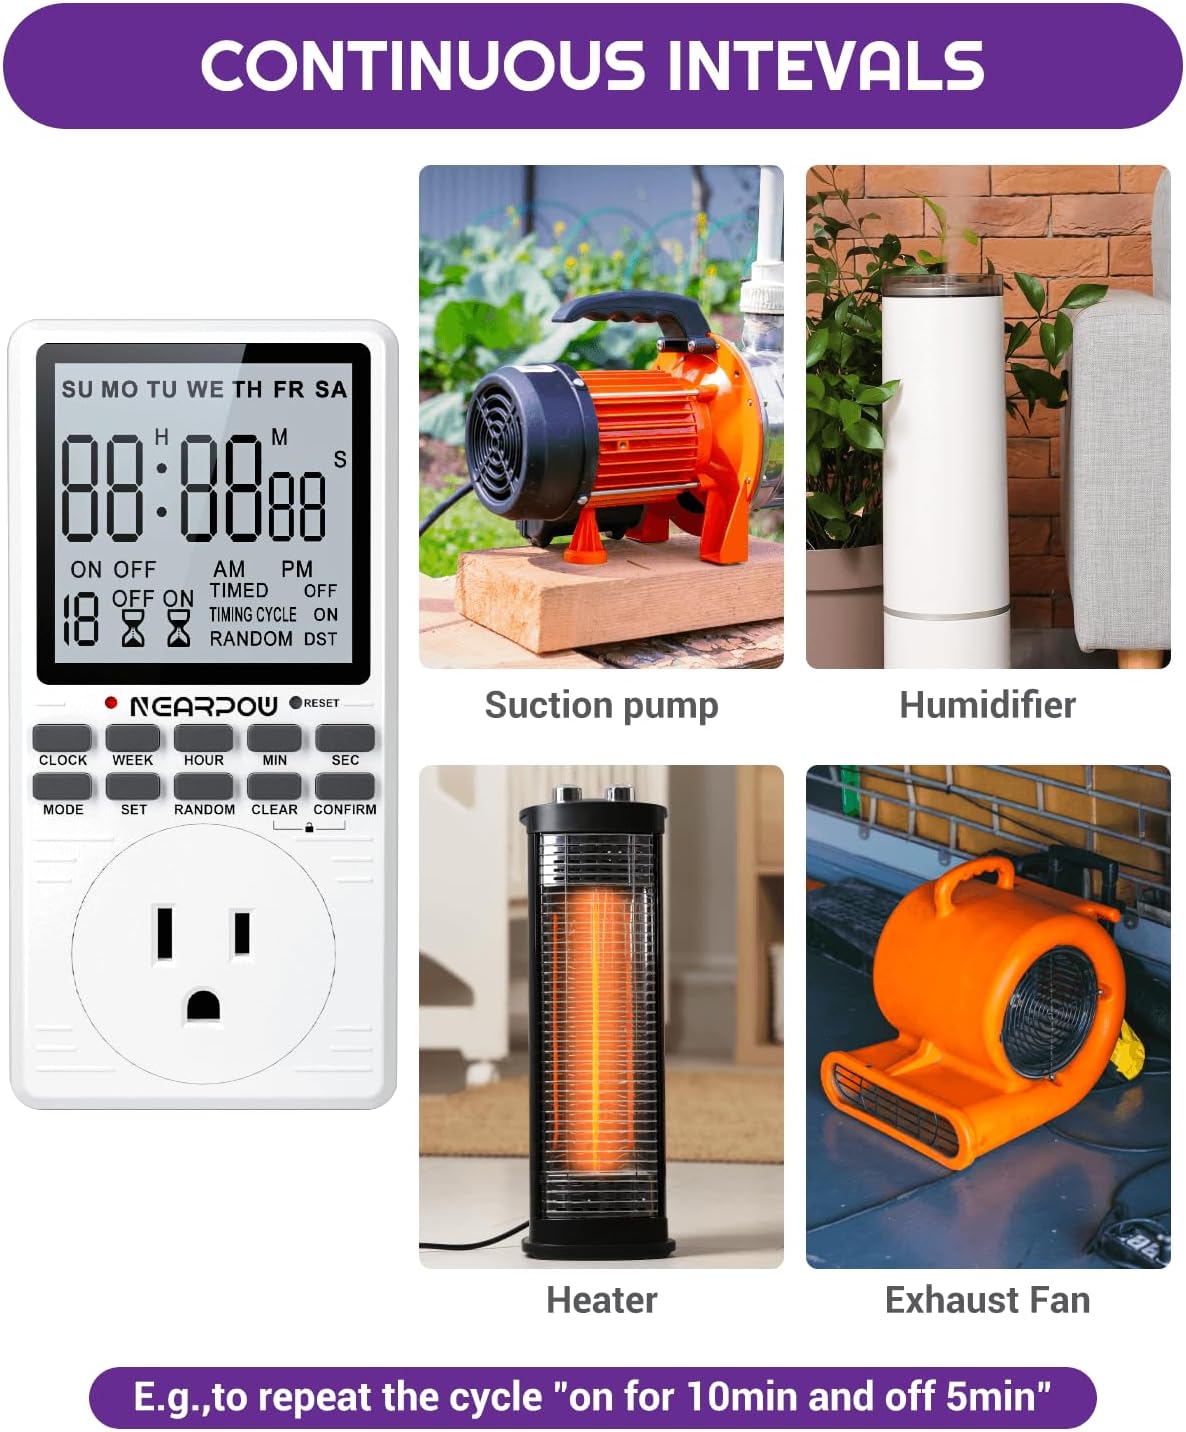
Figure 6: Applications of the Continuous Intervals function, such as cycling a device ON for 10 minutes and OFF for 5 minutes repeatedly.
Random Vacation Mode
This feature randomly turns lights or other devices ON/OFF within a set period to simulate occupancy, deterring potential intruders.
- Press the RANDOM button. "RANDOM" will appear on the display.
- The timer will now randomly turn the connected appliance ON and OFF within a window of time (e.g., 6:00 PM to 6:00 AM).
- To deactivate, press the RANDOM button again.

Figure 7: The Random Vacation Mode helps enhance home security by simulating occupancy.
Always ON/OFF
Quickly set the timer to keep the connected appliance continuously ON or OFF, overriding all programs.
- Press the MODE button repeatedly until "ON" or "OFF" is displayed continuously, indicating the desired state.
Child Lock Function
To prevent accidental changes to programmed settings, activate the child lock.
- Press and hold the CONFIRM button for 3 seconds until a lock icon appears on the display.
- To unlock, press and hold the CONFIRM button again for 3 seconds until the lock icon disappears.
Maintenance
- Cleaning: Wipe the timer with a dry, soft cloth. Do not use abrasive cleaners or immerse the unit in water.
- Storage: When not in use for extended periods, store the timer in a cool, dry place away from direct sunlight and extreme temperatures.
- Battery: The internal battery is designed for long life. If the display becomes dim or settings are frequently lost, ensure the timer is plugged in regularly to recharge the battery.
Troubleshooting
| Problem | Possible Cause | Solution |
|---|---|---|
| Timer does not turn ON/OFF at programmed times. |
|
|
| Display is blank or dim. |
|
|
| Cannot change settings. | Child Lock is active. | Press and hold the CONFIRM button for 3 seconds to unlock. |
| Programs are lost after power outage. | Internal battery not sufficiently charged. | Ensure the timer is plugged in for at least 30 minutes to fully charge the backup battery. |
Specifications
| Attribute | Detail |
|---|---|
| Brand | NEARPOW |
| Model Number | T329C |
| Color | Black, Off-white |
| Product Dimensions | 1"D x 2.49"W x 5"H |
| Number of Settings | 19 (ON/OFF Programs) |
| Screen Size | 1 Inches |
| Item Weight | 13.7 ounces |
| Electrical Rating | 15A/1800W (Standard 3-Prong Outlet) |
| Date First Available | August 11, 2021 |
Warranty and Support
NEARPOW stands behind the quality of its products. This timer comes with a 24-month warranty from the date of purchase, covering manufacturing defects. Additionally, we offer a 6-month return policy and dedicated lifetime support for our customers.
If you encounter any issues or have questions regarding your NEARPOW timer, please do not hesitate to contact our customer support team. We are committed to providing excellent service and assistance.
For support, please visit the official NEARPOW store or contact us through the platform where you purchased the product.