1. Introduction
This manual provides essential instructions for the proper installation, operation, and maintenance of your TEAMWILL SM582PCS Microphone Replacement Capsule Cartridge. Please read this manual thoroughly before attempting installation or use to ensure optimal performance and longevity of the product.
2. Product Overview
The TEAMWILL SM582PCS is a replacement capsule cartridge designed specifically for Shure SM58 type microphones. It is intended to restore or upgrade the audio capture capabilities of compatible microphones. This package includes two replacement capsules.
Key Features:
- Direct replacement for Shure SM58 type microphones.
- Designed for reliable audio performance.
- Durable construction for extended use.

Image: Two TEAMWILL SM582PCS microphone replacement capsules, showing their cylindrical shape and mesh grille.
3. Package Contents
Verify that all items listed below are present in your package:
- 2 x TEAMWILL Microphone Replacement Capsule Cartridges (Model: SM582PCS)
4. Specifications
| Feature | Detail |
|---|---|
| Brand | TEAMWILL |
| Model Number | SM582PCS |
| Compatible Devices | Shure SM58 Type Microphones |
| Material | Brass |
| Color | Black |
| Item Weight | 2.08 ounces (approx. 59 grams) |
| Package Dimensions | 6.06 x 4.84 x 1.38 inches |
| Polar Pattern | Bidirectional (as per general microphone specifications, specific to capsule not provided) |
| Audio Sensitivity | 53 Decibels (as per general microphone specifications, specific to capsule not provided) |
| Frequency Response | 15 KHz (as per general microphone specifications, specific to capsule not provided) |
| UPC | 718255041265 |
Note: Some specifications like Polar Pattern, Audio Sensitivity, and Frequency Response are typically associated with the complete microphone unit. While this capsule is a component, these values are provided based on general microphone characteristics for informational purposes.
5. Setup and Installation
This section outlines the general procedure for replacing a microphone capsule. Please note that specific microphone models may have slight variations. If you are unsure, consult a qualified technician.
Required Tools (Not Included):
- Small Phillips head screwdriver (if applicable)
- Soldering iron and solder (if connections are soldered)
- Desoldering pump or braid (if connections are soldered)
- Pliers or tweezers (for handling small components)
Installation Steps:
- Disassemble the Microphone: Carefully unscrew the microphone grille and any retaining rings or screws that secure the existing capsule. Some microphones may require opening the handle to access internal wiring.
- Disconnect the Old Capsule: Identify the electrical connections to the old capsule. These are typically two wires (positive and negative). If they are soldered, carefully desolder them. If they are connected via a plug or clip, gently disconnect them.
- Remove the Old Capsule: Once disconnected, carefully remove the old capsule from its housing or shock mount.
- Prepare the New Capsule: Ensure the TEAMWILL replacement capsule is clean and free of debris.
- Connect the New Capsule: Connect the wires from the microphone body to the corresponding terminals on the new TEAMWILL capsule. Ensure correct polarity (positive to positive, negative to negative). If soldering, use a small amount of solder and ensure strong, clean connections.
- Secure the New Capsule: Carefully place the new capsule into the microphone's housing or shock mount. Ensure it is seated correctly and securely.
- Reassemble the Microphone: Reattach any retaining rings, screws, and the microphone grille. Ensure all components are tightened appropriately but do not overtighten.
- Test the Microphone: Connect the microphone to an audio system and perform a sound check to verify proper functionality.
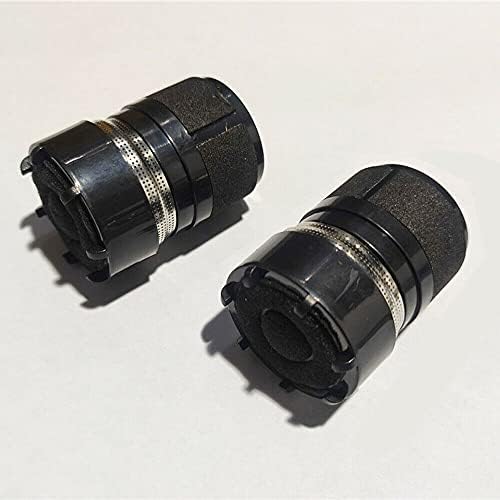
Image: A pair of TEAMWILL SM582PCS microphone replacement capsules, ready for installation.
6. Operating the Microphone (After Capsule Replacement)
Once the replacement capsule is installed, the microphone operates as usual. Refer to your microphone's original user manual for detailed operating instructions. General usage guidelines include:
- Connection: Connect the microphone to a compatible audio input (e.g., mixer, audio interface) using an appropriate XLR cable.
- Gain Setting: Adjust the gain on your audio device to achieve an optimal signal level without clipping.
- Proximity: For vocal applications, maintain a consistent distance from the microphone for best sound quality.
- Feedback Prevention: Position speakers away from the microphone to minimize audio feedback.
7. Maintenance
Proper maintenance ensures the longevity and performance of your microphone capsule:
- Cleaning: Gently wipe the exterior of the microphone grille with a soft, dry cloth. Avoid using liquid cleaners directly on the capsule or grille.
- Storage: Store the microphone in a clean, dry environment, preferably in a protective case, when not in use.
- Handling: Avoid dropping or subjecting the microphone to strong impacts, as this can damage the sensitive capsule.
- Moisture: Keep the microphone away from moisture and extreme temperatures.
8. Troubleshooting
If you encounter issues after replacing the capsule, consider the following troubleshooting steps:
| Problem | Possible Cause | Solution |
|---|---|---|
| No Sound Output | Incorrect wiring/soldering; loose connection; faulty cable; audio device issue. |
|
| Distorted Sound | Input gain too high; damaged capsule; incorrect impedance matching. |
|
| Weak or Low Volume | Input gain too low; incorrect wiring; capsule not fully seated. |
|
| Intermittent Sound | Loose connection; faulty cable; internal wiring issue. |
|
If these steps do not resolve the issue, please contact customer support.
9. Warranty and Support
For product support, technical assistance, or warranty inquiries, please contact TEAMWILL customer service through the retailer where the product was purchased. Please have your purchase receipt and product model number (SM582PCS) available when contacting support.
While specific warranty details are not provided in this manual, standard consumer rights and warranties apply. Please refer to the terms and conditions provided at the time of purchase.