1. Introduction
This manual provides essential information for the safe and effective use of your GSKY Trimmer Charger Power Cord. This charger is designed to provide a stable and continuous power supply for small household equipment, specifically cordless clippers and beard trimmers, that utilize a B-shaped charging interface.
Please read this manual thoroughly before using the product to ensure proper operation and to prevent damage to the charger or your device.

Figure 1: GSKY Trimmer Charger Power Cord. This image shows the black charger block with two prongs for wall outlets and the attached black cable ending in a B-shaped connector.
2. Product Features
- Power Cord Length: The total length of the power cord is 4.8 inches, suitable for indoor use.
- Exclusive Charging Technology: Designed for fast and stable charging of hair clippers and beard trimmers.
- Durable Construction: Made with durable materials and high-quality components to ensure long-term durability and resistance to scratches, bumps or drops.
- Power Specifications: Global input voltage range of 100-240V 50/60HZ, with an output of 5V1A, featuring an American standard wall plug.
- Safety and Reliability: Tested for safe, usable, and efficient charging. Certified with UL, CE, FCC, and RoHS, and includes over-voltage, overload, over-current, and short-circuit protection functions.

Figure 2: Multiple Protection Features. This diagram illustrates the charger's built-in safety mechanisms: Over-Voltage Protection (OVP), Overload Protection (OP), Over-Current Protection (OCP), and Short-Circuit Protection (SCP), ensuring safer charging.
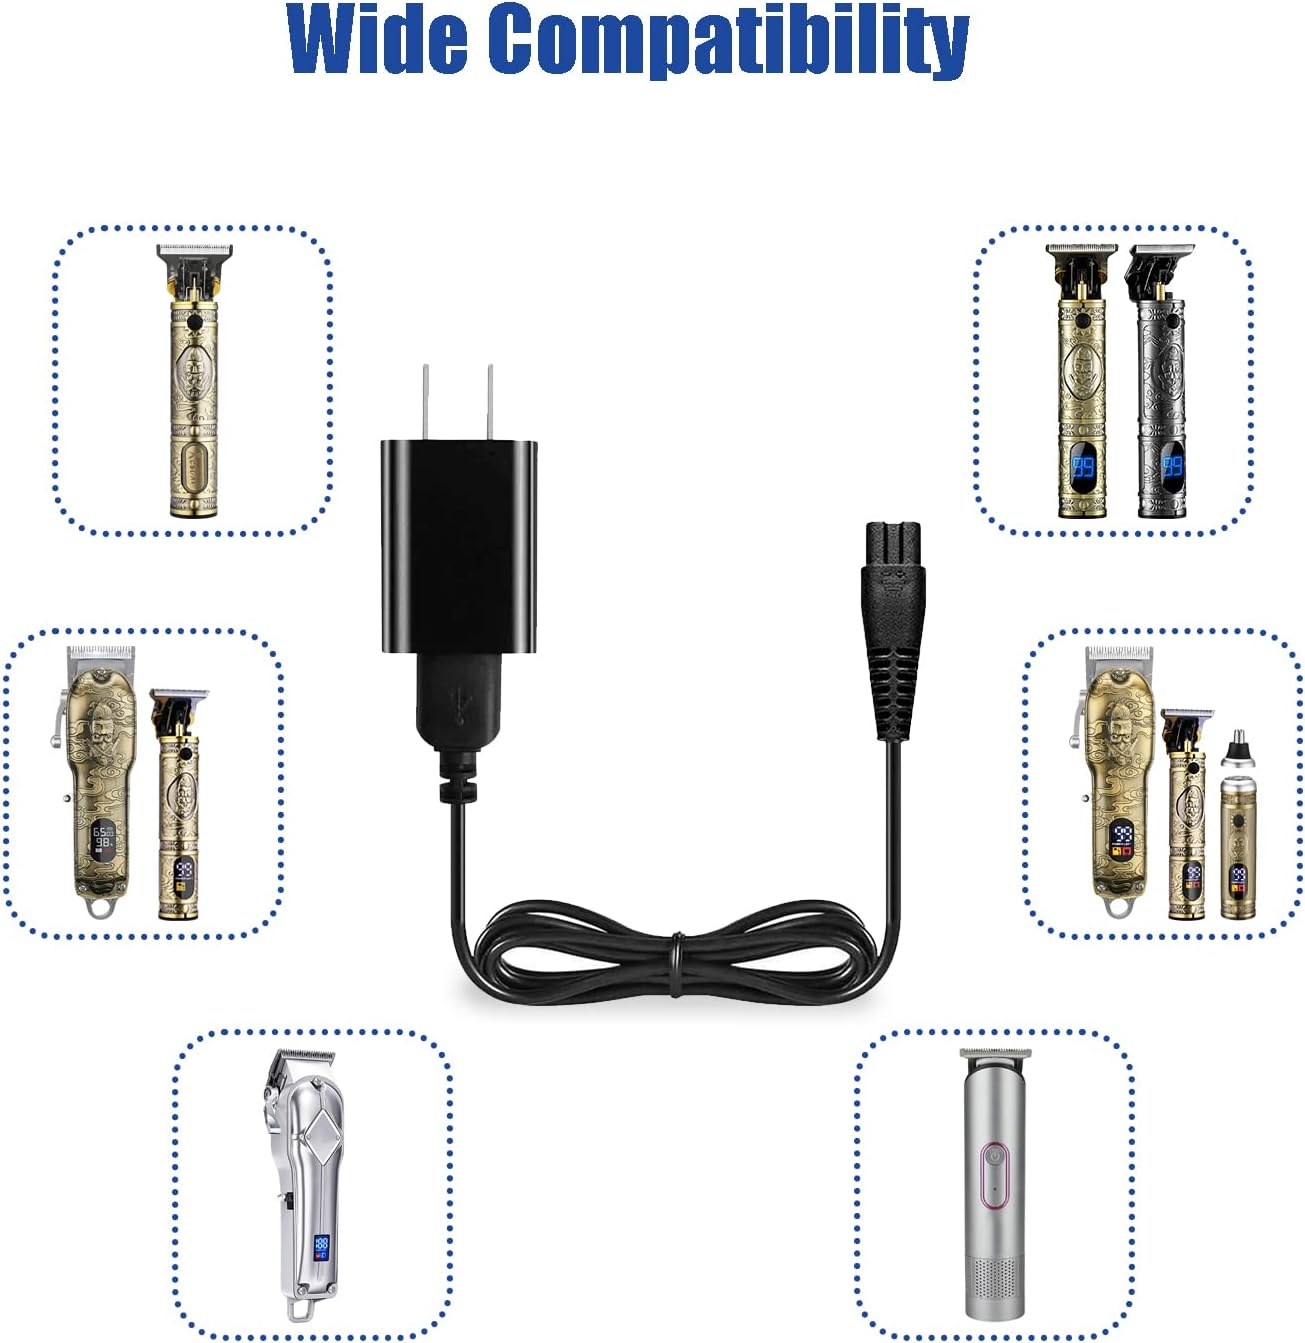
Figure 3: Wide Compatibility. This image displays the charger surrounded by various models of hair trimmers and clippers, demonstrating its broad compatibility with devices that use a B-shaped charging interface.
3. Setup
- Verify Compatibility: Before connecting, ensure your device requires a 5V power supply and has a B-shaped charging interface. Refer to your device's manual for specific power requirements.
- Inspect Charger: Check the charger and cable for any visible damage before use. Do not use if damaged.
- Connect to Device: Carefully insert the B-shaped connector of the charger cable into the charging port of your trimmer or clipper. Ensure a snug fit.
- Connect to Power Outlet: Plug the charger's wall plug into a standard 100-240V AC wall outlet.

Figure 4: Connector Compatibility. This image highlights the correct B-shaped connector type required for compatibility, contrasting it with an incompatible round pin connector. Always verify your device's charging port matches the charger's connector.
4. Operating Instructions
Once the charger is properly connected to both the device and a power outlet, your trimmer or clipper should begin charging. Most devices will have an indicator light to show charging status (refer to your device's manual for specific indicator behavior).
- Allow the device to charge fully for optimal battery life.
- Disconnect the charger from the device and the wall outlet once charging is complete or when the device is not in use.
- Avoid leaving the charger plugged in for extended periods when not actively charging a device.

Figure 5: Trimmer Charging. This image shows a trimmer connected to the GSKY charger, which is plugged into a wall outlet, demonstrating the typical charging setup.
5. Maintenance
Proper maintenance ensures the longevity and safe operation of your charger.
- Cleaning: Disconnect the charger from the power outlet before cleaning. Wipe the charger and cable with a soft, dry cloth. Do not use liquid cleaners or abrasive materials.
- Storage: Store the charger in a cool, dry place away from direct sunlight and moisture when not in use. Avoid tightly winding the cable to prevent damage.
- Handling: Do not pull the cable to unplug the charger from the wall outlet or the device. Always grasp the plug or connector directly.
6. Troubleshooting
| Problem | Possible Cause | Solution |
|---|---|---|
| Device is not charging. |
|
|
| Charger feels warm during use. | Normal operation. | A slight warmth is normal during charging. If it becomes excessively hot or emits smoke/odor, immediately unplug it and discontinue use. |
7. Specifications
| Feature | Detail |
|---|---|
| Model Number | ct01 |
| Input Voltage | 100-240V AC, 50/60HZ |
| Output | 5V DC, 1A |
| Connector Type | B-shaped (Micro USB B type) |
| Cable Length | 4.8 inches (approx. 12.2 cm) |
| Certifications | UL, CE, FCC, RoHS |
| Safety Features | Over-Voltage Protection, Overload Protection, Over-Current Protection, Short-Circuit Protection |
| Item Weight | 2.01 ounces (approx. 0.06 kg) |
| Package Dimensions | 4.8 x 4.21 x 1.06 inches |

Figure 6: AC/DC Adapter Details. This image displays the charger with its input and output specifications (100-240V, 5V1A) and lists its safety certifications (UL, FCC, CE, RoHS).

Figure 7: Power Cord Length. This image visually represents the 4.8-inch (12.2 cm) length of the charger's power cord.
8. Warranty and Support
Your GSKY Trimmer Charger Power Cord comes with the following support:
- Refund Policy: 30 days refund period from the date of purchase.
- Replacement Policy: 12 months replacement warranty for manufacturing defects.
- Customer Support: If you require any assistance or have questions regarding the use of your charger, please do not hesitate to contact GSKY customer support.


