Introduction
This manual provides detailed instructions for the setup, operation, and maintenance of your PEMENOL XY-W50L 100W Stereo Amplifier Board. This digital power amplifier features Bluetooth 5.0, AUX and USB audio inputs, a WiFi electronic clock with alarm functions, and wireless APP control, making it suitable for various DIY home audio applications.
Product Features
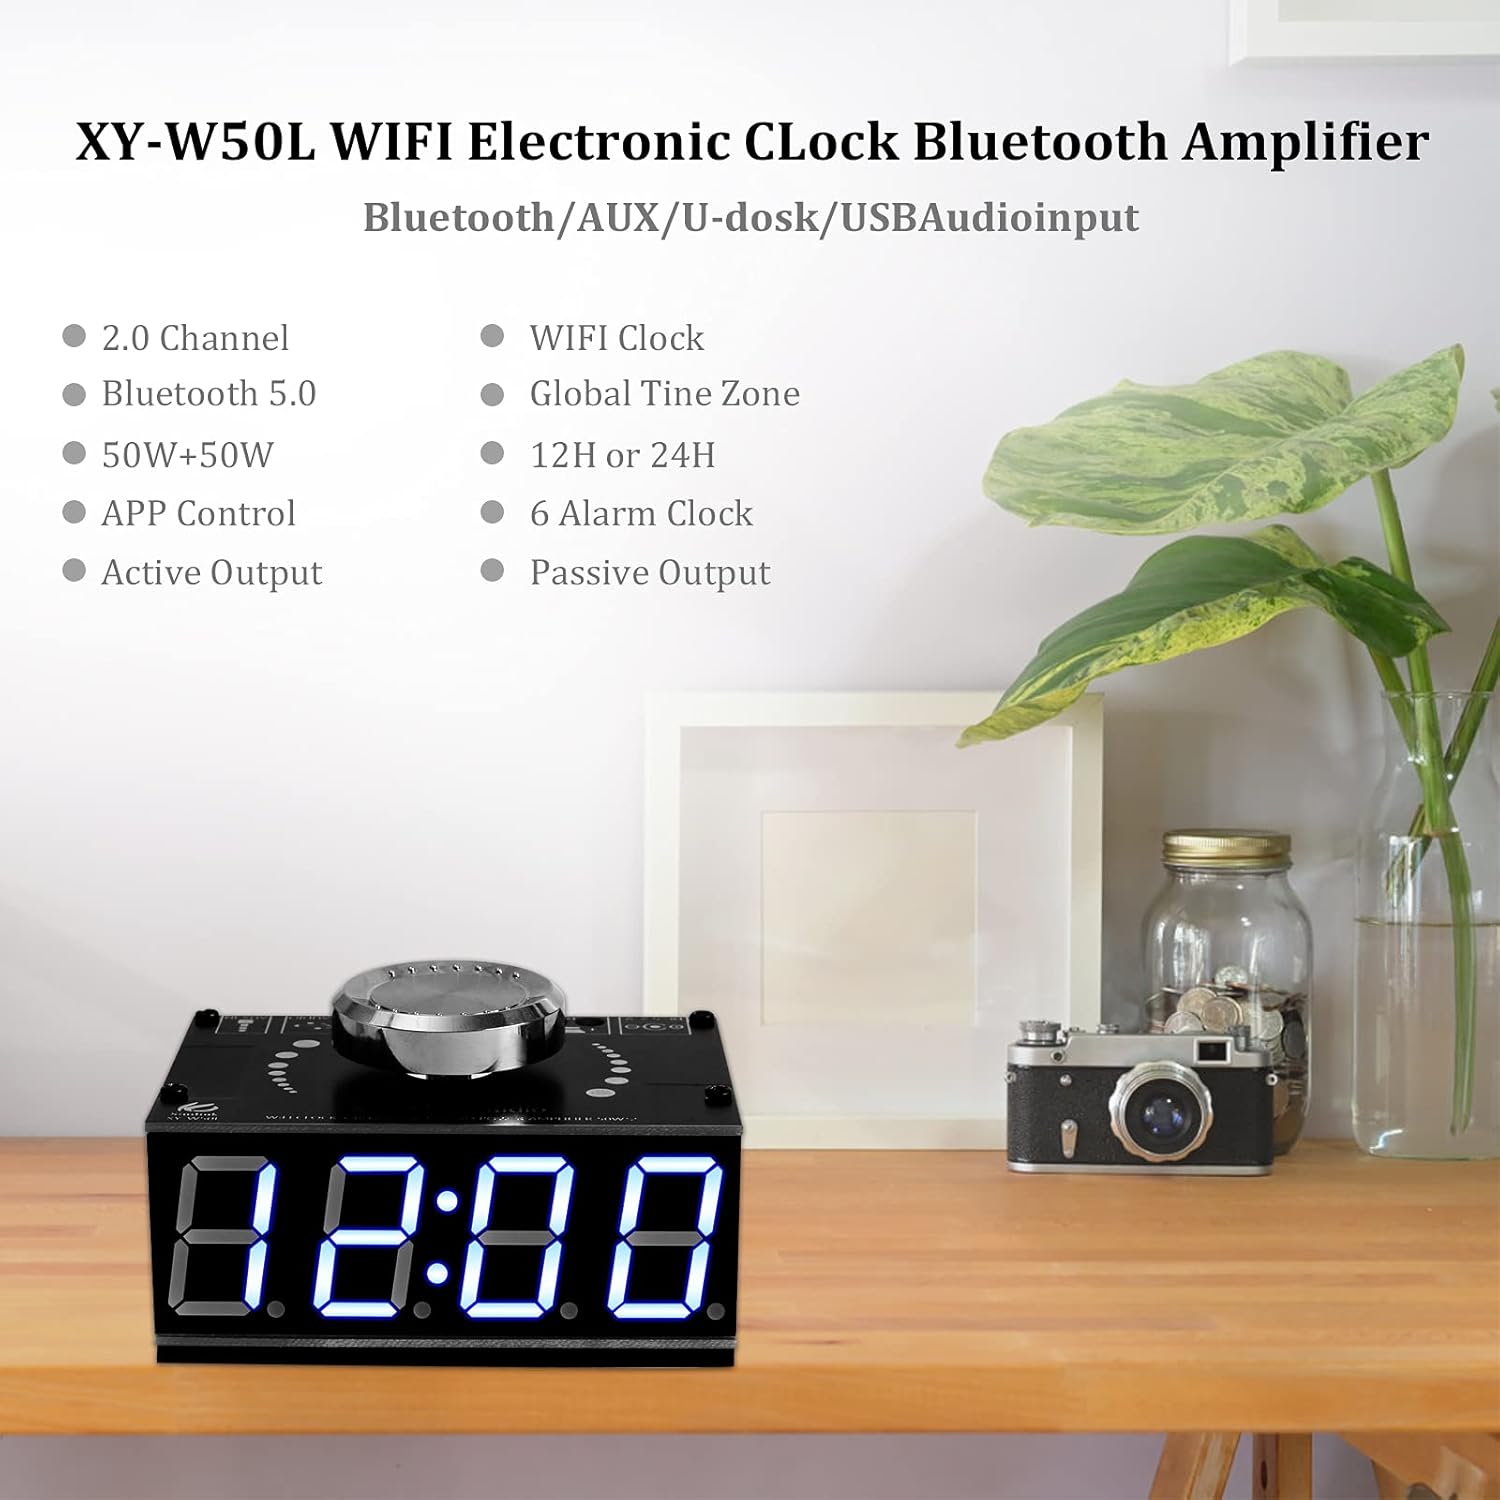
Image: Front view of the PEMENOL XY-W50L amplifier board, highlighting its digital clock display and key features.
- 2.0 Channel Stereo Output: Provides stereo audio amplification.
- Bluetooth 5.0 Connectivity: For wireless audio streaming.
- 100W Power Output: 50W + 50W for robust sound.
- APP Control: Wireless control via a dedicated application.
- Active and Passive Output: Supports various speaker configurations.
- WiFi Clock: Automatic time synchronization via WiFi.
- Global Time Zone Support: Adjusts to local time zones.
- 12H or 24H Display: User-selectable time format.
- 6 Alarm Clocks: Multiple programmable alarms.
- AUX + USB Input: Versatile wired audio input options.
Product Components and Interface Overview
Internal Components

Image: Exploded view showing the internal components of the amplifier board, including the aluminum alloy board, M2*26mm copper columns, acrylic board, aluminum radiator, M2*8mm screws, circuit board, and the main knob.
- Aluminum Alloy Board: Top protective layer.
- Knob: Multi-function control for volume and settings.
- M2*8mm Screws: For assembly.
- M2*26mm Copper Column: Spacers for board separation.
- Aluminum Radiator: Heat dissipation for optimal performance.
- Acrylic Board: Bottom protective layer.
- Circuit Board: Main electronic components.
External Interface
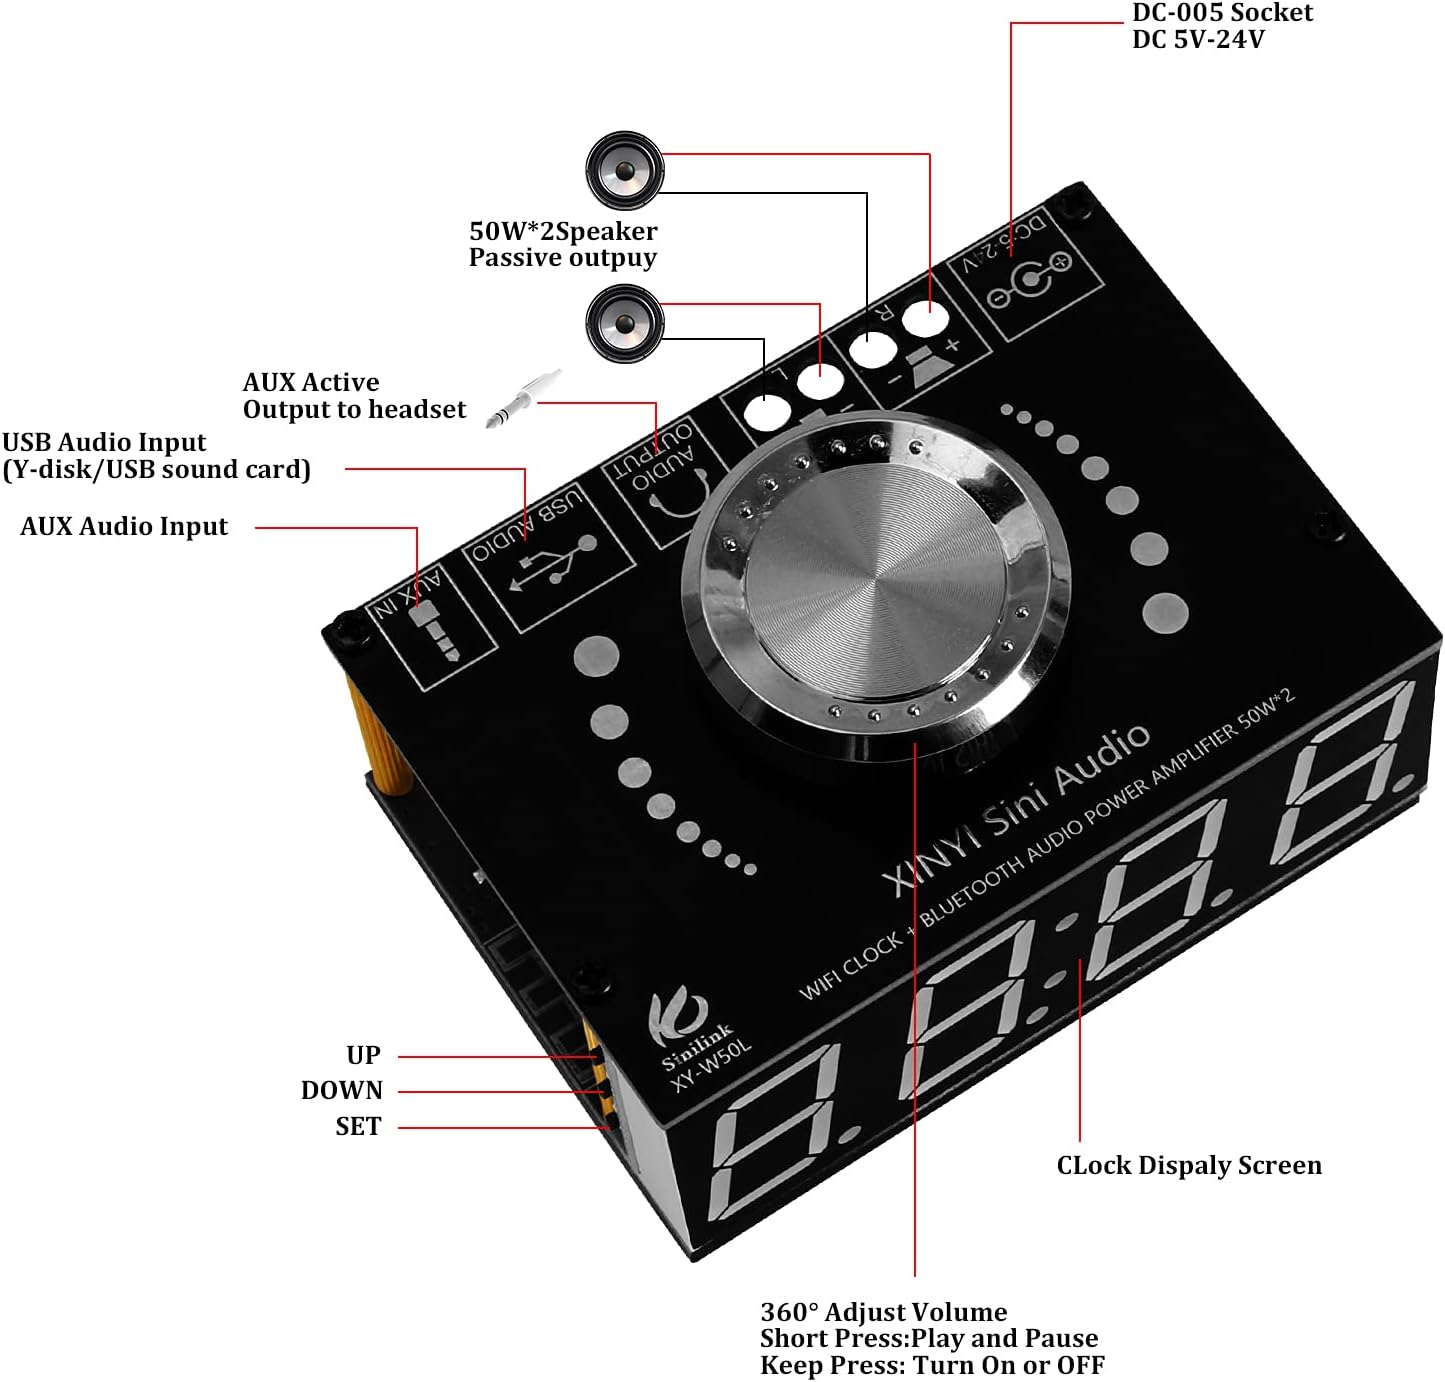
Image: Top-down view of the amplifier board, labeling the DC-005 socket, 50W*2 speaker passive output, AUX active output to headset, USB audio input, AUX audio input, clock display screen, and the UP, DOWN, SET buttons.
- DC-005 Socket (DC 5V-24V): Power input port.
- 50W*2 Speaker Passive Output: Connects to passive speakers.
- AUX Active Output to Headset: For headphone connection.
- USB Audio Input (Y-disk/USB sound card): Connects USB storage or acts as a sound card.
- AUX Audio Input: Standard 3.5mm audio input.
- Clock Display Screen: Shows time, date, and alarm status.
- 360° Adjust Volume Knob: Rotate to adjust volume. Short press for Play/Pause. Long press to Turn On/Off.
- UP/DOWN/SET Buttons: For navigation and setting adjustments.
Setup
Physical Assembly

Image: All components of the amplifier board kit, including the main circuit board, acrylic panels, screws, copper columns, knob, and power adapter connector, ready for assembly.
- Place the main circuit board between the two acrylic panels.
- Secure the panels and board using the provided M2*26mm copper columns and M2*8mm screws.
- Attach the volume knob to the potentiometer shaft.
- Ensure the aluminum radiator is properly attached to the heat-generating component on the circuit board.
Power Connection
Connect a DC 5V-24V power supply to the DC-005 socket. Ensure the power supply matches the voltage requirements of your speakers for optimal performance and to prevent damage.
Speaker Connection
Connect your passive speakers to the 50W*2 Speaker Passive Output terminals. Observe correct polarity (+ to + and - to -) for each speaker channel.
Audio Input Connection
- AUX Input: Use a 3.5mm audio cable to connect your audio source (e.g., smartphone, MP3 player) to the AUX Audio Input port.
- USB Audio Input: Insert a USB flash drive (Y-disk) with audio files or connect a device that functions as a USB sound card to the USB Audio Input port.
Operating Instructions
Basic Operation
- Power On/Off: Long press the volume knob to turn the device on or off.
- Volume Adjustment: Rotate the volume knob clockwise to increase volume, counter-clockwise to decrease volume.
- Play/Pause: Short press the volume knob to play or pause audio playback.
Bluetooth Pairing

Image: The amplifier board next to a smartphone displaying the Bluetooth control application interface, showing various play modes and controls.
- Ensure the amplifier board is powered on.
- On your mobile device, enable Bluetooth and search for available devices.
- Select "Sinilink-APP" or a similar device name to pair.
- Once paired, audio from your device will play through the amplifier.
APP Control

Image: A sequence of smartphone screens illustrating the Sinilink-APP interface, showing the main control screen, Bluetooth device search, and music playback controls.
Download the "Sinilink-APP" from your device's app store. After pairing via Bluetooth, open the app to control various functions of the amplifier, including input source selection (SD card, U Disk, Bluetooth, Sound card, AUX), equalizer settings, and alarm management.
WiFi Clock Setup and Display Modes
Video: Demonstrates how to set the time and date, adjust display brightness, and set alarms on the amplifier board. The video also shows how to activate power-saving mode and cycle through display modes.
- The WiFi clock automatically synchronizes time once connected to a network via the APP.
- Adjust Brightness: Press 'UP' or 'DOWN' button to adjust screen brightness.
- Set Time and Date: Keep press 'SET' button for 1 second to enter time and date setting mode. Use 'UP'/'DOWN' to adjust values (Hour, Minute, Month, Year) and 'SET' to confirm and move to the next field.
- Display Modes: Short press the 'DOWN' button at normal display status to cycle through different display modes (Dormancy, Month, Time, Alarm clock display).

Image: Four examples of the digital display: Dormancy display, Month display, Time display, and Alarm clock display.
Alarm Clock Setup
Image: A visual representation of setting up to six different alarms (A1-A6) on the amplifier board, showing both active and inactive states.
- Keep press 'SET' button for 3 seconds to enter alarm mode.
- Use 'UP'/'DOWN' to select alarm A1-A6.
- Press 'SET' to toggle the selected alarm ON or OFF.
- Press 'SET' again to set the alarm time (Hour, Minute) using 'UP'/'DOWN' buttons.
- Save parameters and return to normal display status by long pressing 'SET'.
Power Saving Mode
Keep press 'UP' button for 1 second to turn ON or OFF the power saving mode. In power saving mode, the display will dim or turn off after a period of inactivity to conserve power.
Maintenance
- Cleaning: Use a soft, dry cloth to clean the device. Avoid liquid cleaners or abrasive materials.
- Ventilation: Ensure adequate airflow around the amplifier to prevent overheating. Do not block ventilation holes.
- Storage: Store the device in a cool, dry place away from direct sunlight and extreme temperatures.
- Power Supply: Always use a power supply within the specified voltage range (DC 5V-24V).
Troubleshooting
| Problem | Possible Cause | Solution |
|---|---|---|
| No power | Incorrect power supply voltage or loose connection. | Check power supply (5V-24V DC) and ensure secure connection. |
| No sound output | Incorrect speaker connection, wrong input selected, or low volume. | Verify speaker polarity, select correct input source (Bluetooth, AUX, USB), and increase volume. |
| Bluetooth pairing failure | Device too far, Bluetooth not enabled, or interference. | Ensure device is within range, Bluetooth is on, and try re-pairing. Clear previous pairings if necessary. |
| Clock not synchronizing | No WiFi connection or incorrect network settings. | Ensure the device is connected to WiFi via the APP and network settings are correct. |
| Audio distortion | Volume too high, impedance mismatch, or faulty audio source. | Reduce volume, check speaker impedance, and test with a different audio source. |
Specifications
- Model: XY-W50L
- Power Output: 100W (50W + 50W)
- Bluetooth Version: 5.0
- Input Voltage: DC 5V-24V
- Audio Inputs: AUX, USB
- Control: Wireless APP Control, On-board buttons/knob
- Clock Features: WiFi synchronization, Global Time Zone, 12/24H display, 6 Alarms
- Package Dimensions: 4.61 x 2.52 x 2.52 inches
- Item Weight: 3.84 ounces
- Manufacturer: PEMENOL
- ASIN: B09BVLQQYW
Warranty and Support
For warranty information or technical support, please refer to the product packaging or contact PEMENOL customer service directly. Keep your purchase receipt for any warranty claims.


