
1. Introduction
This manual provides essential instructions for the safe and efficient operation, installation, and maintenance of your Whirlpool SWA2040Q Mini Split Air Conditioner. Please read this manual thoroughly before using your air conditioner and retain it for future reference. Proper use and maintenance will ensure optimal performance and extend the lifespan of your unit.
2. Safety Information
To prevent injury to the user or others and property damage, the following instructions must be followed. Failure to observe these instructions may cause harm or damage.
- Professional Installation: Installation must be performed by qualified personnel in accordance with all local and national electrical codes.
- Power Supply: Ensure the power supply matches the specifications (110V) and is properly grounded. Do not use extension cords.
- Maintenance: Always disconnect power before cleaning or performing any maintenance.
- Refrigerant: The unit contains refrigerant. Do not attempt to repair or tamper with the refrigerant circuit yourself. Contact qualified service personnel.
- Children and Pets: Keep children and pets away from the unit, especially during operation and maintenance.
3. Product Overview
The Whirlpool SWA2040Q is a mini split air conditioner designed for both cooling and heating, offering efficient climate control for your space. It features an indoor unit and an outdoor compressor unit.
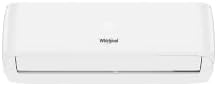
Image 1: Front view of the Whirlpool SWA2040Q indoor unit. This white, rectangular unit features the Whirlpool logo centrally located on its front panel, with the air outlet visible at the bottom.
4. Setup and Installation
Installation of this mini split air conditioner requires specialized tools and knowledge. It is strongly recommended that installation be performed by a certified HVAC technician.
4.1 Pre-Installation Checks
- Verify that the installation site meets the required structural integrity for both indoor and outdoor units.
- Ensure adequate space for air circulation around both units.
- Confirm power supply specifications (110V) are available at the installation point.
4.2 Indoor Unit Mounting
- Attach the mounting plate securely to the wall, ensuring it is level.
- Drill a hole through the wall for refrigerant piping and drainage.
- Connect the refrigerant pipes and drain hose to the indoor unit.
- Mount the indoor unit onto the mounting plate.
4.3 Outdoor Unit Placement and Connection
- Place the outdoor unit on a stable, level surface, ensuring proper clearance for airflow.
- Connect the refrigerant pipes and electrical wiring between the indoor and outdoor units.
- Perform a vacuum test and charge the system with refrigerant as per manufacturer specifications.
4.4 Electrical Connections
- Ensure all electrical connections are made by a qualified electrician.
- Connect the unit to a dedicated 110V power circuit with appropriate overcurrent protection.
- Verify proper grounding to prevent electrical shock.
5. Operating Instructions
Your Whirlpool SWA2040Q is operated via a wireless remote control (not pictured). Familiarize yourself with the remote's buttons and display.
5.1 Basic Operation Modes
- Cooling Mode (COOL): Select this mode for cooling. Adjust the temperature to your desired setting.
- Heating Mode (HEAT): Select this mode for heating. Adjust the temperature to your desired setting.
- Fan Mode (FAN): Circulates air without cooling or heating. Fan speed can be adjusted.
- Dry Mode (DRY): Reduces humidity in the room. The fan speed is automatically controlled.
- Auto Mode (AUTO): The unit automatically selects cooling, heating, or fan mode based on the room temperature and your set temperature.
5.2 Temperature and Fan Speed Adjustment
- Use the TEMP UP/DOWN buttons on the remote to set your desired temperature.
- Press the FAN SPEED button to cycle through available fan speeds (Low, Medium, High, Auto).
5.3 Special Features
- Silent Mode: Activate this mode for ultra-quiet operation, ideal for nighttime use. Refer to your remote control for the specific button (often labeled 'Quiet' or 'Sleep').
- Timer Function: Set the unit to turn on or off automatically after a specified period. Consult the remote control section of your full manual for detailed timer programming.
6. Maintenance
Regular maintenance ensures efficient operation and prolongs the life of your air conditioner. Always disconnect power before performing any maintenance.
6.1 Cleaning Air Filters
- Open the front panel of the indoor unit.
- Remove the air filters.
- Clean the filters with a vacuum cleaner or wash them with lukewarm water and mild detergent.
- Allow filters to dry completely before reinstalling. Clean filters every 2-4 weeks, or more often if used frequently.
6.2 Cleaning the Indoor Unit
- Wipe the exterior of the indoor unit with a soft, damp cloth. Do not use harsh chemicals or abrasive cleaners.
- Ensure the drain pan and drain hose are clear of obstructions.
6.3 Cleaning the Outdoor Unit
- Keep the area around the outdoor unit clear of debris, leaves, and other obstructions.
- Carefully clean the outdoor coil fins with a soft brush or water hose. Avoid bending the fins.
7. Troubleshooting
Before contacting service, review the following common issues and their solutions.
| Problem | Possible Cause | Solution |
|---|---|---|
| Unit does not start | No power; circuit breaker tripped; remote control batteries low. | Check power supply; reset circuit breaker; replace remote batteries. |
| Insufficient cooling/heating | Dirty air filters; blocked outdoor unit; wrong mode selected; temperature setting incorrect. | Clean air filters; clear obstructions from outdoor unit; select correct mode; adjust temperature. |
| Unusual noise | Loose parts; foreign objects in fan; normal operating sounds (e.g., refrigerant flow). | Check for loose parts; remove obstructions; if persistent or loud, contact service. |
| Water leakage from indoor unit | Blocked drain hose; improper installation. | Clear drain hose; contact installer for inspection. |
If the problem persists after attempting these solutions, please contact qualified service personnel.
8. Specifications
- Model: SWA2040Q
- Brand: Whirlpool
- Cooling/Heating Capacity: 11000 BTU
- Voltage: 110 Volts
- Power Source: Electric with cable
- Product Dimensions (Indoor Unit): Approximately 35 cm (Depth) x 70 cm (Width) x 60 cm (Height)
- Special Feature: Silent Mode
9. Warranty and Support
Your Whirlpool SWA2040Q Mini Split Air Conditioner comes with a Limited Warranty. Please refer to the warranty card included with your product for specific terms, conditions, and duration of coverage.
For technical assistance, service requests, or to inquire about replacement parts, please contact Whirlpool customer support. Have your model number (SWA2040Q) and purchase date ready when you call.
Contact information for Whirlpool support can typically be found on the Whirlpool official website or on your product's packaging.


