1. Introduction
The MASTERCANOPY 10x10 Pop Up Canopy Tent with Church Window Sidewalls is designed for versatile outdoor use, providing shade and shelter. Its convenient pop-up design allows for easy setup and portability. This canopy features four removable sidewalls, including one with a zippered entry and two with transparent church windows, offering both privacy and visibility. Constructed with a sturdy steel frame and a durable polyester fabric with silver-plated PU coating, it provides excellent UV protection (UPF 50+) and water resistance. The height is adjustable to suit various needs.
2. Package Contents
Please ensure all items listed below are present in your package before beginning assembly. If any parts are missing or damaged, please contact customer support.
- 1 x Canopy Top
- 1 x Frame (Pre-assembled)
- 4 x Sidewalls (1 with zipper, 2 with windows)
- 8 x Stakes
- 4 x Ropes
- 4 x Weight Bags (empty, for sand or other ballast)
- 1 x Wheeled Bag (for transport and storage)

Figure 2.1: All components included in the package. Note that weight bags are provided empty and require filling.
3. Setup Instructions
Follow these steps for a quick and easy setup of your canopy tent. It is recommended to have at least two people for assembly.
- Step 1: Unfold the Frame. Place the pre-assembled canopy frame in the desired location. With a partner, gently pull the outer legs of the frame outwards to begin unfolding it. Do not force the frame.
- Step 2: Attach the Canopy Top. Drape the canopy top over the partially unfolded frame. Ensure the corners of the canopy top align with the corners of the frame. Secure the canopy top to the frame using the attached Velcro straps.
- Step 3: Extend Legs and Adjust Height. Fully extend the frame until it locks into place. Then, press the thumb buttons on each leg to adjust the height to your desired setting. Ensure all four legs are locked at the same height for stability.
- Step 4: Secure the Canopy. Use the provided stakes to anchor the canopy legs to the ground. Attach the ropes to the canopy corners and secure them to the ground using additional stakes, pulling them taut at an angle to provide extra stability against wind. Fill the bonus weight bags with sand or other heavy material and attach them to the canopy legs for added stability, especially in windy conditions.
- Step 5: Attach Sidewalls. Attach the four removable sidewalls using the Velcro straps located along the top and sides of the frame. The sidewall with the zipper can be used as an entry/exit point, and the two sidewalls with church windows provide light and visibility.

Figure 3.1: Unfolding the canopy frame.

Figure 3.2: Attaching the canopy top.

Figure 3.3: Adjusting canopy height.
Setup Video Guide:
Video 3.1: A step-by-step guide to setting up your Mastercanopy Pop Up Canopy Tent with Church Window Sidewalls.
4. Operating Instructions
Height Adjustment:
The canopy features 2 different height settings. To adjust the height, locate the thumb press buttons on each leg. Press the button and slide the leg to the desired height until it snaps securely into place. Ensure all legs are adjusted to the same height for stability.
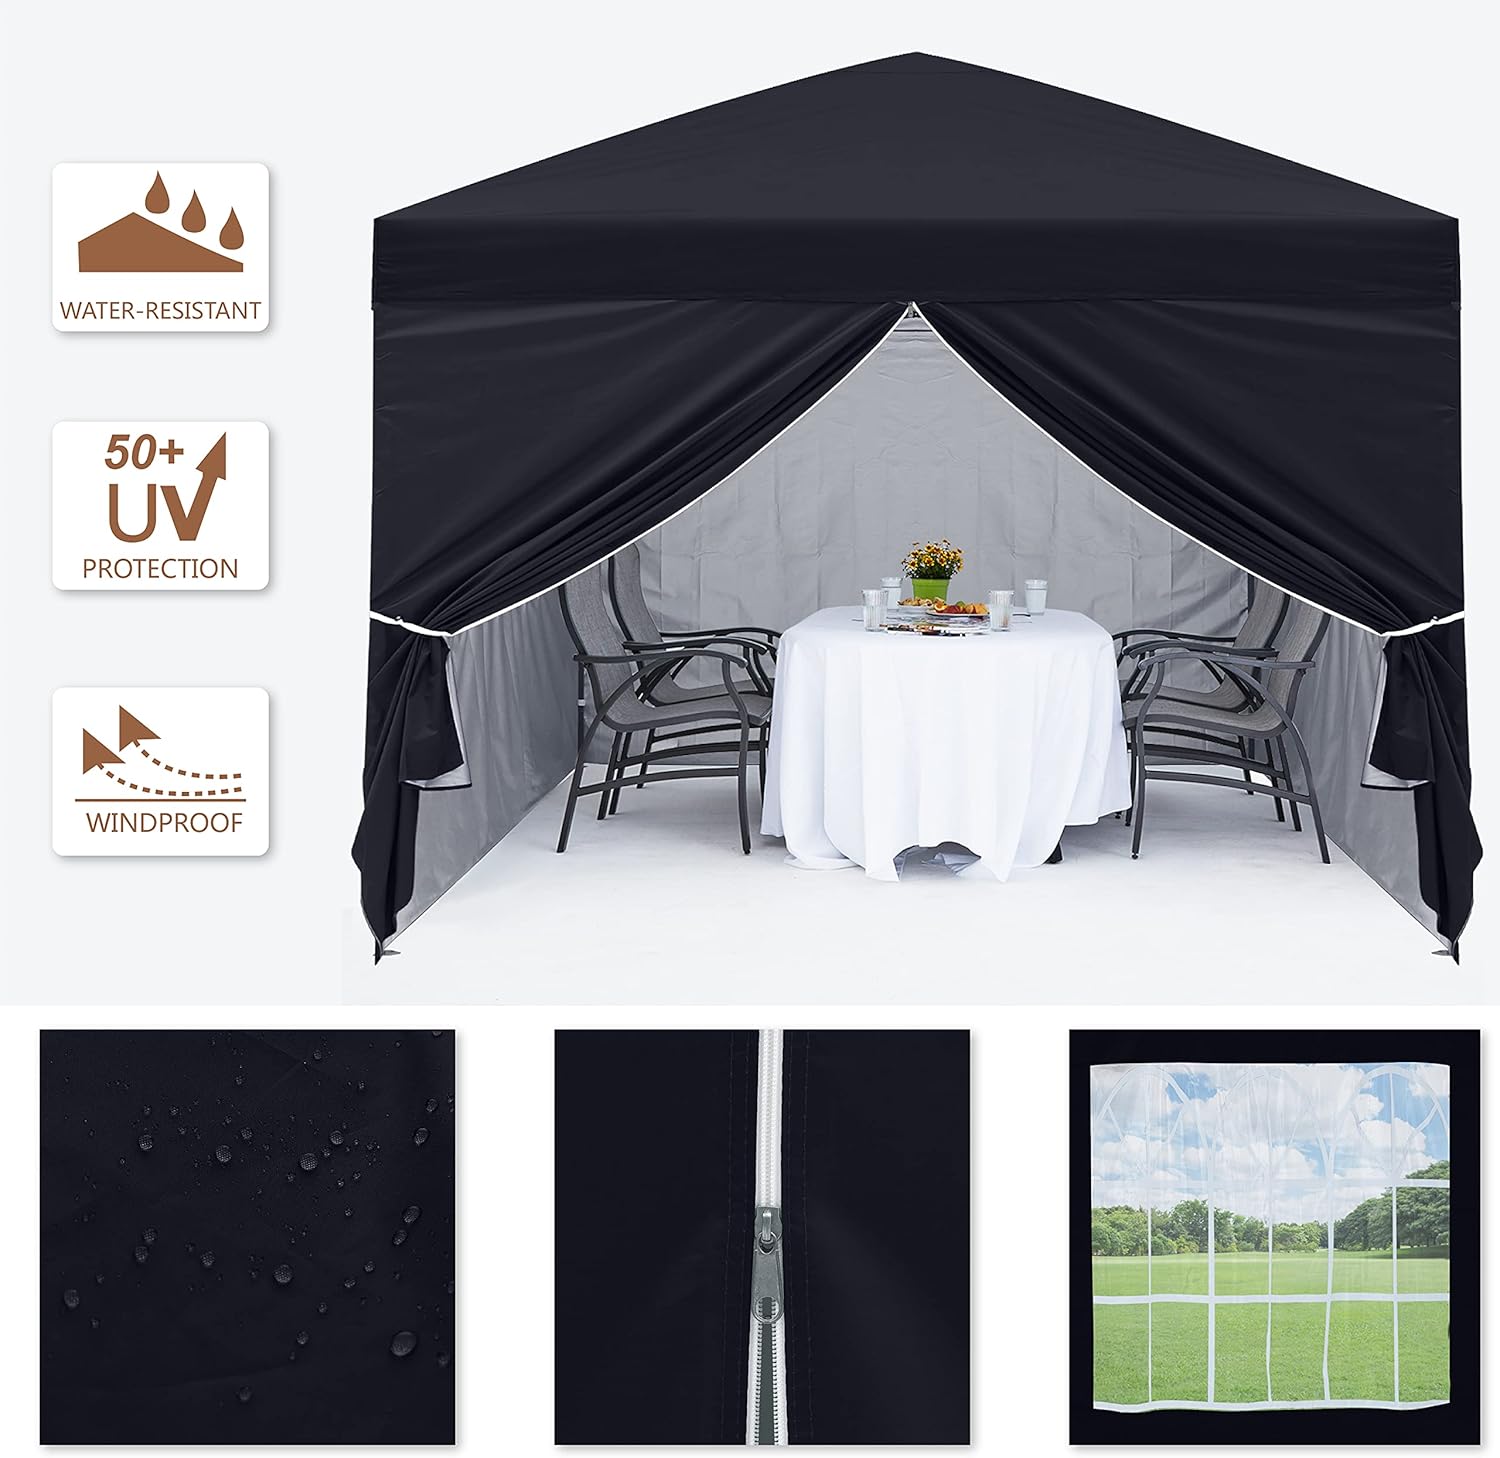
Figure 4.1: Adjustable legs with two height settings.
Sidewall Usage:
The canopy includes four removable sidewalls. One sidewall features a smooth-running zipper for easy entry and exit. The two sidewalls with church windows allow light to enter and provide a clear view of the surroundings. Sidewalls can be attached or removed as needed for privacy, weather protection, or ventilation.

Figure 4.2: Detail of the smooth zipper on the sidewall.
Weather Resistance Features:
The canopy top is made of 150D polyester fabric with a silver-plated PU coating, providing UPF 50+ UV protection and water resistance. The triangular structure of the roof is designed to prevent water accumulation during rainfall. For optimal performance, ensure the canopy is properly tensioned and secured.
Product Feature Demonstration Video:
Video 4.1: Demonstration of the canopy's UV protection, wind resistance, and water resistance features.
5. Maintenance
- Cleaning: Clean the canopy fabric and frame with mild soap and water. Do not use harsh chemicals or abrasive cleaners. Rinse thoroughly and allow to air dry completely before storage.
- Storage: Always ensure the canopy top and sidewalls are completely dry before folding and storing them in the wheeled bag. Storing damp fabric can lead to mold and mildew. Store in a cool, dry place away from direct sunlight.
- Inspection: Periodically inspect the frame for any signs of damage, rust, or loose connections. Check the fabric for tears, holes, or weakened areas. Address any issues promptly to prolong the life of your canopy.
6. Troubleshooting
- Canopy is unstable or sways in wind:
- Ensure all legs are fully extended and locked at the same height.
- Verify that all stakes are securely driven into the ground.
- Make sure the ropes are taut and properly anchored.
- Ensure weight bags are filled and attached to the legs.
- Water pooling on the canopy top:
- Check that the canopy top is properly stretched and secured to the frame, allowing for proper water runoff.
- Ensure the frame is fully extended and the peak is at its highest point.
- Difficulty folding the canopy:
- Ensure all height adjustment buttons are disengaged before attempting to collapse the legs.
- Gently push the center of the frame upwards while pulling the outer legs inwards to initiate folding.
7. Specifications
| Feature | Detail |
|---|---|
| Brand | MASTERCANOPY |
| Material | Polyurethane (PU), Polyester, Polyvinyl Chloride (PVC), Alloy Steel |
| Color | Black |
| Recommended Uses | Outdoor Activities, Beach, Party, Festival, Picnic, Market, Canopy |
| UV Protection | UPF 50+ |
| Frame Material | Alloy Steel |
| Closure Type | Zipper (on one sidewall) |
| Water Resistance Level | Waterproof |
| Coverage Area | 10x10 feet (100 sq ft) |
| Max Ceiling Height | 114 Inches (approx. 9.5 feet) |
| Product Dimensions | 120 x 120 x 116 inches (L x W x H) |
| Item Weight | 42.1 pounds |
| Assembly Required | No (Pop-up design) |
Figure 7.1: Canopy dimensions and adjustable height.
8. Safety Information
- Do not use the canopy in severe weather conditions, including heavy rain, strong winds, or snow. Disassemble and store the canopy to prevent damage or injury.
- Always secure the canopy with stakes, ropes, and weight bags (filled) to prevent it from blowing away.
- Keep all flame and heat sources away from the canopy fabric. The fabric is not fireproof.
- Ensure proper ventilation when using the canopy in enclosed spaces.
- Supervise children and pets around the canopy to prevent accidents.
- Do not hang heavy objects from the canopy frame.
9. Warranty and Support
MASTERCANOPY stands behind the quality of its products. For any warranty claims, technical support, or inquiries regarding your Pop Up Canopy Tent, please refer to the warranty information provided at the time of purchase or contact MASTERCANOPY customer service directly. Please have your model number and purchase date ready when contacting support.
For further assistance, visit the official MASTERCANOPY website or contact their customer support team.


