
1. Introduction
This manual provides essential information for the safe and effective replacement of the dryer heating element for compatible Maytag Epic Z and Bravos series dryers. This component is crucial for your dryer's heating function. Please read all instructions carefully before proceeding with installation.
2. Safety Information
WARNING: Risk of Electric Shock or Injury.
- Always disconnect the dryer from its power supply (unplug or turn off circuit breaker) before attempting any repairs or maintenance.
- Wear appropriate personal protective equipment, including gloves, to prevent cuts or scrapes.
- If you are not comfortable performing electrical repairs, it is highly recommended to seek assistance from a qualified appliance technician.
- Ensure all connections are secure and correctly installed before restoring power.
3. Compatible Models
This Owigift dryer heating element is compatible with the following Maytag Epic Z and Bravos series dryer models:
- MED9800TQ0
- MED9600SQ0
- MED6630HW0
- MED6630HW1
- MED7230HC0
- MED7230HW1
- MED8200FC1
- MED8200FC2
- MED8200FW1
- MED8200FW2
- MED8230HC0
Please verify your dryer's model number before purchasing and installing this replacement part.
4. Package Contents
The package typically includes:
- 1 x Dryer Heating Element Assembly
- 1 x Thermostat (pre-attached or separate, depending on specific kit)
Note: Additional tools required for installation (e.g., screwdrivers, nut drivers) are not included.
5. Setup (Installation Instructions)
The following steps provide a general guide for replacing a dryer heating element. Specific procedures may vary slightly depending on your exact dryer model. Always refer to your dryer's service manual for detailed instructions.
- Disconnect Power: Unplug the dryer from the wall outlet or turn off the circuit breaker supplying power to the dryer. This is a critical safety step.
- Access the Heating Element: Depending on your dryer model, you may need to remove the back panel, front panel, or top panel to access the heating element housing. This usually involves unscrewing several screws.
- Locate the Old Heating Element: The heating element is typically housed in a metal chamber. Carefully observe how the old element is connected and mounted.
- Disconnect Wires: Take a photo or make a diagram of the wire connections to the heating element and thermostat for reference. Carefully disconnect all electrical wires from the old heating element and thermostat.
- Remove Old Element: Unscrew or unclip the old heating element assembly from its housing. Gently pull it out.
- Install New Element: Carefully insert the new Owigift heating element assembly into the housing. Ensure it is seated correctly and secure it with screws or clips.
- Connect Wires: Reconnect the electrical wires to the new heating element and thermostat according to your reference photo/diagram. Ensure all connections are tight and secure.
- Reassemble Dryer: Replace any panels or components that were removed to access the heating element. Ensure all screws are tightened.
- Test Dryer: Plug the dryer back into the wall outlet or turn on the circuit breaker. Run a short cycle with no load to confirm the dryer heats properly. Check for any unusual noises or smells.
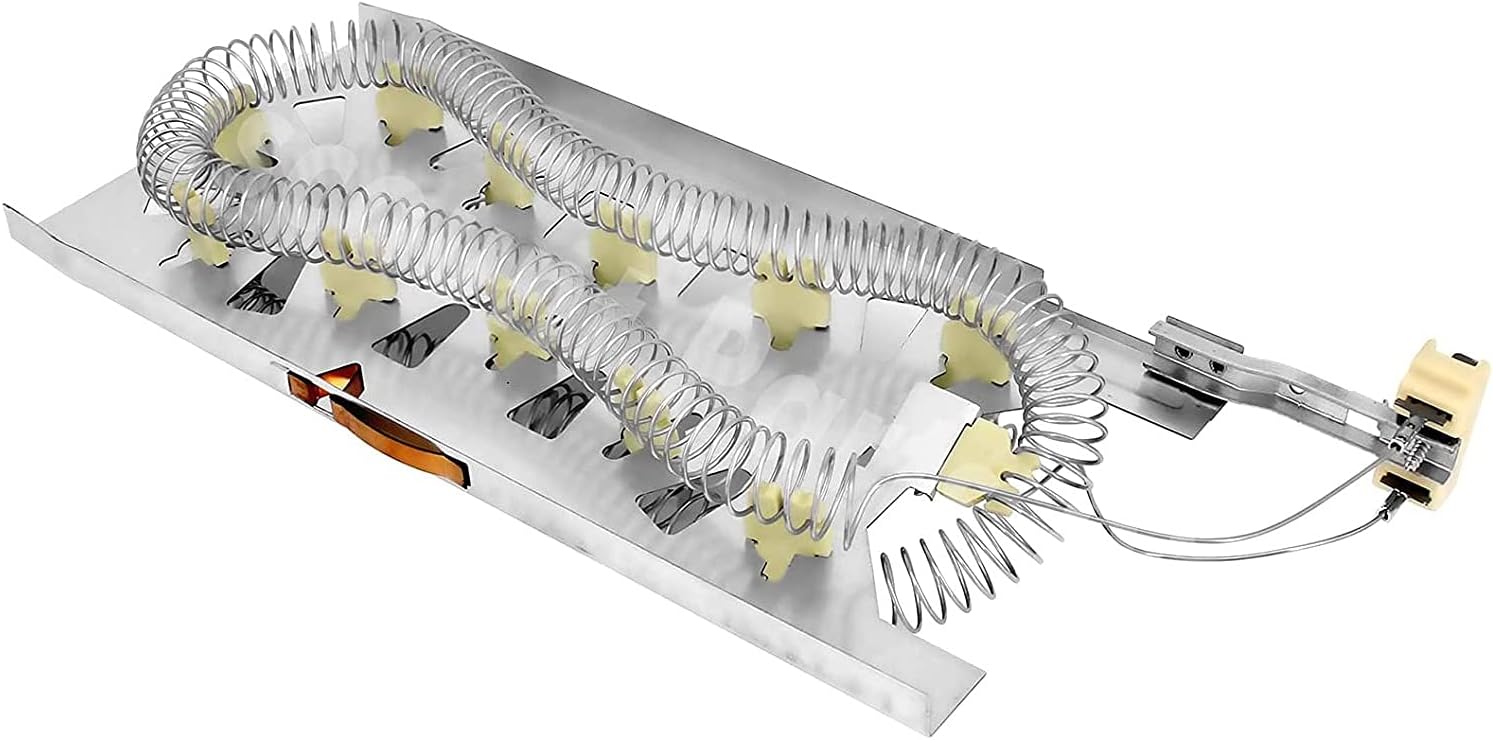
Image 1: The complete Owigift dryer heating element assembly, showing the coiled heating element within its metal housing and terminal connections. This image illustrates the overall structure of the replacement part.

Image 2: A close-up view of the terminal block and thermostat connections on the Owigift dryer heating element. This detail is important for correctly wiring the new component during installation.
6. Operating (Post-Installation Check)
After installation, perform the following checks:
- Initial Test Run: Run an empty dryer cycle on a heat setting. Observe if the drum rotates and if heat is being produced.
- Temperature Check: After a few minutes, the air inside the dryer should feel warm. Do not overload the dryer during the first few cycles.
- Listen for Abnormalities: Pay attention to any unusual noises, vibrations, or burning smells. If any occur, immediately disconnect power and re-check your installation.
7. Maintenance
To ensure the longevity of your dryer and its heating element:
- Clean Lint Filter: Always clean the lint filter before or after every load. A clogged lint filter restricts airflow, causing the heating element to overheat and potentially fail prematurely.
- Check Venting: Periodically inspect and clean the dryer's exhaust vent system. Blocked vents can lead to poor drying performance and overheating.
- Avoid Overloading: Do not overload the dryer, as this can strain components and reduce airflow.
8. Troubleshooting
If your dryer is not heating or experiencing issues after replacing the element:
| Symptom | Possible Cause | Solution |
|---|---|---|
| Dryer runs but produces no heat. | Faulty thermostat, thermal fuse, or incorrect wiring. | Check all wire connections. Test the thermostat and thermal fuse for continuity (if applicable). |
| Dryer takes too long to dry clothes. | Restricted airflow (clogged lint filter or vent), or partial heating element failure. | Clean lint filter and dryer vent. Ensure the heating element is fully functional. |
| Burning smell during operation. | Lint buildup on heating element or other components. | Immediately disconnect power. Inspect and clean the interior of the dryer, especially around the heating element. |
If troubleshooting steps do not resolve the issue, it is recommended to consult a professional appliance technician.
9. Specifications
- Part Type: Dryer Heating Element Replacement
- Compatibility: Maytag Epic Z and Bravos Series Dryers (refer to Section 3 for specific models)
- Material: Durable metal and heating coil construction
Note: Refer to your specific dryer model's original specifications for electrical requirements (voltage, wattage) as these are replacement parts designed to match OEM specifications.
10. Warranty and Support
For warranty information, returns, or technical support regarding this Owigift dryer heating element, please contact the seller directly through your purchase platform. Keep your purchase receipt or order number handy for faster service.