1. Introduction
Thank you for choosing the Nilight 12-inch 300W LED Light Bar. This manual provides essential information for the safe installation, operation, and maintenance of your new off-road lighting system. Please read these instructions thoroughly before installation and retain them for future reference.
2. Safety Information
- Always disconnect the vehicle's battery before performing any electrical work.
- Ensure all wiring connections are secure and properly insulated to prevent short circuits.
- Do not look directly into the light bar when it is illuminated, as it can cause eye strain or damage.
- Mount the light bar securely to prevent it from dislodging during vehicle operation.
- Verify that the installation complies with all local and national regulations regarding vehicle lighting.
- Use only the provided wiring harness and fuses, or replacements with equivalent specifications.
3. Package Contents
Please check the package to ensure all components are present:
- 1 x Nilight 12-inch 300W LED Light Bar
- 1 x 12V 5-Pin Rocker Switch
- 1 x 16AWG Wiring Harness Kit (2-lead, 12 feet extendable)
- 2 x Adjustable Mounting Brackets
- Assorted Fuses
- Mounting Hardware (bolts, nuts, washers)
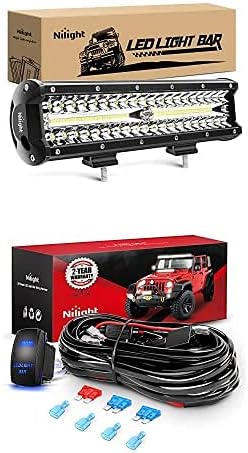
This image displays the Nilight 12-inch LED light bar, featuring a triple-row spot and flood combo beam design, along with its comprehensive wiring harness kit. The kit includes a 12V 5-pin rocker switch, 16AWG wiring, and various blade fuses for installation.
4. Setup and Installation
Professional installation is recommended. If installing yourself, ensure you have basic electrical knowledge and proper tools.
4.1 Mounting the Light Bar
- Choose a Mounting Location: Select a sturdy surface on your vehicle that can support the weight of the light bar and provide optimal light projection. Common locations include bumpers, roof racks, or grille guards.
- Position Brackets: Attach the adjustable mounting brackets to the light bar using the provided hardware. Do not fully tighten yet.
- Mark Drilling Points: Hold the light bar in the desired position and mark the drilling points for the brackets on your vehicle.
- Drill Holes: Carefully drill pilot holes, then enlarge them to the appropriate size for the mounting hardware.
- Secure Light Bar: Attach the light bar with its brackets to the vehicle using the remaining mounting hardware. Adjust the angle of the light bar as needed for optimal beam direction, then fully tighten all bolts.
4.2 Wiring the Light Bar
The provided 16AWG wiring harness kit is designed for easy connection of two light fixtures (up to 180W total). This light bar is 300W, so ensure proper fuse rating and direct connection for optimal performance.
- Disconnect Battery: Before starting, disconnect the negative terminal of your vehicle's battery to prevent electrical shorts.
- Connect Light Bar: Connect the positive and negative wires from the light bar to the corresponding connectors on the wiring harness. Ensure a secure and insulated connection.
- Route Wiring Harness: Carefully route the wiring harness from the light bar to the desired location for the rocker switch and then to the vehicle's battery, avoiding moving parts, sharp edges, and heat sources.
- Install Rocker Switch: Install the 5-pin rocker switch in a convenient and accessible location within the vehicle's cabin. Connect the switch wires to the harness as per the wiring diagram (typically included with the harness). The switch has built-in LEDs for visibility in the dark.
- Connect to Power: Connect the positive wire of the wiring harness (with the inline blade fuse) to the positive terminal of the vehicle's battery. Connect the negative wire of the harness to the negative terminal of the battery or a suitable chassis ground point.
- Verify Fuses: Ensure the inline blade fuse is correctly installed in the fuse holder. This acts as the first line of defense against overcurrent and short circuits.
- Reconnect Battery: Once all connections are secure and verified, reconnect the negative terminal of the vehicle's battery.
5. Operating Instructions
To operate the Nilight LED Light Bar:
- Ensure the vehicle's ignition is on (if wired to an accessory circuit) or the battery is connected (if wired directly).
- Locate the installed 5-pin rocker switch.
- Press the rocker switch to turn the LED light bar ON or OFF. The switch's built-in LEDs will illuminate when the light bar is active.
6. Maintenance
- Cleaning: Periodically clean the lens of the light bar with a soft cloth and mild soap and water to maintain optimal light output. Avoid abrasive cleaners.
- Inspection: Regularly check all mounting hardware and electrical connections for tightness and corrosion. Tighten any loose bolts and clean any corroded terminals.
- Wiring: Inspect the wiring harness for any signs of wear, fraying, or damage. Replace damaged sections immediately.
7. Troubleshooting
| Problem | Possible Cause | Solution |
|---|---|---|
| Light bar does not turn on. | No power to the light bar. Blown fuse. Faulty wiring connection. Defective switch. | Check battery connections. Inspect and replace the inline fuse if blown. Verify all wiring connections are secure. Test the rocker switch for functionality. |
| Light output is dim or flickers. | Low voltage. Loose connection. Corroded terminals. | Check vehicle's battery voltage. Tighten all electrical connections. Clean battery terminals and wiring connections. |
| Moisture inside the lens. | Seal integrity compromised. | Contact customer support for assistance. |
8. Specifications
- Brand: Nilight
- Model: B09BLVTTZ2
- Power: 300W
- Length: 12 Inches
- Beam Pattern: Spot Flood Combo (Triple Row, Nest Reflector Cup)
- Voltage: 12 Volts DC
- Light Source Type: LED
- Wiring Harness: 16AWG, 2-Lead, 12 Feet Extendable
- Switch: 5-Pin Rocker Switch with built-in LEDs
- Protection: Inline Blade Fuse for overcurrent and short circuit
- Mounting: Adjustable Bracket
- Fit Type: Universal Fit
- Vehicle Service Type: Truck, SUV, Car
9. Warranty Information
This Nilight LED Light Bar comes with a 2-Year Warranty from the date of purchase. This warranty covers manufacturing defects and material flaws under normal use. It does not cover damage caused by improper installation, misuse, accidents, or unauthorized modifications. Please retain your proof of purchase for warranty claims.
10. Customer Support
For technical assistance, warranty claims, or any questions regarding your Nilight LED Light Bar, please refer to the contact information provided on the Nilight official website or your purchase platform. When contacting support, please have your product model number (B09BLVTTT2) and proof of purchase readily available.