1. Introduction
This manual provides detailed instructions for the setup, operation, and maintenance of your Blackmagic Design HyperDeck Studio HD Pro Recorder. Please read this manual thoroughly before using the device to ensure proper functionality and to maximize its performance.

Figure 1: Front view of the Blackmagic Design HyperDeck Studio HD Pro Recorder.
2. Product Overview
The HyperDeck Studio HD Pro is a professional video recorder designed for broadcast and production environments. It offers advanced recording capabilities and extensive connectivity options.
Key Features:
- Ultra HD Recording: Capable of recording in Ultra HD resolutions.
- Full Rack Width Design: Features a full rack width size for integration into existing studio setups.
- Enhanced Connectivity: Includes 6G-SDI support, two SD card slots, USB Type-C recording output, timecode input, and upgraded 10G Ethernet.
- User Interface: Redesigned jog/shuttle wheel and built-in speaker for intuitive control and monitoring.
- Redundant Power: Equipped with 2 redundant AC power supplies for reliability.
- Advanced Timecode: Timecode connections upgraded to XLR connectors.
- Broad Codec Support: Supports H.264, ProRes, and DNx files, suitable for broadcast masters. PCM or AAC audio is also supported. 4K models add H.265 for Ultra HD recording.
- USB Webcam Functionality: Works with video software like Zoom, Microsoft Teams, Skype, and live streaming platforms such as Open Broadcaster and XSplit Broadcaster.
- ISO Recording Capabilities: Features timecode and reference generators with loop outputs for multi-cam editing and syncing cameras.
- Digital Signage Integration: HDMI output for large screen TVs and projectors, with a built-in sync generator for multi-screen video walls. Supports FTP for file upload and remote control protocols.
- Broadcast Archiving: Supports all SD and HD standards for archiving from broadcast decks. Records direct to H.264 for storage efficiency.

Figure 2: Overview of the HyperDeck Studio HD Pro's capabilities.
3. Setup
Before operating your HyperDeck Studio HD Pro, ensure all necessary connections are made and the device is powered correctly.
3.1. Unpacking and Inspection
- Carefully remove the HyperDeck Studio HD Pro from its packaging.
- Verify that the main unit is present. No other accessories are included in the box.
- Inspect the unit for any signs of physical damage.
3.2. Power Connection
- Connect the provided AC power cable to one of the redundant AC power inputs on the rear of the unit.
- Plug the other end of the power cable into a suitable power outlet.
- For redundant power, connect a second AC power cable to the other input and a separate power source.
3.3. Initial Configuration
- Upon first power-up, the unit may prompt you to set basic parameters such as language, date, and time. Use the front panel controls to navigate and confirm settings.
4. Connections
The HyperDeck Studio HD Pro offers a wide range of input and output connections for various professional workflows.

Figure 3: Rear panel connections of the HyperDeck Studio HD Pro.
4.1. Inputs
- SDI Input: 1 x BNC, 6G-SDI.
- HDMI Input: 1 x HDMI 2.0 Type A.
- Embedded Audio (SDI): 16 channels.
- Embedded Audio (HDMI): 16 channels.
- Timecode Input: 1 x XLR.
- Reference Input: 1 x BNC.
- Ethernet: 1 x RJ45, 10 Gb/s.
- Device Control: 1 x RS-422.
4.2. Outputs
- SDI Loop-Out: 1 x BNC.
- SDI Outputs: 2 x BNC, 6G-SDI.
- SDI Monitor Output: 1 x BNC.
- HDMI Output: 1 x HDMI 2.0 Type-A.
- Embedded Audio (SDI): 8 channels.
- Embedded Audio (HDMI): 8 channels.
- USB Type-C: For external recording or webcam use.
- Timecode Output: 1 x XLR.
- Reference Output: 1 x BNC.
- Device Control: 1 x RS-422.
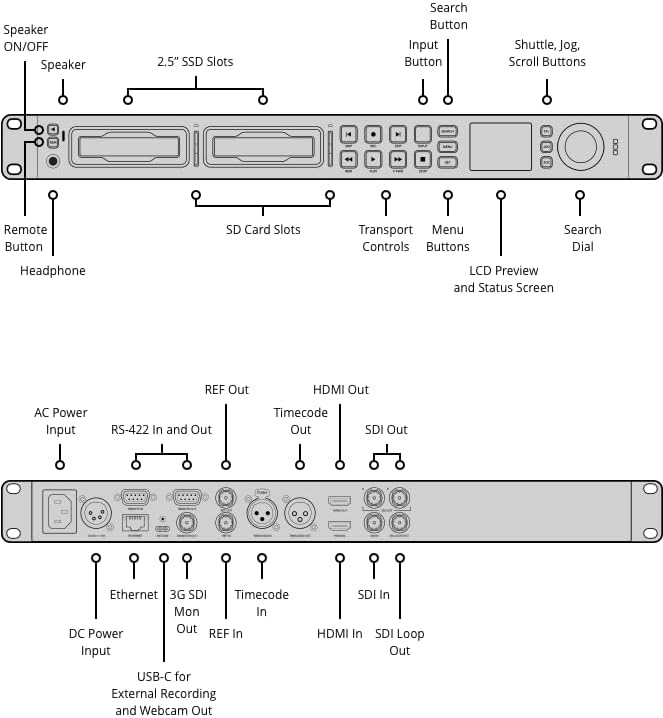
Figure 4: Front panel layout with controls and media slots.
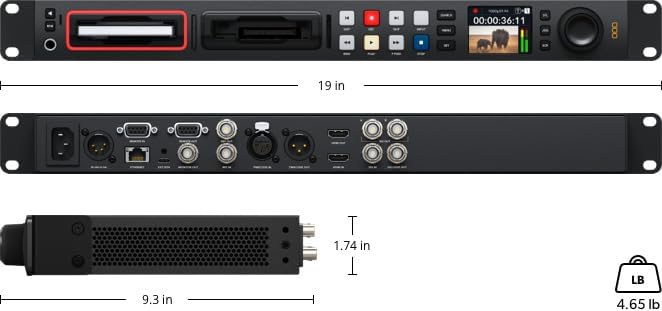
Figure 5: Rear panel connection diagram.
5. Operating Instructions
This section outlines the basic steps for operating your HyperDeck Studio HD Pro.
5.1. Front Panel Controls
- LCD Preview and Status Screen: Displays video preview, timecode, and device status.
- Transport Controls: Play, Stop, Fast Forward, Rewind buttons.
- Record Button: Initiates recording.
- Search Dial: For precise jogging, shuttling, and menu navigation.
- Menu/Set Buttons: Access and confirm menu settings.
- Speaker ON/OFF: Toggles the built-in speaker.
- Headphone Jack: For audio monitoring.
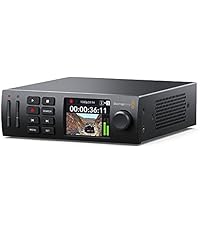
Figure 6: Detailed view of the jog/shuttle wheel.
5.2. Recording
- Insert a compatible SD card or SSD into one of the available slots.
- Ensure your video source is connected to an input (SDI or HDMI).
- Use the Menu button and Search Dial to select your desired recording format, codec, and input source.
- Press the REC button to begin recording. The record indicator will illuminate.
- Press the STOP button to end recording. The recording will be saved to the inserted media.
5.3. Playback
- Ensure media with recorded content is inserted.
- Use the Search Dial to browse through recorded clips on the LCD screen.
- Press the PLAY button to start playback.
- Use the Fast Forward, Rewind, Jog, and Shuttle buttons for navigation.
6. Media and Storage
The HyperDeck Studio HD Pro supports various media types for recording and playback.
6.1. Supported Media
- SD Card Slots: Two dedicated slots for SD cards.
- 2.5" SSD Slots: Two slots for 2.5-inch Solid State Drives.
- USB Type-C: Connect external USB-C drives for recording.
6.2. Media Management
- Ensure media is formatted correctly for optimal performance. Refer to the on-screen menu for formatting options.
- The unit supports continuous recording across multiple media cards/SSDs.

Figure 7: HyperDeck Studio HD Pro connected for external recording or webcam use.
7. Maintenance
Regular maintenance ensures the longevity and optimal performance of your HyperDeck Studio HD Pro.
- Cleaning: Use a soft, dry cloth to clean the exterior of the unit. Avoid abrasive cleaners or solvents.
- Ventilation: Ensure the ventilation slots are clear of dust and obstructions to prevent overheating.
- Firmware Updates: Periodically check the Blackmagic Design website for firmware updates to ensure you have the latest features and bug fixes.
8. Troubleshooting
This section addresses common issues you might encounter with your HyperDeck Studio HD Pro.
- No Power: Check power cable connections and ensure the power outlet is functional. Verify both redundant power supplies are connected if applicable.
- No Video Input: Confirm that the video source is correctly connected to the selected input (SDI or HDMI) and that the source is outputting a compatible signal. Check cable integrity.
- Recording Issues: Ensure media (SD card/SSD) is inserted, properly formatted, and has sufficient free space. Check selected recording codec and resolution settings.
- Audio Problems: Verify audio input settings and monitor levels on the LCD screen. Check audio cable connections.
- Unit Not Responding: Try power cycling the unit by disconnecting and reconnecting the power cable. If issues persist, consult the Blackmagic Design support resources.
9. Specifications
| Feature | Specification |
|---|---|
| Product Dimensions | 9.1 x 9.1 x 9.1 inches |
| Item Weight | 6.15 pounds |
| ASIN | B09BJQ8Y7N |
| Item Model Number | HYPERD/ST/DFHP |
| Date First Available | July 30, 2021 |
| Manufacturer | Blackmagic Design |
10. What's in the Box
- Main unit only
11. Warranty and Support
For detailed warranty information and technical support, please refer to the official Blackmagic Design website or contact their customer service directly. Specific warranty terms may vary by region and retailer.


