1. Introduction
Thank you for choosing the YUYTE Digital Programmable Thermostat. This manual provides essential information for the safe and efficient operation of your new thermostat. Please read it thoroughly before installation and use, and retain it for future reference.
2. Safety Information
- Always disconnect power to the heating system before installing or servicing the thermostat.
- Installation should be performed by a qualified electrician or heating technician.
- Do not expose the thermostat to water or excessive humidity.
- Keep out of reach of children to prevent misoperation.
- Ensure batteries are inserted correctly according to polarity markings.
3. Package Contents
Verify that all items are present in the package:
- 1 x YUYTE Digital Programmable Thermostat
- 1 x User Manual (this document)
- Mounting Screws (typically included)

Image: The YUYTE Digital Programmable Thermostat, its user manual, and mounting screws, as typically found in the product package.
4. Product Overview
4.1 Features
- High reliability single-chip performance with strong anti-interference ability.
- Child lock function to prevent accidental operation.
- Data memory function retains settings during power failure.
- Holiday mode for comfortable temperatures when returning home.
- Easy operation with intuitive buttons for various working modes.
- Built-in product sensor.
- 0.5°C accuracy.
4.2 Components

Image: Front view of the thermostat, showing the digital LCD display and the control buttons below it. The display shows room temperature, set temperature, time, and mode indicators.
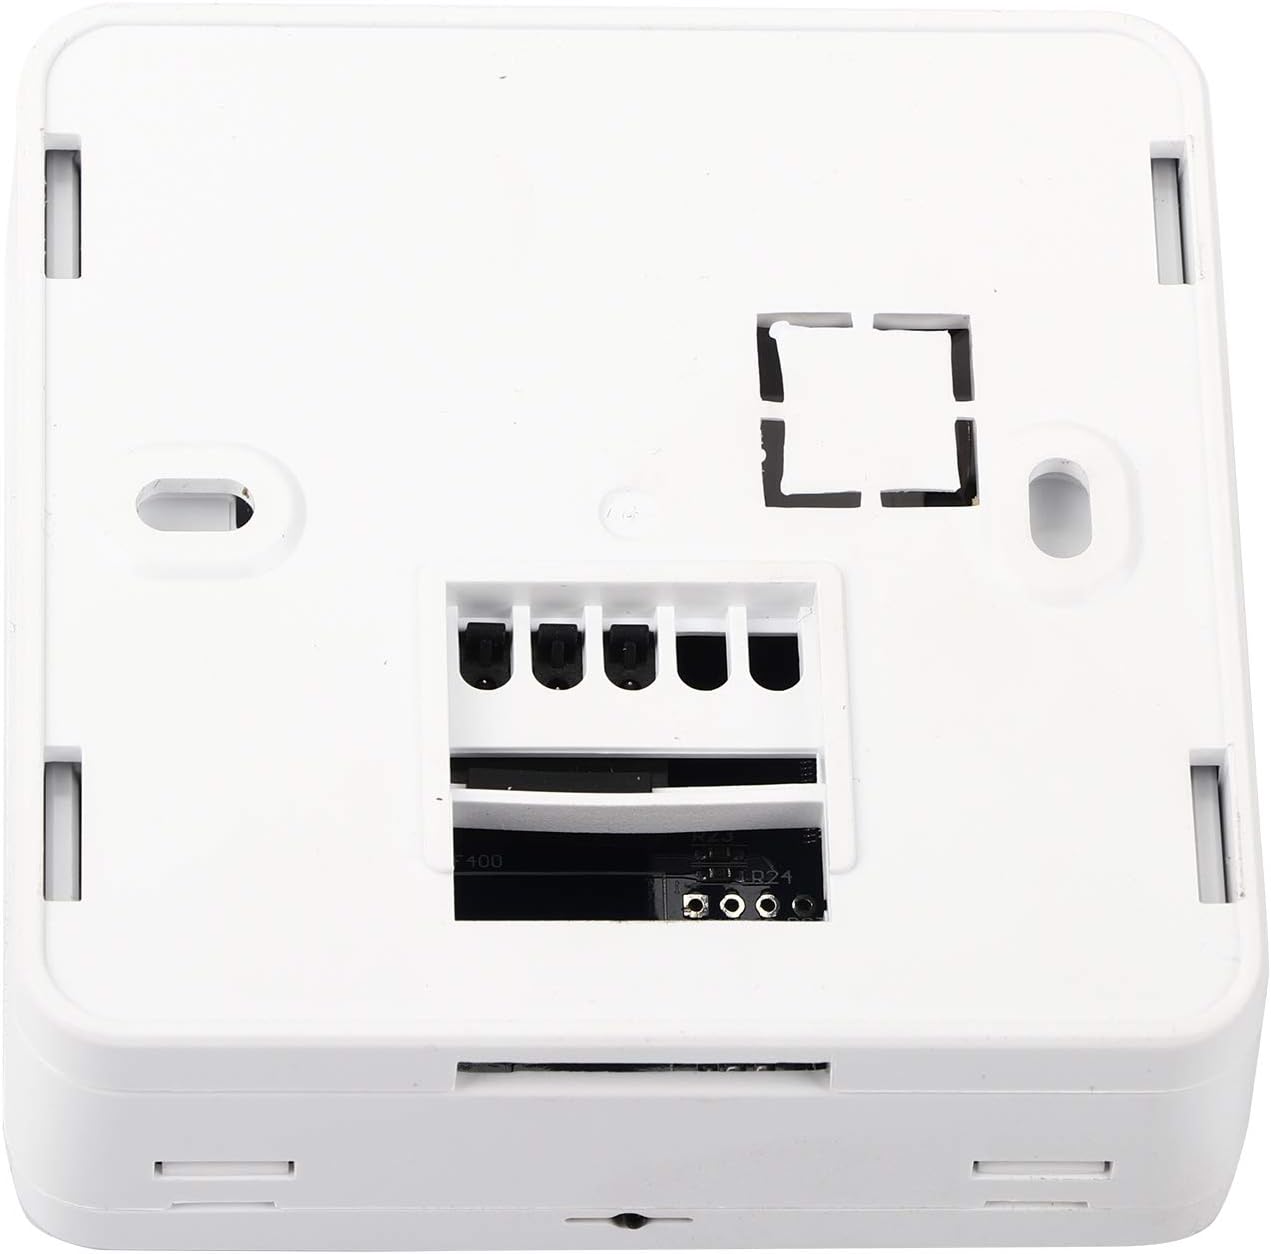
Image: Rear view of the thermostat, revealing the wiring terminals for electrical connection to the heating system.
The thermostat features a clear LCD display for temperature and time, along with intuitive buttons for setting adjustments. The rear panel contains the necessary terminals for connecting to your heating system.
5. Setup and Installation
5.1 Mounting Location
Choose a location on an interior wall, approximately 1.5 meters (5 feet) above the floor, away from direct sunlight, drafts, and heat sources (e.g., radiators, televisions). Ensure good air circulation around the thermostat.
5.2 Wiring Instructions
- Power Off: Before beginning, ensure the main power supply to your heating system is turned off at the circuit breaker.
- Remove Old Thermostat (if applicable): Carefully disconnect and label the wires from your existing thermostat.
- Mounting: Secure the thermostat base to the wall using the provided screws. The thermostat is designed for flat mounting and fits standard 86mm hidden boxes or 60mm European boxes.
- Connect Wires: Refer to the wiring diagram provided with your heating system and connect the wires to the appropriate terminals on the YUYTE thermostat. The thermostat is suitable for water heating systems (load current 3A) or boiler heating systems (capacity 5A).
- Attach Thermostat: Once wiring is complete, carefully attach the front panel of the thermostat to its base.
- Power On: Restore power to your heating system at the circuit breaker.

Image: Side profile of the thermostat, illustrating its compact design and how it sits against the wall after installation.
5.3 Battery Installation
The thermostat requires 2 AA batteries (not included) for operation. Open the battery compartment, insert the batteries according to the polarity markings (+/-), and close the compartment. The display will illuminate upon successful battery installation.
6. Operating Instructions
6.1 Basic Operation
Upon initial power-up or after battery replacement, the thermostat will display the current room temperature and time. Use the buttons below the display to navigate and adjust settings.

Image: Close-up of the thermostat's front panel, highlighting the digital display and the 'SET', 'OK', 'Up', and 'Down' arrow buttons for user interaction.
6.2 Setting the Time and Day
- Press the SET button to enter the time setting mode.
- Use the Up and Down arrow buttons to adjust the hour. Press OK to confirm.
- Repeat for minutes and day of the week.
- Press OK to exit time setting mode.
6.3 Setting Temperature
- In normal operating mode, use the Up and Down arrow buttons to adjust the desired set-point temperature.
- The new setting will be automatically saved after a few seconds.
6.4 Programming Schedule (7-Day Cycle)
The thermostat allows for a programmable schedule, set per 1 week as a cycle. Detailed programming steps are typically found in the full manual, but generally involve:
- Press and hold the SET button to enter programming mode.
- Use SET to cycle through different periods (e.g., morning, day, evening, night) for each day of the week.
- Use Up and Down arrows to adjust the start time and desired temperature for each period.
- Press OK to confirm settings and move to the next period/day.
- Exit programming mode by pressing SET until the normal display returns.
6.5 Holiday Mode
Activate Holiday Mode to maintain a specific temperature for a set duration, ideal for when you are away. This feature ensures a comfortable temperature upon your return without needing to manually adjust settings daily.
- Press a specific button (refer to the full manual, often a dedicated 'Holiday' button or a combination of 'SET' and an arrow) to enter Holiday Mode settings.
- Set the desired temperature and the number of days for the holiday period.
- Confirm the settings. The thermostat will revert to its programmed schedule after the holiday period ends.
6.6 Child Lock Function
To prevent accidental changes to settings, the thermostat includes a child lock function. Typically, this is activated by pressing and holding two specific buttons simultaneously for a few seconds (e.g., 'Up' and 'Down' arrows). Repeat the action to unlock.
7. Maintenance
7.1 Cleaning
Wipe the thermostat's exterior with a soft, damp cloth. Do not use abrasive cleaners or solvents, as these can damage the finish or internal components.
7.2 Battery Replacement
When the battery indicator appears on the display, replace the 2 AA batteries promptly. Ensure the power to the heating system is off before opening the battery compartment. Dispose of old batteries responsibly.
8. Troubleshooting
| Problem | Possible Cause | Solution |
|---|---|---|
| Display is blank | No power; dead batteries. | Check circuit breaker; replace batteries. |
| Heating system not responding | Incorrect wiring; system power off; thermostat in wrong mode. | Verify wiring connections; check heating system power; ensure thermostat is in heating mode. |
| Temperature reading inaccurate | Thermostat exposed to drafts or heat sources. | Relocate thermostat or shield it from external influences. |
| Settings cannot be changed | Child lock is active. | Deactivate child lock (refer to section 6.6). |
If problems persist, please contact customer support.
9. Specifications
| Feature | Detail |
|---|---|
| Model Number | Cimenn-GZP-124896736 |
| Power Supply | 2 x AA Batteries (not included) |
| Load Current (Water Heating) | 3A |
| Capacity (Boiler Heating) | 5A |
| Temperature Display Range | 0 - 70°C |
| Working Temperature | 1 - 70°C |
| Accuracy | ±0.5°C |
| Set-point Temperature Range | 5°C - 35°C |
| Output | Switch Relay |
| Probe Sensor | NTC (10K, 1%) |
| Running Program | Set per 1 week as a cycle |
| Dimensions | Approx. 8.6 x 8.6 x 2.9 cm (3.39 x 3.39 x 1.14 inches) |
| Weight | Approx. 170g (6 oz) |
| Material | ABS, Plastic |
| Color | White |
| Display Type | Digital, Manual |
| Backlight | Yes |
10. Warranty and Support
10.1 Warranty Information
YUYTE products are manufactured to high-quality standards. For specific warranty details, please refer to the warranty card included with your purchase or contact YUYTE customer service. Keep your purchase receipt as proof of purchase.
10.2 Customer Support
If you have any questions, require technical assistance, or encounter issues not covered in this manual, please contact YUYTE customer support. Visit the official YUYTE store on Amazon for more information: YUYTE Store.