
BAOFENG UV 5R
Contents
BAOFENG UV-5R Pro Ham Radio User Manual
Model: UV-5R Pro
Brand: BAOFENG
1. Introduction
This manual provides detailed instructions for the safe and effective operation of your BAOFENG UV-5R Pro Ham Radio. Please read this manual thoroughly before using the device to ensure proper functionality and to understand all features.
Package Contents
- 2 × BaoFeng UV-5R Pro Radio
- 2 × 3800mAh Li-ion Battery
- 2 × 1800mAh Li-ion Battery
- 2 × Programming Cable
- 2 × RH-771 High Gain Antenna
- 2 × Original Antenna
- 2 × Hand Microphone
- 2 × Power Adapter
- 2 × Earpiece
- 2 × Belt Clip
- 2 × Hand Strap
- 2 × User's manual

Image: The complete BAOFENG UV-5R Pro Ham Radio kit, including two radios, multiple batteries, antennas, programming cables, hand microphones, power adapters, earpieces, belt clips, and hand straps.
2. Technical Specifications
| Feature | Description |
|---|---|
| Frequency Range | VHF: 150-174 MHz / UHF: 400-480 MHz (Rx/Tx) |
| Frequency Stability | ±2.5ppm |
| Channels | 128 Channel Memory |
| CTCSS/DCS Codes | 50 CTCSS / 104 DCS codes |
| Output Power | High / Medium / Low (Switchable) |
| Battery Capacity | 1800 mAh / 3800 mAh Li-ion |
| Operating Voltage | DC 7.4V |
| Dimensions (excluding antenna) | 4.3 × 2.3 × 1.3 inches |
| Item Weight (excluding antenna) | 6.77 oz |
| Special Features | Dual-Band Display/Dual-Standby, Tri-color backlit LCD, Built-in LED Flashlight, VOX Function, Emergency Alarm, Keypad Lock |
3. Setup and Assembly
3.1 Battery Installation and Charging
The BAOFENG UV-5R Pro comes with two battery options: an 1800mAh and a 3800mAh Li-ion battery. Ensure the battery is fully charged before first use.
- Align the battery with the grooves on the back of the radio.
- Slide the battery upwards until it clicks into place.
- To remove, press the release latch at the bottom of the battery and slide it downwards.
- Place the radio with the installed battery into the desktop charger.
- Connect the power adapter to the charger and a power outlet (100-240V).
- The charger indicator light will show charging status (typically red for charging, green for fully charged).

Image: The BAOFENG UV-5R Pro radio with both the 3800mAh and 1800mAh batteries, demonstrating their respective charging bases. The image highlights the extended standby and continuous use times provided by the larger battery.
3.2 Antenna Attachment
The radio includes both an original antenna and an RH-771 high gain antenna for improved range.
- Screw the desired antenna clockwise onto the antenna connector at the top of the radio until it is finger-tight. Do not overtighten.

Image: A visual comparison between the standard 5.9-inch antenna and the longer 15.1-inch high gain antenna, illustrating how the longer antenna can improve signal strength and range.
3.3 Hand Microphone and Earpiece Connection
The hand microphone and earpiece connect to the side port of the radio.
- Open the rubber cover on the side of the radio.
- Insert the plugs of the hand microphone or earpiece firmly into the corresponding jacks.

Image: The BAOFENG UV-5R Pro radio connected to its hand microphone, demonstrating the convenience of remote operation. Insets show the 360-degree rotation of the clip, the headphone port, and the PTT (Push-to-Talk) button on the microphone.
4. Operating Instructions
4.1 Basic Controls and Functions

Image: A detailed diagram labeling the key components and controls of the BAOFENG UV-5R Pro radio, including the antenna, flashlight, volume knob (ON/OFF & Volume), LED display, LED indicator, MIC, A/B band switch, Frequency/Channel Mode switch, speaker, and keypad.
- Volume Knob (ON/OFF & Volume): Rotate clockwise to turn on the radio and increase volume. Rotate counter-clockwise to decrease volume and turn off.
- Antenna: For transmitting and receiving signals.
- LED Indicator: Illuminates red during transmission, green during reception.
- PTT (Push-to-Talk) Button: Press and hold to transmit, release to receive.
- MONI (Monitor) Button: Press to open the squelch and listen to weak signals.
- CALL Button: Press to activate the alarm function or access FM radio.
- VFO/MR Button: Switches between Frequency (VFO) mode and Channel (MR) mode.
- A/B Button: Switches between the upper (A) and lower (B) frequency displays.
- BAND Button: Switches between VHF and UHF bands.
- Keypad: Used for frequency input, channel selection, and menu navigation.
- MENU Button: Enters the menu system.
- UP/DOWN Arrows: Navigate menu options or adjust frequencies/channels.
- EXIT Button: Exits the current menu or function.
4.2 Programming the Radio
The UV-5R Pro can be programmed manually via the keypad or using a computer with the provided programming cable and software (e.g., CHIRP).
4.2.1 Manual Programming (Example: Setting a Frequency)
- Press the VFO/MR button to enter Frequency (VFO) mode.
- Use the keypad to enter the desired frequency (e.g., 145.000).
- Press MENU, then use the UP/DOWN arrows to navigate to the desired setting (e.g., S-D for saving channel).
- Press MENU again to confirm, then use UP/DOWN to select an empty channel number.
- Press MENU to save.
4.2.2 PC Programming
For advanced programming and managing multiple channels, PC programming is recommended.
- Install the driver for the programming cable (CD-PL-2303 chip driver is often included or available online).
- Install compatible programming software (e.g., CHIRP).
- Connect the programming cable to your computer's USB port and the radio's side port.
- Turn on the radio.
- Launch the programming software and select the correct COM port.
- Read data from the radio, make desired changes, and then write the new data back to the radio.
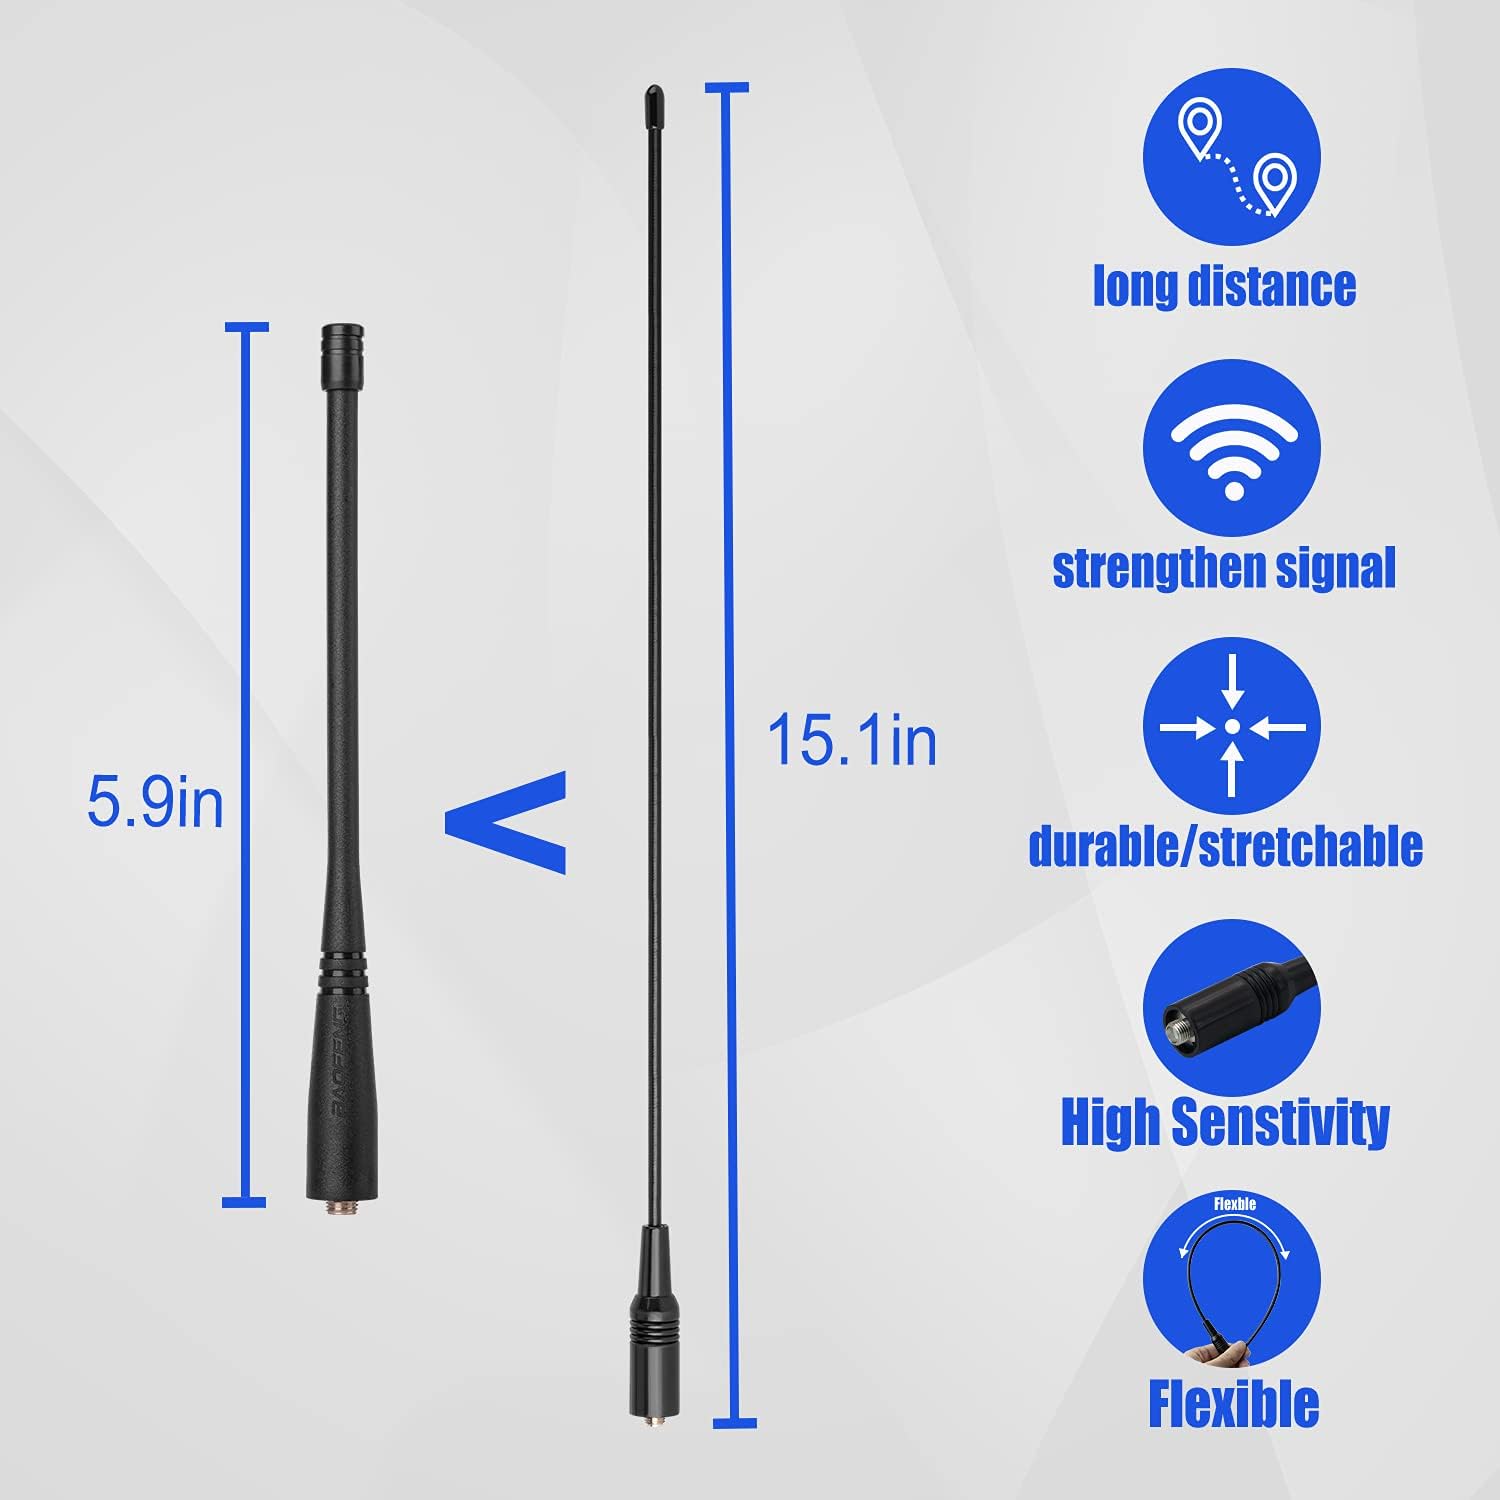
Image: The BAOFENG UV-5R Pro radio connected via its programming cable to a computer, with a software CD visible. This setup enables stable, continuous, and long-range programming without delay, supporting Windows 7 systems.
4.3 Key Features
- Dual-Band Display/Dual-Standby: Monitor two different frequencies simultaneously.
- Tri-color backlit LCD Display: Customize display color for different modes.
- Built-in LED Flashlight: Provides illumination in low-light conditions.
- VOX Function: Voice-activated transmission, allowing hands-free operation.
- Emergency Alarm: Activates an audible alarm for emergency situations.
- Keypad Lock: Prevents accidental key presses.
- Battery Saver: Extends battery life by reducing power consumption during idle periods.
- Transmit Time-out Timer (TOT): Limits transmission duration to prevent accidental continuous transmission.
- ROGER Beep function: Emits a short tone to indicate the end of transmission.
5. Maintenance and Care
- Keep the radio dry. If it gets wet, wipe it immediately.
- Do not expose the radio to extreme temperatures.
- Clean the radio's surface with a soft, damp cloth. Avoid using harsh chemicals or solvents.
- Ensure battery contacts are clean.
- Store the radio in a cool, dry place when not in use for extended periods.
- Do not attempt to disassemble or modify the radio. This will void the warranty and may cause damage.
6. Troubleshooting
| Problem | Possible Cause | Solution |
|---|---|---|
| Radio does not turn on. | Battery is not installed correctly or is depleted. | Ensure battery is securely attached and fully charged. |
| Cannot transmit or receive. | Incorrect frequency/channel, squelch too high, antenna not connected. | Verify frequency/channel, adjust squelch level, check antenna connection. Ensure you have a valid license for transmission. |
| Poor audio quality. | Low battery, weak signal, incorrect volume. | Charge battery, move to an area with better signal, adjust volume. |
| Programming error via PC. | Incorrect COM port, driver issue, radio not in programming mode. | Verify COM port in device manager, reinstall cable drivers, ensure radio is on and connected. |
7. Warranty and Support
Bit Trading is the authorized BaoFeng US Distributor. All Baofeng ham radio walkie talkies sold by Bit Trading are covered by Baofeng's support.
For further assistance or warranty claims, please contact the authorized distributor or refer to the official BAOFENG website.
FCC Compliance: This equipment has been tested and found to comply with the limits for a Class B digital device, pursuant to part 15 and part 90 of the FCC Rules. FCC ID: 2AJGM-UV5RPRO.
Documents and downloads
Ask a question about this manual
Ask about setup, troubleshooting, compatibility, parts, safety, or missing instructions. Manuals+ will review the question and use this page’s manual context to help answer it.