Introduction
Thank you for purchasing the Kitchen 10L Desktop Electric Oven. This manual provides important information regarding the safe operation, maintenance, and troubleshooting of your new appliance. Please read this manual thoroughly before use and retain it for future reference.
Important Safety Instructions
When using electrical appliances, basic safety precautions should always be followed, including the following:
- Read all instructions.
- Do not touch hot surfaces. Use handles or knobs.
- To protect against electrical shock, do not immerse cord, plugs, or appliance in water or other liquid.
- Close supervision is necessary when any appliance is used by or near children.
- Unplug from outlet when not in use and before cleaning. Allow to cool before putting on or taking off parts.
- Do not operate any appliance with a damaged cord or plug or after the appliance malfunctions or has been damaged in any manner.
- The use of accessory attachments not recommended by the appliance manufacturer may cause injuries.
- Do not use outdoors.
- Do not let cord hang over edge of table or counter, or touch hot surfaces.
- Do not place on or near a hot gas or electric burner, or in a heated oven.
- Extreme caution must be used when moving an appliance containing hot oil or other hot liquids.
- Always attach plug to appliance first, then plug cord into the wall outlet. To disconnect, turn any control to "off", then remove plug from wall outlet.
- Do not use appliance for other than intended use.
Product Overview
Familiarize yourself with the components of your electric oven.

Figure 1: Front view of the 10L Desktop Electric Oven, showing the glass door, handle, and control knobs on the right side.
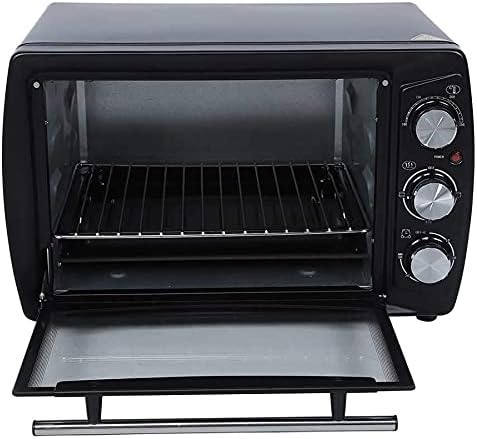
Figure 2: Interior view of the oven with the door open, revealing the wire rack and the removable crumb tray at the bottom.
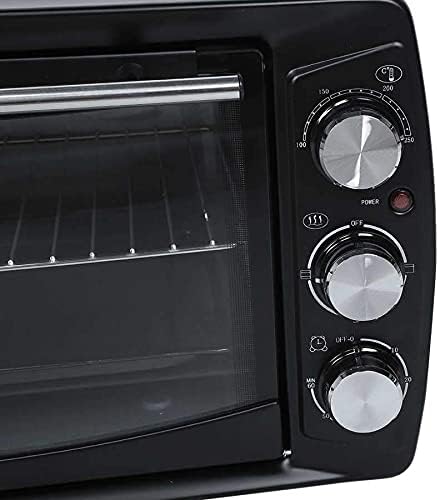
Figure 3: Close-up of the control panel, featuring three rotary knobs for temperature, function, and timer settings, along with a power indicator light.
Components:
- Temperature Control Knob: Used to set the desired cooking temperature.
- Function Control Knob: Selects heating elements (e.g., upper, lower, or both).
- Timer Control Knob: Sets the cooking duration.
- Power Indicator Light: Illuminates when the oven is operating.
- Glass Door: Allows viewing of food during cooking.
- Wire Rack: For placing food items.
- Crumb Tray: Collects crumbs and drips for easy cleaning.
- Heating Elements: Four heating elements for efficient cooking.
Setup
- Unpacking: Carefully remove the oven and all accessories from the packaging. Retain packaging for future storage or transport.
- Placement: Place the oven on a stable, heat-resistant, and flat surface. Ensure there is adequate ventilation around the oven (at least 4 inches of clearance on all sides). Do not place it near flammable materials or heat sources.
- Initial Cleaning: Before first use, wipe down the interior and exterior of the oven with a damp cloth. Wash the wire rack and crumb tray with warm, soapy water, rinse thoroughly, and dry completely.
- First Use Burn-Off: It is recommended to run the oven empty for about 10-15 minutes at maximum temperature (250°C) with the function set to both upper and lower heating. This will burn off any manufacturing residues and odors. A slight smoke or odor is normal during this process. Ensure the area is well-ventilated.
- Power Connection: Plug the power cord into a grounded 220V electrical outlet.
Operating Instructions
Follow these steps to operate your electric oven:
- Prepare Food: Place your food item on the wire rack. Ensure proper cookware is used that is safe for oven use.
- Insert Rack: Slide the wire rack with food into the desired rack position inside the oven.
- Close Door: Close the oven door securely.
- Set Temperature: Turn the Temperature Control Knob to your desired cooking temperature (e.g., 100°C to 250°C).
- Select Function: Turn the Function Control Knob to select the desired heating mode (e.g., upper heating, lower heating, or both).
- Set Timer: Turn the Timer Control Knob to the desired cooking time (up to 60 minutes). The power indicator light will illuminate, indicating the oven is heating. The oven will automatically turn off when the timer reaches zero, and a bell will sound. For continuous operation, turn the timer past the 60-minute mark to the "Stay On" position (if available).
- Monitor Cooking: You can observe the cooking progress through the glass door.
- Remove Food: Once cooking is complete and the timer has sounded, carefully open the oven door. Use oven mitts to remove the hot food and rack.
- Cool Down: Allow the oven to cool down completely before cleaning or storing.
Maintenance and Cleaning
Regular cleaning and maintenance will ensure the longevity and optimal performance of your oven.
- Always Unplug: Before cleaning, always unplug the oven from the power outlet and allow it to cool down completely.
- Exterior Cleaning: Wipe the exterior surfaces with a soft, damp cloth. Do not use abrasive cleaners or scouring pads, as they may damage the finish.
- Interior Cleaning: For the interior, wipe with a damp cloth and mild detergent. For stubborn stains, a non-abrasive oven cleaner designed for small appliances can be used, following the product's instructions. Ensure all cleaner residue is wiped away.
- Crumb Tray: The crumb tray should be emptied and cleaned regularly to prevent grease buildup and potential fire hazards. Wash with warm, soapy water, rinse, and dry thoroughly.
- Wire Rack: The wire rack can be washed in warm, soapy water or placed in a dishwasher.
- Do Not Immerse: Never immerse the main body of the oven, cord, or plug in water or any other liquid.
- Storage: When not in use, store the oven in a clean, dry place.
Troubleshooting
If you encounter issues with your oven, refer to the following common problems and solutions:
| Problem | Possible Cause | Solution |
|---|---|---|
| Oven does not turn on. | Not plugged in; power outlet issue; timer not set. | Ensure the oven is securely plugged into a working 220V outlet. Check if the timer knob is set to a cooking time or "Stay On". |
| Food not cooking evenly. | Incorrect rack position; uneven food placement; door not fully closed. | Adjust rack position for optimal heat distribution. Ensure food is placed centrally. Check that the oven door is fully closed during operation. |
| Excessive smoke or odor during cooking. | Food spills; crumb tray not cleaned; first use burn-off. | Clean any food spills immediately. Empty and clean the crumb tray regularly. If it's the first use, this is normal; ensure ventilation. |
| Timer not working. | Timer knob malfunction. | Ensure the timer knob is turned past the initial resistance point to activate. If it still doesn't work, contact customer support. |
If the problem persists after trying these solutions, please contact customer support.
Specifications
| Feature | Detail |
|---|---|
| Model | 10L Desktop Electric Oven |
| Capacity | 10 Liters (11-20L range specified in description, but product is 10L variant) |
| Power (W) | 1201-1500W |
| Voltage (V) | 220V |
| Certification | CE |
| Power Source | Electric (Corded Electric) |
| Number of Heating Elements | 4 |
| Style | Horizontal |
| Material | Aluminum |
| Controlling Mode | Mechanical Timer Control |
| Control Type | Knob |
| Door Style | Dropdown Door |
| Included Components | Crumb Tray |
| Color | Black |
| UPC | 808233200514 |
Warranty and Support
For information regarding warranty coverage, product registration, or technical support, please refer to the warranty card included with your product packaging or visit the manufacturer's official website. Please have your model number (10L Desktop Electric Oven) and UPC (808233200514) ready when contacting support.
For further assistance, you may also contact the retailer where the product was purchased.


