
1. Introduction
This manual provides detailed instructions for the operation and maintenance of your PRUNUS J-199 Retro Bluetooth Radio. Please read this manual thoroughly before using the device to ensure proper function and longevity.

Image 1.1: Front view of the PRUNUS J-199 Retro Bluetooth Radio, showcasing its classic design.
2. Product Features
- Multi-band Reception: Supports AM (522-1620 kHz), FM (87-108 MHz), and SW (5.9-18.0 MHz) radio bands.
- Bluetooth Connectivity: Integrated Bluetooth for wireless audio streaming from compatible devices.
- Multiple Playback Options: Supports audio playback from microSD cards (up to 32GB) and USB drives.
- AUX Input: 3.5mm auxiliary input for connecting external audio sources.
- Voice Recorder Function: Allows recording of audio.
- High-Quality Audio: Built-in 10W magnetic speaker for clear and balanced sound.
- Enhanced Reception: Features a high-quality DSP chip and a 75cm (29.5 inch) 360° rotatable antenna for stable signal reception.
- Versatile Power Options: Operates via AC power, rechargeable battery, or D-type batteries (not included).

Image 2.1: Overview of the PRUNUS J-199's control panel and supported features, including AM/FM/SW, Bluetooth, USB, and TF card compatibility.
3. Setup
3.1 Unpacking
Carefully remove the radio and all accessories from the packaging. Verify that all components are present:
- PRUNUS J-199 Radio
- AC Power Cable
- Rechargeable Battery (pre-installed or separate)
- User Manual
3.2 Powering the Device
The PRUNUS J-199 offers three power options:
- AC Power: Connect the provided AC power cable to the radio's AC input port and then to a standard wall outlet.
- Rechargeable Battery: The radio includes a rechargeable battery. Ensure it is fully charged before portable use. The battery charges automatically when the radio is connected to AC power.
- D-Type Batteries: For extended portable use or as a backup, insert three D-type batteries (not included) into the battery compartment located on the back of the radio. Ensure correct polarity.
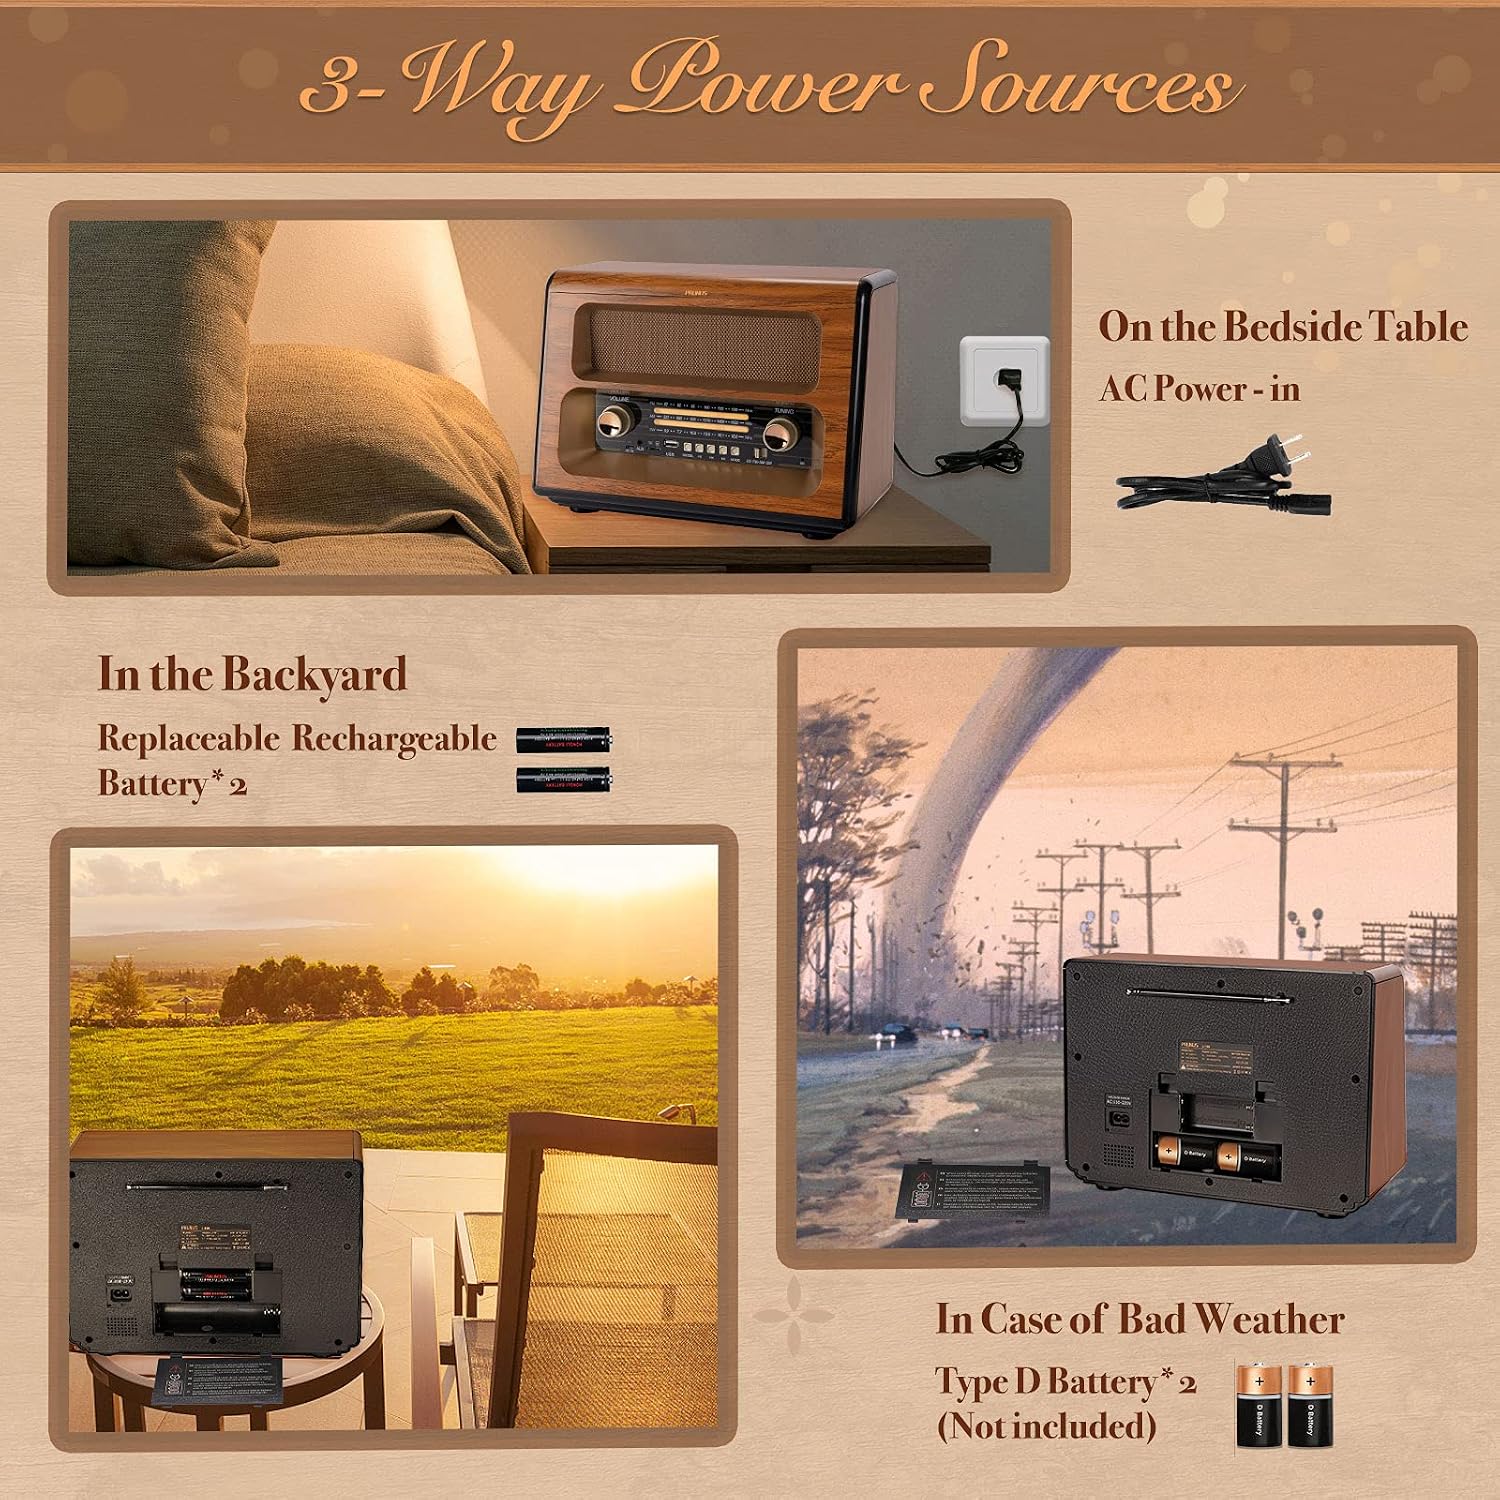
Image 3.1: Illustration of the three power options for the PRUNUS J-199 radio.
4. Operating Instructions
4.1 Basic Controls
Familiarize yourself with the main controls on the front panel:
- Volume Knob: Rotate to adjust the audio output level.
- Tuning Knob: Rotate to select radio frequencies.
- Mode Button: Press to cycle through different modes (Radio, Bluetooth, USB, TF, AUX).
- Band Selector: Switch between AM, FM, and SW radio bands.
- Antenna: Extend and rotate the telescopic antenna for optimal radio reception.

Image 4.1: Detailed view of the radio's control panel.
4.2 Radio Operation (AM/FM/SW)
- Turn on the radio using the power switch (often integrated with the volume knob).
- Select the desired band (AM, FM, or SW) using the band selector switch.
- Extend and rotate the telescopic antenna for the best signal reception, especially for FM and SW bands.
- Slowly rotate the Tuning Knob to scan for stations. The frequency display will indicate the current tuning.
- Adjust the Volume Knob to your preferred listening level.

Image 4.2: The radio with its 360-degree rotary antenna extended for optimal reception.
4.3 Bluetooth Mode
- Press the Mode button until "Bluetooth" or "BT" is displayed or indicated.
- On your external device (smartphone, tablet, etc.), enable Bluetooth and search for available devices.
- Select "PRUNUS J-199" from the list of devices to pair.
- Once paired, you can stream audio from your device to the radio.
4.4 USB/TF Card Playback
- Insert a USB drive or a microSD card (up to 32GB, not included) into the respective slot on the radio.
- Press the Mode button to select "USB" or "TF" mode.
- The radio will automatically detect and begin playing audio files from the inserted storage device.
- Use the playback control buttons (e.g., Play/Pause, Next/Previous Track) on the radio to manage your audio.
4.5 AUX Input
- Connect an external audio device (e.g., MP3 player) to the radio's AUX input port using a 3.5mm audio cable (not included).
- Press the Mode button to select "AUX" mode.
- Audio from the external device will now play through the radio's speaker. Control playback from the external device.
4.6 Voice Recorder Function
The radio includes a voice recording function. Refer to the specific buttons on the control panel labeled for recording (e.g., "REC/DEL") and follow the on-screen prompts or indicator lights to initiate and stop recording. Recordings are typically saved to the inserted USB drive or TF card.
5. Maintenance
- Cleaning: Use a soft, dry cloth to clean the exterior of the radio. Do not use abrasive cleaners, waxes, or solvents.
- Storage: When not in use for extended periods, store the radio in a cool, dry place. Remove D-type batteries if using them, to prevent leakage.
- Battery Care: If using the rechargeable battery, ensure it is charged periodically to maintain its lifespan, even if not in regular use.
- Environment: Avoid exposing the radio to extreme temperatures, direct sunlight, high humidity, or dusty environments. The device is not waterproof.
6. Troubleshooting
| Problem | Possible Cause | Solution |
|---|---|---|
| No power |
|
|
| Poor radio reception |
|
|
| Bluetooth not pairing |
|
|
| USB/TF card not playing |
|
|
7. Specifications
| Feature | Detail |
|---|---|
| Model Number | J-199 |
| Dimensions (L x W x H) | 35 cm x 19.1 cm x 27.6 cm (13.8 in x 7.5 in x 10.9 in) |
| Weight | 2.27 kg (5 lbs) |
| Radio Bands | AM (522-1620 kHz), FM (87-108 MHz), SW (5.9-18.0 MHz) |
| Connectivity | Bluetooth, USB, AUX |
| Supported Storage | MicroSD card (up to 32GB), USB drive |
| Speaker Output | 10W Magnetic Speaker |
| Power Sources | AC Adapter, Rechargeable Battery, 3 x D-type Batteries (not included) |
| Special Features | Voice Recorder, Rechargeable |
| Display Type | LCD or LED |
| Water Resistance | Not waterproof |

Image 7.1: Physical dimensions of the PRUNUS J-199 radio.
8. Warranty and Support
8.1 Warranty Information
PRUNUS products are covered by a standard manufacturer's warranty. Please refer to the warranty card included in your packaging or visit the official PRUNUS website for detailed warranty terms and conditions. Keep your purchase receipt as proof of purchase.
8.2 Customer Support
If you encounter any issues not covered in the troubleshooting section or require further assistance, please contact PRUNUS customer support. Contact details can typically be found on the official PRUNUS website or on the product packaging.
For online support, you may visit the PRUNUS brand store on Amazon: PRUNUS Brand Store


