1. Introduction
The Ejoyous Planer Blade Setting Gauge is a precision tool designed to assist in the accurate installation and adjustment of planer blades. This system utilizes micro-adjustable magnets to ensure blades are perfectly aligned within the cutter head, simplifying the process of resetting and setting knives. It is compatible with most planer blades and is an essential tool for achieving precise cuts in woodworking.
This gauge provides the simplest and most effective method to reset your planer blades, ensuring optimal performance and safety.

Image Description: The Ejoyous Planer Blade Setting Gauge, highlighting its primary function as a tool for setting planer blades.
2. Setup
Before using your Ejoyous Planer Blade Setting Gauge, please follow these setup steps:
- Unpacking: Carefully remove the two planer blade setting gauges from their wooden storage box.
- Inspection: Before initial use, inspect both gauges for any signs of damage or manufacturing defects. Ensure all adjustable components move smoothly and the magnets are securely in place.
- Components: The system includes two individual gauges, each equipped with strong magnets for secure attachment to a planer's cutter head.

Image Description: The Ejoyous Planer Blade Setting Gauges neatly stored within their protective wooden box.

Image Description: A pair of Ejoyous Planer Blade Setting Gauges, showing their individual design and components.
3. Operating Instructions
The Ejoyous Planer Blade Setting Gauge simplifies the process of setting planer blades with precision. Follow these steps for accurate blade alignment:
- Preparation: Ensure your planer's cutter head is clean and free of debris. The planer blades should be loosely installed or ready for installation, allowing for vertical adjustment.
- Positioning the Gauge: Place one gauge onto the planer blade, ensuring the magnets firmly attach to the metal cutter head. The gauge should straddle the blade, with the magnetic base resting on the cutter head.
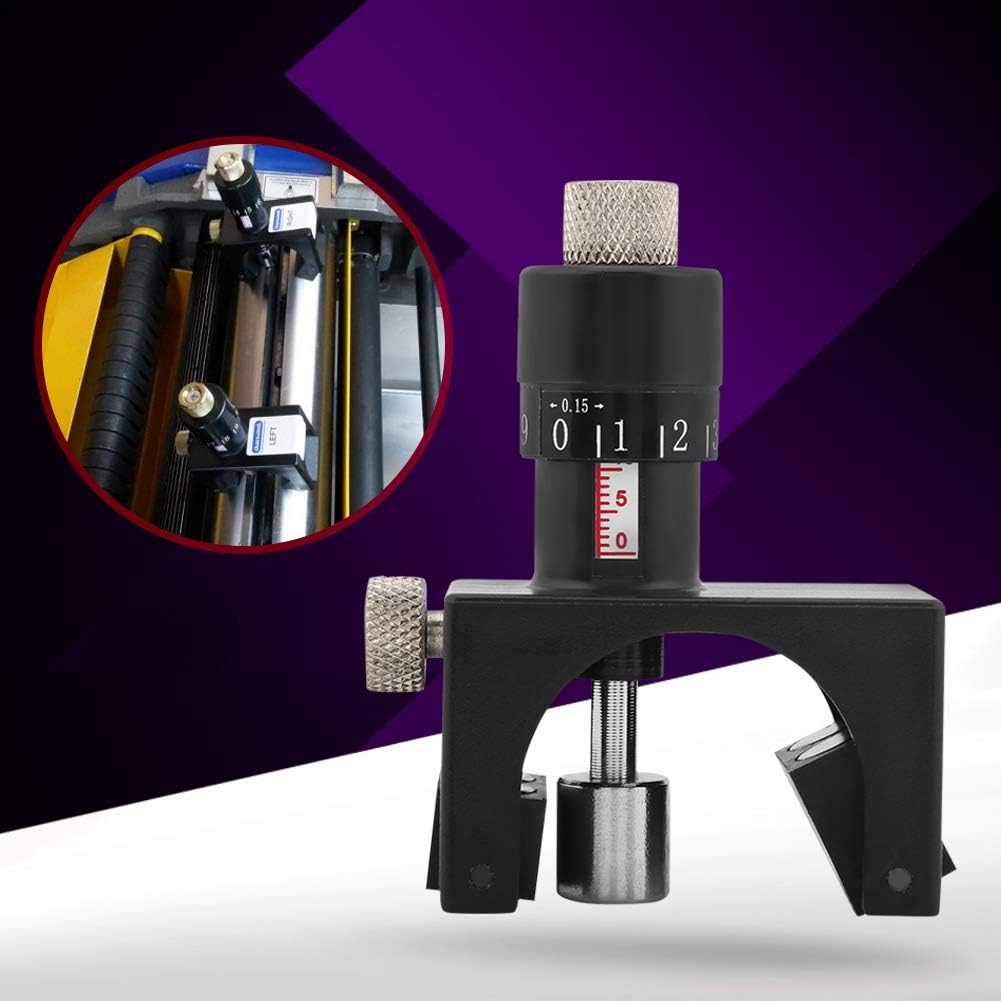
Image Description: This image shows a close-up of the Ejoyous planer blade setting gauge securely placed on a planer blade, demonstrating its magnetic attachment to the cutter head.
- Adjusting Blade Height: Using the micro-adjustable mechanism on the gauge, carefully raise or lower the planer blade until it aligns with the desired height indicated on the gauge. The gauge stabilizes the knife blade during this adjustment, ensuring consistent projection.

Image Description: This image illustrates the planer blade setting gauge in operation, highlighting its adjustment mechanism. It also indicates the tool's compatibility with minimum cutting block diameters of 75mm and maximum cutter diameters of 125mm.
- Repeat for Second Gauge: Place the second gauge on the opposite end of the same planer blade or on another blade, and repeat the adjustment process to ensure consistent height across all blades.

Image Description: This image displays both planer blade setting gauges actively used on a planer, showing how they facilitate simultaneous and accurate adjustment of multiple blades.
- Secure Blades: Once the blades are precisely set to the correct height, tighten the planer blade locking mechanisms according to your planer's instructions.
- Verify Alignment: After tightening, re-check the blade height with the gauges to confirm that the blades remain perfectly aligned.
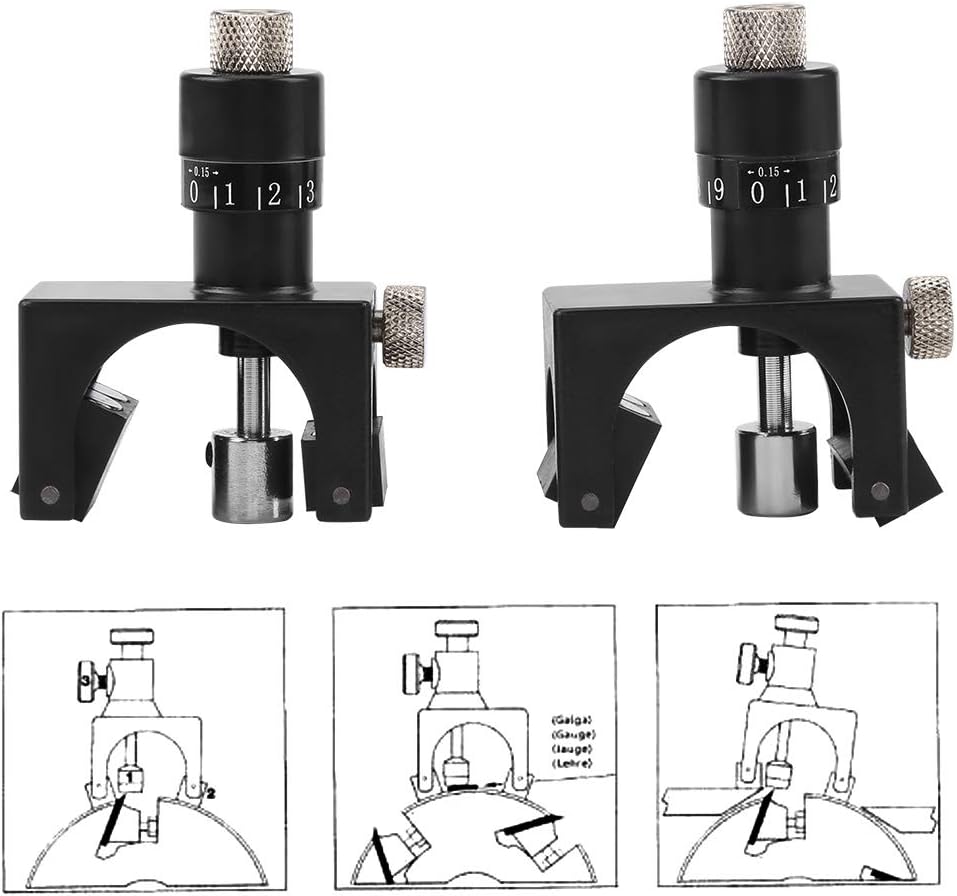
Image Description: This diagram provides a conceptual illustration of how the planer blade setting gauge works, showing the blade's position relative to the cutter head and the gauge's role in achieving precise alignment.
4. Maintenance
Proper maintenance will ensure the longevity and accuracy of your Ejoyous Planer Blade Setting Gauge:
- Cleaning: After each use, wipe the gauges with a clean, dry cloth to remove any sawdust, metal shavings, or debris. Avoid using harsh chemicals, solvents, or abrasive materials that could damage the finish or magnetic components.
- Storage: Always store the gauges in their original wooden box when not in use. Keep them in a dry, cool place, away from direct sunlight and moisture, to protect them from dust, corrosion, and accidental damage. This also helps preserve the magnetic strength.
5. Troubleshooting
If you encounter any issues while using your planer blade setting gauge, consider the following:
- Gauge Not Attaching Firmly: Ensure the planer's cutter head surface is clean and free of rust, excessive debris, or non-magnetic coatings that might interfere with the magnets' grip.
- Inconsistent Blade Height: Double-check that both gauges are properly seated on the cutter head and that the planer blades are tightened securely after adjustment. Ensure the micro-adjustment mechanism is not overtightened or loose, which could affect readings.
- Difficulty Adjusting: If the adjustment mechanism feels stiff, ensure it is clean and free of any sawdust or foreign particles. Do not force the adjustment; inspect for any obstructions.
6. Specifications
Key technical specifications for the Ejoyous Planer Blade Setting Gauge:
| Feature | Specification |
|---|---|
| Minimum Cutting Block Diameter | 75 mm |
| Maximum Cutter Diameter | 125 mm |
| Height Adjustment Range | 22 mm |
| Incremental Adjustment | 0.15 mm |
| Material | Steel |
| Product Dimensions (L x W x H) | 20 x 20 x 10 cm |
| Weight | 400 Grams |
| Number of Pieces | 2 |
| Model Number | Ejoyous1q689gxmb02935 |

Image Description: A diagram illustrating the key dimensions of the planer blade setting gauge, including height and width measurements.
7. Warranty and Support
No specific warranty information is provided with this product. For product support, inquiries, or to explore other Ejoyous products, please visit the official Ejoyous store: