
Makita DDF487Z
Makita DDF487Z 18V Li-ion LXT Brushless Drill Driver Instruction Manual
Model: DDF487Z
Introduction
This manual provides essential information for the safe and effective operation, maintenance, and troubleshooting of your Makita DDF487Z 18V Li-ion LXT Brushless Drill Driver. Please read this manual thoroughly before using the tool to ensure proper handling and to maximize its lifespan.

Figure 1: Makita DDF487Z 18V Li-ion LXT Brushless Drill Driver (Battery not included)
Safety Information
Always observe basic safety precautions when using power tools to reduce the risk of fire, electric shock, and personal injury.
General Power Tool Safety Warnings
- Work Area Safety: Keep work area clean and well lit. Cluttered or dark areas invite accidents. Do not operate power tools in explosive atmospheres, such as in the presence of flammable liquids, gases or dust.
- Electrical Safety: Power tool plugs must match the outlet. Never modify the plug in any way. Do not expose power tools to rain or wet conditions.
- Personal Safety: Stay alert, watch what you are doing and use common sense when operating a power tool. Do not use a power tool while you are tired or under the influence of drugs, alcohol or medication. Always wear eye protection.
- Tool Use and Care: Do not force the power tool. Use the correct power tool for your application. Disconnect the battery pack from the power tool before making any adjustments, changing accessories, or storing power tools.
- Battery Tool Use and Care: Recharge only with the charger specified by the manufacturer. Use power tools only with specifically designated battery packs.
Product Overview
Components
The Makita DDF487Z is a compact and powerful drill driver designed for various drilling and fastening tasks. Key components include:
- Keyless Chuck: For quick and easy bit installation and removal.
- Torque Setting Ring: Adjusts the clutch for fastening applications.
- Mode Selector: Switches between drilling and driving modes.
- Speed Selector Switch: Toggles between high and low mechanical gears.
- Trigger Switch: Controls the tool's speed.
- Forward/Reverse Switch: Changes the rotation direction.
- LED Job Light: Illuminates the work area.
- Battery Terminal: For connecting 18V Li-ion LXT slide type batteries (not included).
- Belt Clip: For convenient carrying.
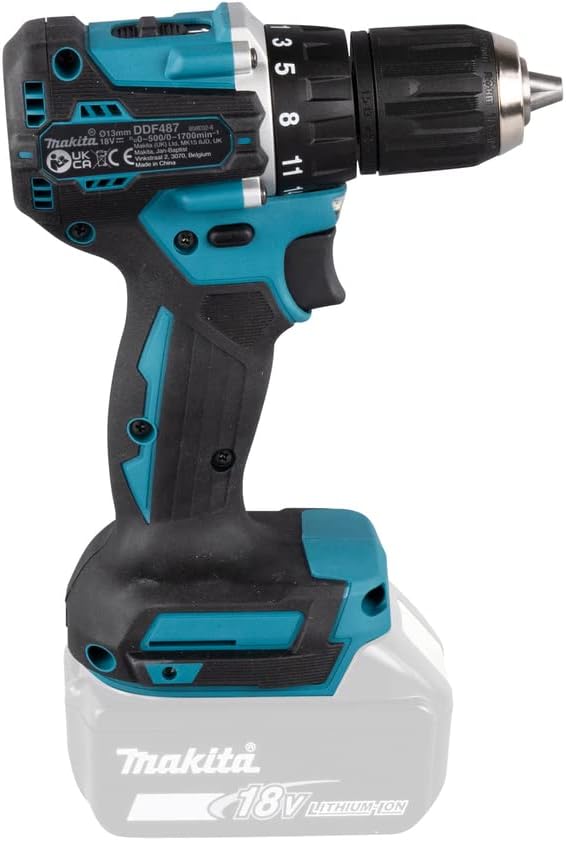
Figure 2: Side view of the drill driver, highlighting its compact design.
Features
- Suitable for a wide range of drilling and fastening applications.
- 20 torque settings plus drill mode for added fastening control.
- 2 mechanical gears for optimal speed and torque.
- Battery protection circuit to prevent over-discharge, overheating, and overload current.
- Forward/reverse rotation for versatile use.
- LED job light for improved visibility.
- 13mm single sleeve keyless chuck for quick bit changes.
- Maximum capacity in steel 13mm, 36mm in wood.
- Not compatible with G-Series batteries.
Setup
Battery Installation and Removal
This tool operates on an 18V Li-ion LXT slide type battery (not included). Ensure the battery is fully charged before use.
- To install, align the battery pack with the grooves in the tool's housing and slide it in until it clicks into place.
- To remove, press the release button on the battery pack and slide it out.

Figure 3: The drill driver uses 18V Lithium-Ion LXT batteries.
Bit Installation
The 13mm single sleeve keyless chuck allows for quick and easy bit changes.
- Rotate the chuck counter-clockwise to open the jaws.
- Insert the drill bit or screwdriver bit fully into the chuck.
- Rotate the chuck clockwise to tighten the jaws securely around the bit. Ensure the bit is centered and firmly gripped.

Figure 4: Close-up view of the 13mm keyless chuck.
Attaching the Belt Clip
The included belt clip can be attached to either side of the tool for convenient carrying.
- Align the belt clip with the screw hole on the side of the tool.
- Secure it with the provided screw using a screwdriver.
Operating Instructions
Selecting Speed and Torque
- Speed Selector Switch: Located on top of the tool.
- Position '1' (Low Speed): For heavy-duty applications requiring high torque, such as driving large screws or drilling large holes.
- Position '2' (High Speed): For speedy drilling in light-duty applications.
- Torque Setting Ring: Rotate the ring to select one of the 20 torque settings for fastening screws. The higher the number, the greater the fastening torque. For drilling, set the ring to the drill mode symbol.

Figure 5: Top view showing the speed selector switch (1 or 2).
Starting and Stopping the Tool
- To start the tool, pull the trigger switch. The tool speed increases with increased pressure on the trigger.
- To stop the tool, release the trigger switch. The electric brake will engage, stopping the rotation quickly.
Changing Rotation Direction
The forward/reverse switch is located above the trigger. Push the lever from either side to select clockwise (forward) or counter-clockwise (reverse) rotation. Ensure the switch is in the center position for locking the trigger when not in use.
Using the LED Job Light
The LED job light illuminates the work area when the trigger switch is pulled. It remains lit for a short period after the trigger is released.

Figure 6: The drill driver in action, demonstrating its use for drilling applications.
Maintenance
Regular maintenance ensures optimal performance and extends the life of your tool. Always disconnect the battery before performing any maintenance.
- Cleaning: Keep the tool's ventilation openings clean to prevent overheating. Wipe the tool body with a soft, damp cloth. Do not use strong detergents or solvents.
- Chuck Maintenance: Periodically clean the chuck jaws to ensure proper gripping of bits.
- Battery Care: Store batteries in a cool, dry place away from direct sunlight. Do not store fully discharged batteries for extended periods. The battery protection circuit helps prevent damage from over-discharge, overheating, and overload.
- Inspection: Regularly inspect the tool for any signs of damage, loose screws, or worn parts. If any issues are found, have the tool serviced by an authorized Makita service center.
Troubleshooting
| Problem | Possible Cause | Solution |
|---|---|---|
| Tool does not start. | Battery not installed correctly or discharged. | Ensure battery is fully inserted. Charge the battery. |
| Reduced power or speed. | Low battery charge; incorrect speed/torque setting. | Recharge battery. Adjust speed selector or torque setting. |
| Chuck not holding bit securely. | Chuck jaws are dirty or worn. | Clean chuck jaws. If problem persists, replace chuck. |
| Tool stops unexpectedly. | Overload protection activated (battery protection circuit). | Reduce load on the tool. Allow tool/battery to cool down. |
Specifications
| Feature | Detail |
|---|---|
| Brand | Makita |
| Model Number | DDF487Z |
| Power Source | Battery Powered (18V Li-ion LXT) |
| Maximum Rotational Speed | 1700 RPM |
| Voltage | 18 Volts |
| Maximum Chuck Size | 13 mm |
| Maximum Torque | 40 Newton Meters |
| Number of Speeds | 2 (Mechanical Gears) |
| Drilling Capacity (Wood) | 36 mm |
| Drilling Capacity (Metal) | 13 mm |
| Item Weight | 1.2 Kilograms (2.64 pounds) |
| Product Dimensions | 5.91"L x 3.19"W x 9.76"H |
| UPC | 088381736558 |
Warranty and Support
Warranty Information
Makita offers a 1-year manufacturer warranty for the DDF487Z drill driver. This warranty can be extended by an additional 2 years (totaling 3 years) when the product is registered within 30 days of purchase. Please refer to the official Makita website for detailed warranty terms and registration procedures.
Important Note: The use of non-genuine or non-recommended parts, accessories, batteries, or chargers with Makita tools will invalidate the Makita guarantee.
Customer Support
For technical assistance, spare parts, or service, please contact Makita customer support or visit their official website. Ensure you have your product model number (DDF487Z) and purchase details ready when contacting support.
Official Makita Website: www.makita.com
Related documentsDDF487Z


Ask a question about this manual
Ask about setup, troubleshooting, compatibility, parts, safety, or missing instructions. Manuals+ will review the question and use this page’s manual context to help answer it.