
1. Introduction
The MOOER R7 X2 Stereo Multi Reverb Pedal combines advanced digital reverb algorithms to offer a wide range of reverb effects, from classic to modern ambient sounds. This pedal features 14 distinct reverb types, along with comprehensive controls for sound shaping and preset management. Designed for guitarists seeking versatile and high-quality reverb, the R7 X2 includes unique functions such as Infinite and Trail-on to enhance your sonic experience.

Image 1.1: Front view of the MOOER R7 X2 Stereo Multi Reverb Pedal, showcasing its controls and footswitches.
2. Setup
Follow these steps to set up your MOOER R7 X2 pedal:
- Power Connection: Connect a standard 9V DC power adapter (center negative) to the DC 9V input jack on the top of the pedal. Ensure the power supply meets the pedal's requirements.
- Audio Input: Connect your instrument (e.g., guitar) to the INPUT L (MONO) jack using a 1/4-inch mono audio cable. For stereo input, connect a second instrument or stereo source to the INPUT R jack.
- Audio Output: Connect the OUTPUT L (MONO) jack to your amplifier or audio interface using a 1/4-inch mono audio cable. For stereo output, connect the OUTPUT R jack to a second amplifier or stereo input.

Image 2.1: The MOOER R7 X2 pedal shown with its included power adapter, ready for connection.

Image 2.2: A side view of the pedal highlighting the input and output jacks for audio connections.
3. Operating Instructions
3.1 Controls and Functions
The R7 X2 features several knobs and footswitches for precise control over your reverb effects:
- HC (High Cut): Controls the high-frequency cut-off of the reverb. Frequency range: 20kHz - 2.2kHz.
- LC (Low Cut): Controls the low-frequency cut-off of the reverb. Frequency range: 20Hz - 520Hz.
- MIX: Adjusts the blend between the dry signal and the reverb effect.
- DECAY: Modifies the length of the reverb tail.
- PRE-DLY (Pre-Delay): Controls the time before the reverb effect begins. For the spring reverb preset, this parameter simulates the length of the spring.
- SAVE Button: Press to cycle through preset slots. Press and hold to save the current effect settings to the selected slot.
- INFINITE Footswitch: Activates the Infinite function, creating an endless reverb tail. The left footswitch LED flashes when active.
- BYPASS Footswitch: Toggles the pedal effect on or off. The right footswitch LED indicates status (Blue: ON, Red: OFF).

Image 3.1: Overview of the MOOER R7 X2 pedal's control knobs and footswitches.
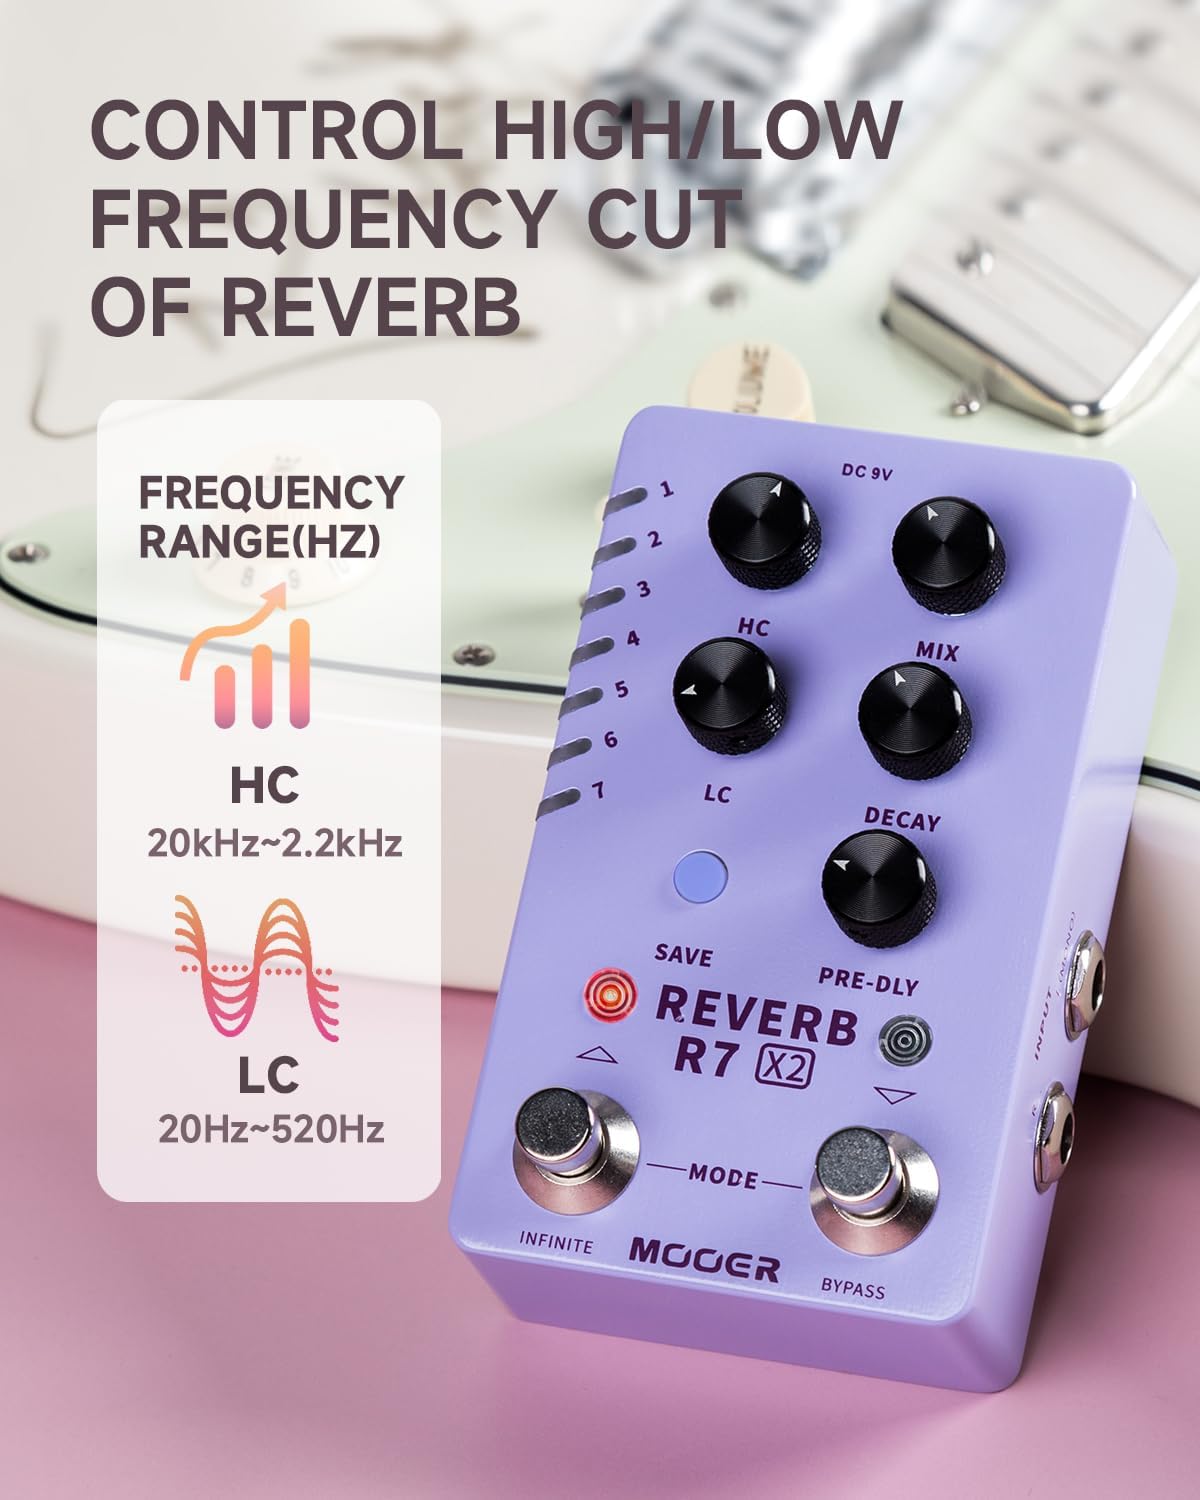
Image 3.2: Illustration of the High Cut (HC) and Low Cut (LC) frequency ranges for reverb tone shaping.
3.2 Reverb Types
The R7 X2 offers 14 distinct reverb types, accessible via two banks (Yellow and Purple LED indicators):

Image 3.3: A table detailing the 14 reverb types, categorized by their corresponding LED colors (Yellow for slots 1-7, Purple for slots 8-14).
| Slot | LED Color | Reverb Name |
|---|---|---|
| 1 | Yellow | Room |
| 2 | Yellow | Hall |
| 3 | Yellow | Church |
| 4 | Yellow | Cave |
| 5 | Yellow | Plate |
| 6 | Yellow | Spring |
| 7 | Yellow | Mod |
| 8 | Purple | Studio |
| 9 | Purple | Reverse |
| 10 | Purple | Warp |
| 11 | Purple | Shake |
| 12 | Purple | Crush |
| 13 | Purple | Shimmer |
| 14 | Purple | Dream |
3.3 Special Functions
The R7 X2 includes advanced functions for enhanced control:
- Infinite Function: Engages an endless reverb tail, ideal for creating atmospheric soundscapes. Activate by pressing the INFINITE footswitch.

Image 3.4: The pedal with an overlay indicating the Infinite function, which creates an endless reverb tail.
- Trail-on Function: Allows the reverb tail to naturally decay even after the effect is bypassed. To toggle Trail-on/off, turn on the pedal, then press and hold the BYPASS footswitch for 2 seconds. The BYPASS indicator will blink and change color to confirm the setting.

Image 3.5: The pedal displaying the Trail On/Off status, indicated by the BYPASS LED.
3.4 Preset Management
The R7 X2 offers two modes for selecting effects:
- Normal Mode: Turn on the pedal and press the SAVE button to cycle through the available effects one by one.
- Preset Rolling Mode: Turn on the pedal and simultaneously press the TAP (INFINITE) and BYPASS footswitches to enter preset switching mode. This allows users to scroll through effects more rapidly.

Image 3.6: Visual guide for selecting effects using Normal Mode and Preset Rolling Mode.
4. Specifications
| Feature | Specification |
|---|---|
| Model Number | M721 |
| Item Weight | 1.05 pounds (476 Grams) |
| Package Dimensions | 5.51 x 5.04 x 3.07 inches |
| Power Source | Corded Electric |
| Voltage | 9 Volts |
| Connector Type | 1/4 inch mono audio jack |
| Hardware Interface | Multipronged Audio |
| Signal Format | Analog |
| Color Name | Reverb X2 |
| Date First Available | July 16, 2021 |
5. Troubleshooting
If you encounter issues with your MOOER R7 X2 pedal, consider the following common troubleshooting steps:
- No Sound:
- Ensure all audio cables are securely connected to the correct input and output jacks.
- Verify the power supply is correctly connected and providing the specified 9V DC (center negative) power.
- Check if the pedal is bypassed. The BYPASS LED should be blue when the effect is active.
- Test with different cables, instruments, and amplifiers to isolate the problem.
- Unexpected Sound/Noise:
- Check the MIX knob setting; a high mix might make the reverb too prominent.
- Adjust the HC (High Cut) and LC (Low Cut) knobs to filter out unwanted frequencies.
- Ensure your power supply is regulated and free from noise.
- Verify that other pedals in your signal chain are functioning correctly and not introducing noise.
- Presets Not Saving:
- Ensure you are pressing and holding the SAVE button until the LED indicates successful saving.
6. Maintenance
To ensure the longevity and optimal performance of your MOOER R7 X2 pedal, follow these maintenance guidelines:
- Cleaning: Use a soft, dry cloth to clean the pedal's exterior. Avoid using abrasive cleaners, solvents, or excessive moisture, which can damage the finish or internal components.
- Storage: Store the pedal in a cool, dry place away from direct sunlight, extreme temperatures, and high humidity. When not in use for extended periods, disconnect the power supply and store it in its original packaging or a protective case.
- Connections: Periodically check all input/output jacks and power connections for any signs of wear or corrosion. Ensure cables are not excessively bent or strained.
- Footswitches and Knobs: Operate footswitches and knobs gently. Avoid applying excessive force, which could lead to mechanical damage.
7. Warranty and Support
For warranty information, product support, or service inquiries, please refer to the official MOOER website or contact your authorized MOOER dealer. Keep your proof of purchase for any warranty claims. The product typically includes a return policy of 30 days from the date of purchase.