Introduction
This manual provides detailed instructions for the installation, operation, and maintenance of your XTRONS HD111D 10.1-inch Dual Car Headrest DVD Player. Please read this manual thoroughly before using the product to ensure proper function and safety. Keep this manual for future reference.
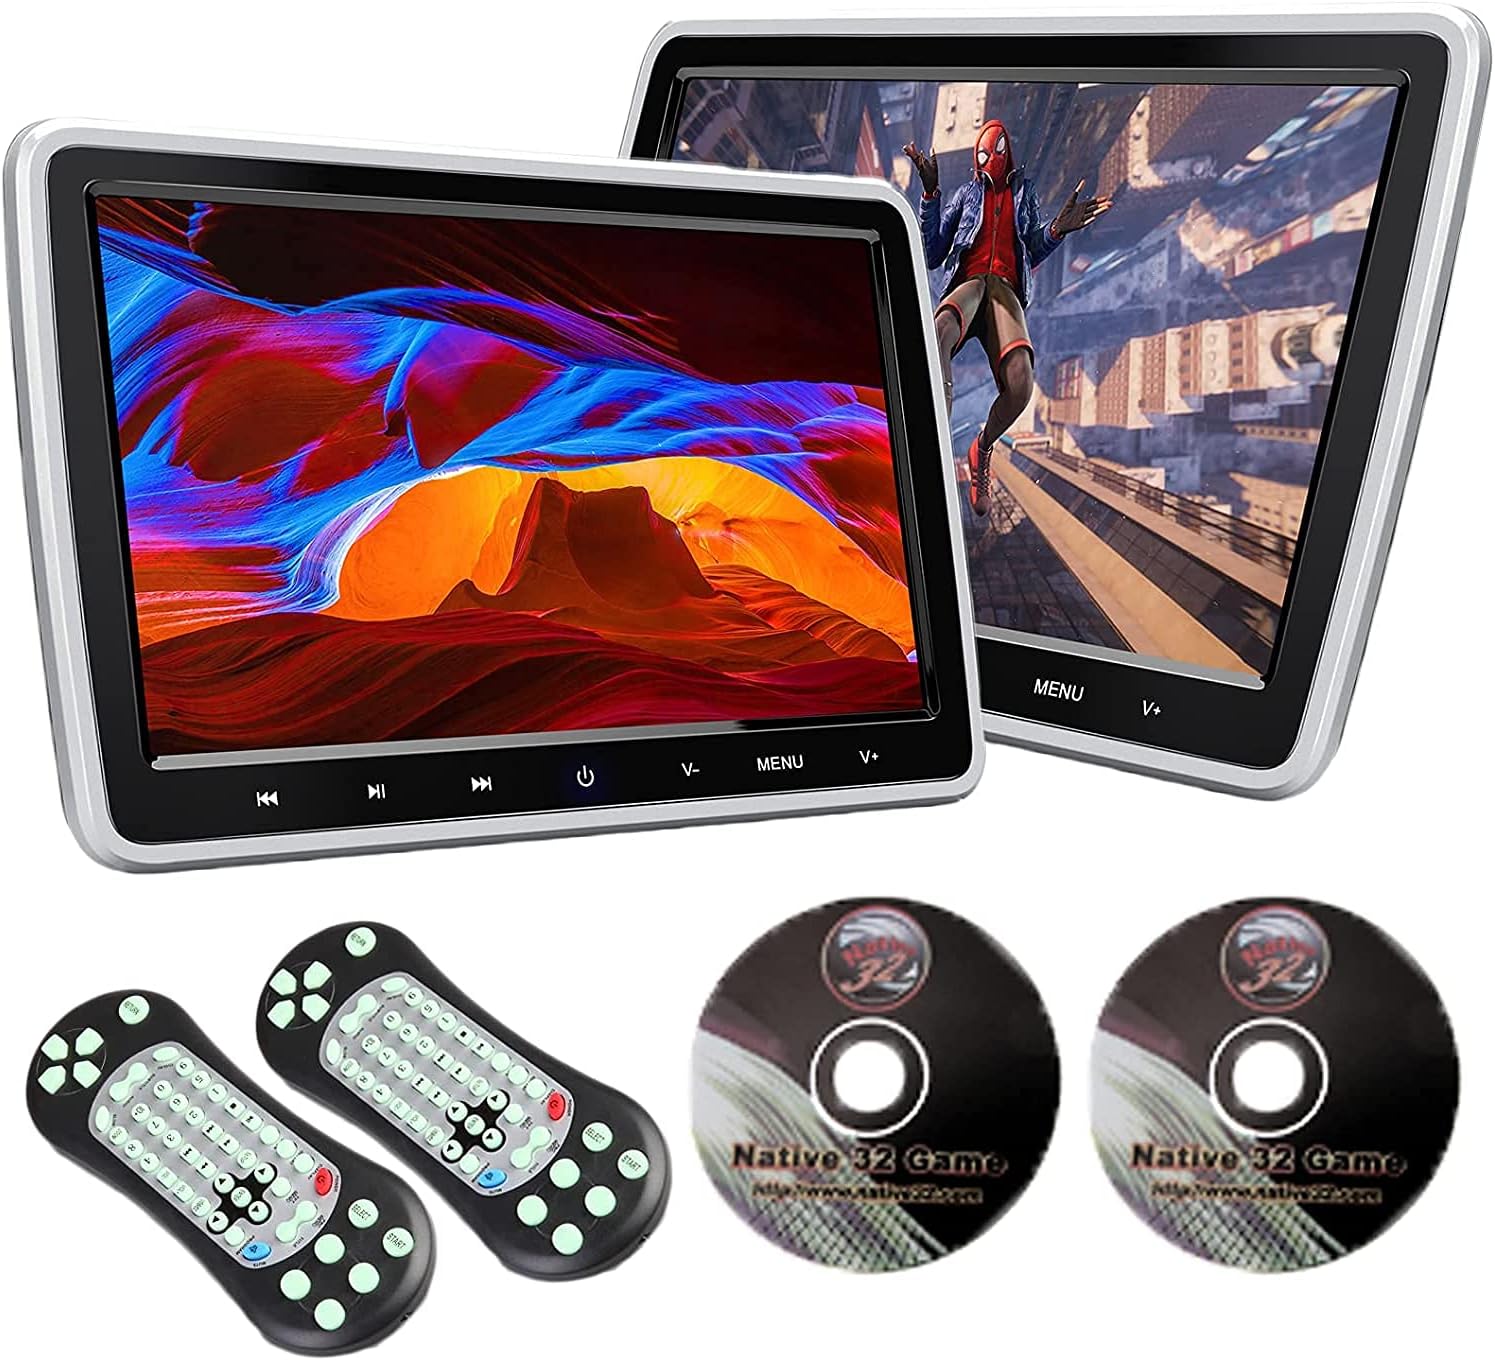
Figure 1: XTRONS HD111D Dual Car Headrest DVD Player with accessories.
Safety Information
- Do not attempt to disassemble or modify the unit. Unauthorized modifications can lead to electric shock, fire, or damage to the product.
- Ensure all connections are secure and correctly made before powering on the device.
- Avoid exposing the unit to extreme temperatures, direct sunlight for prolonged periods, or excessive moisture.
- Keep small objects and liquids away from the unit to prevent damage or malfunction.
- Always operate the vehicle safely. Do not allow the use of the DVD player to distract the driver.
Package Contents
Verify that all items listed below are included in your package:
- 2 x XTRONS 10.1-inch Headrest DVD Players
- 2 x ISO Wiring Harnesses
- 2 x ISO Adapter Cables
- 2 x Mounting Brackets
- 2 x Sets of Plastic Drivepipes
- 2 x Remote Controls
- 2 x Cigarette Lighter Adapters
- 2 x Game Discs
- 2 x Cigarette Lighter Adapter Fuses
- 2 x Fixed Screws
- 1 x User Manual

Figure 2: Product dimensions and included accessories.
Product Overview
Features
- 10.1-inch TFT Screen: High-quality display for clear visuals.
- Region-Free DVD Player: Compatible with various disc formats including AVI, DVD, CD, and JPEG.
- Integrated USB/SD Card Slot: Supports media playback (AVI, 3GP, VOB, MP4, FLV, MP3, WMA, AAC, JPG) up to 32GB.
- HDMI Input: Connect external devices like game consoles or smartphones.
- AV Input/Output: Share content with other car entertainment systems.
- Built-in IR Transmitter: For wireless headphone connectivity.
- 32-bit Games Support: Enjoy pre-loaded games with included game discs and remote controls.
- Intuitive Touch Keys: Easy navigation and control.

Figure 3: 10.1-inch TFT screen with intuitive touch keys.
Ports and Connections
The unit features a variety of ports for versatile connectivity:
- HD Input: For high-definition video sources.
- USB Port: For media playback from USB drives.
- SD Card Slot: For media playback from SD cards.
- AV Input/Output: RCA connections for audio and video.
- Headset Jack: For private listening with wired headphones.
- Power Input: For connecting to the vehicle's power supply.

Figure 4: Side view showing connectivity ports.
Setup and Installation
The XTRONS HD111D is designed for easy installation. Follow these steps to mount the player securely:
- Choose Drivepipes: Select the appropriate set of drivepipes that fit your headrest poles and insert them into the poles.
- Attach Mounting Bracket: Compress the two spring clips on the mounting bracket and place it onto the headrest poles, then release the clips to secure it.
- Install Headrest Player: Slide the headrest DVD player onto the mounting bracket until it clicks into place.
- Adjust and Fix: Adjust the distance of the player for optimal viewing and tighten the fixed screw to secure its position.
- Cable Management: Hide the power and signal cables by inserting the ISO wiring harness from the bottom of the headrest. Guide the cables under the seat to a suitable power supply.

Figure 5: Step-by-step installation guide.
Power Connection Options
You can power the unit using the provided cigarette lighter adapter or by hardwiring it to your vehicle's fuse box. An extra adapter may be required for certain power outlets.

Figure 6: Power connection methods.
Operating Instructions
Playing DVDs/CDs
Insert a compatible DVD or CD into the disc slot. The player will automatically detect the disc and begin playback. Use the on-screen menu or remote control to navigate chapters, adjust volume, and control playback.

Figure 7: Region-free DVD player in use.
USB/SD Card Playback
Insert a USB drive or SD card (up to 32GB) into the respective slot. The unit will display a menu allowing you to select music, video, or photo files for playback. Navigate using the touch keys or remote control.
HDMI Connectivity
Connect an external device (e.g., game console, smartphone) to the HDMI input port using an HDMI cable. Select the HDMI input source from the unit's menu to display content from the connected device.
AV Input/Output
Use the AV input to connect external video sources. The AV output allows you to share the current content playing on the XTRONS unit with other monitors or car entertainment systems that have RCA input capabilities.
Playing 32-bit Games
Insert a game disc into the DVD slot. Use the provided remote controls to navigate the game menu and play the included 32-bit games.

Figure 8: Enjoying 32-bit games.
Screen Mirroring (Optional)
The unit supports screen mirroring from Android and iOS devices. This feature may require optional accessories (XTRONS HDTV05 for wireless, XTRONS HDTV04 for wired connection) which are sold separately. Refer to the accessory manual for detailed setup.

Figure 9: Screen mirroring functionality.
Connecting a Digital TV Receiver (Optional)
You can connect an optional XTRONS digital TV receiver to the unit via HDMI to watch TV shows. Compatible models include HDMI01, HDMI02, HDMI03, FV011, FV014, FV012DE, and FV015DE. These are sold separately.

Figure 10: Connecting to a digital TV receiver.
Maintenance
- Cleaning: Use a soft, dry cloth to clean the screen and exterior of the unit. Do not use abrasive cleaners or solvents.
- Disc Care: Handle discs by their edges. Keep them clean and free of scratches to ensure optimal playback.
- Storage: If storing the unit for an extended period, disconnect it from power and store it in a cool, dry place.
Troubleshooting
| Problem | Possible Cause | Solution |
|---|---|---|
| No power | Loose power connection; Blown fuse; Vehicle power issue. | Check power cable connection; Replace fuse in cigarette lighter adapter; Consult vehicle manual or technician. |
| No picture/sound | Incorrect source selected; Loose AV/HDMI cable; Damaged disc/file. | Select correct input source; Ensure cables are securely connected; Try a different disc/file. |
| Disc not playing | Incompatible disc format; Disc is dirty or scratched; Disc inserted incorrectly. | Ensure disc is compatible (AVI, DVD, CD, JPEG); Clean or replace disc; Insert disc correctly with label facing up. |
| Remote control not working | Dead batteries; Obstruction between remote and unit; Remote sensor blocked. | Replace batteries; Remove any obstructions; Ensure remote is pointed at the unit's IR sensor. |
If you encounter issues not listed here, please contact XTRONS customer support.
Specifications
- Brand: XTRONS
- Model: HD111D
- Screen Size: 10.1 Inches
- Display Type: TFT
- Supported Media Types: CD-RW, DVD+R, DVD+RW, DVD-R, DVD-RW, SD, USB (AVI, 3GP, VOB, MP4, FLV, MP3, WMA, AAC, JPG)
- Max USB/SD Capacity: 32 GB
- Connectivity Technology: USB, HDMI, AV (RCA)
- Item Weight: 3.6 Kilograms
- Package Dimensions: 43.9 x 31.3 x 15.6 cm
- Batteries: Not included, Not required for main unit operation.
Warranty and Support
XTRONS provides a 1-year warranty for this headrest DVD player. This warranty covers manufacturing defects and ensures professional technical support.
For technical assistance, warranty claims, or any inquiries, please contact XTRONS customer support through the Amazon platform. We are committed to responding promptly and safeguarding your rights and interests.


