Introduction
Thank you for choosing the SONICAKE Rude Mouse Distortion Pedal. This manual provides essential information for the proper setup, operation, and maintenance of your new guitar effects pedal. Please read this manual thoroughly to ensure optimal performance and longevity of your device.
Product Overview
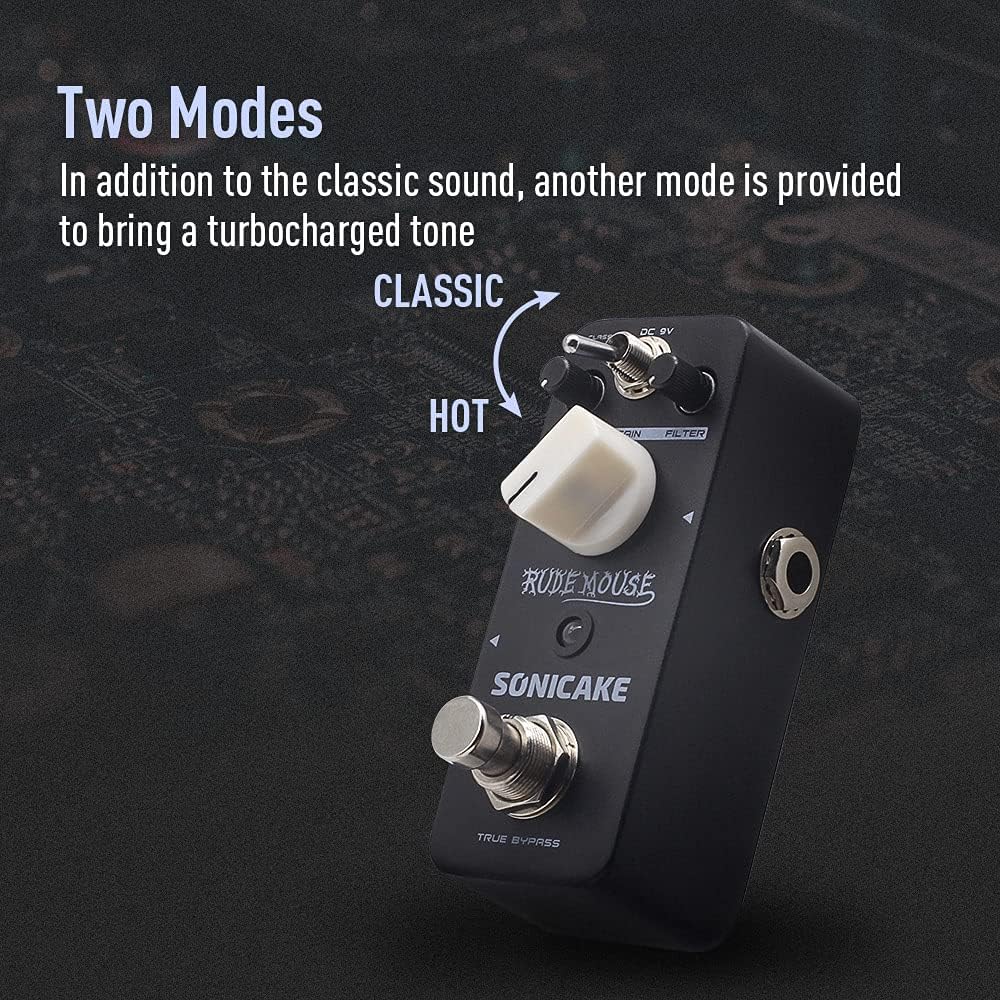
The SONICAKE Rude Mouse is a compact, all-analog distortion pedal designed to deliver a wide range of classic and modern distortion tones. It features two distinct modes, "Classic" and "Hot," offering versatility from creamy overdrive to aggressive fuzz. Its true bypass design ensures your guitar's signal remains uncolored when the effect is disengaged.
- 100% Analog Circuit: Provides authentic and rich distortion, overdrive, and fuzz tones.
- Two Modes: Switch between "Classic" for vintage distortion and "Hot" for a more aggressive, turbo-charged sound.
- Filter Control: Offers a broad tonal range, from dark to bright, allowing precise sound sculpting.
- True Bypass: Maintains the integrity of your guitar's signal when the pedal is off.
- Durable Construction: Housed in a robust zinc-alloy die-cast casing for reliability.
- Compact Size: Designed for portability and efficient pedalboard space utilization.


Controls and Functions
Familiarize yourself with the controls of the Rude Mouse pedal:

- DC 9V Input: Connect a standard 9V DC power adapter (center negative) here. The pedal requires a stable power supply for operation.
- LEVEL Knob: Controls the overall output volume of the effect. Adjust to balance the effect volume with your clean signal.
- GAIN Knob: Adjusts the amount of distortion. Turning clockwise increases the intensity of the distortion.
- FILTER Knob: Shapes the tone of the distorted sound. This control allows you to dial in a wide range of frequencies, from dark and bass-heavy to bright and cutting.
- MODE Switch (Classic/Hot): Toggles between two distinct distortion voicings.
- Classic: Provides a vintage, smooth distortion tone.
- Hot: Delivers a more aggressive, higher-gain distortion with increased saturation.
- Output Jack: Connect this to your amplifier or the next pedal in your signal chain.
- Input Jack: Connect your guitar or the preceding pedal in your signal chain here.
- TRUE BYPASS Footswitch: Engages or disengages the effect. When engaged, the LED indicator will illuminate. When disengaged, the pedal is bypassed, and your signal passes through unaffected.
Setup
Follow these steps to set up your SONICAKE Rude Mouse pedal:
- Power Connection: Connect a standard 9V DC power adapter (center negative) to the DC 9V input jack (1). Ensure the power supply meets the specified voltage and polarity requirements. (Note: Power adapter is not included.)
- Input Connection: Connect your guitar to the Input Jack (7) using a standard 1/4-inch instrument cable.
- Output Connection: Connect the Output Jack (6) to your amplifier's input or to the input of the next pedal in your effects chain using a standard 1/4-inch instrument cable.
- Initial Settings: Before powering on, set the LEVEL knob to a low position, and the GAIN and FILTER knobs to their middle positions (12 o'clock).
- Power On: Once all connections are secure, power on your amplifier and then the pedal.


Operating Instructions
To achieve various distortion sounds:
- Engage the Effect: Press the TRUE BYPASS Footswitch (8) to activate the distortion effect. The red LED indicator will light up.
- Adjust Level: Use the LEVEL knob (2) to set the desired output volume. Start low and increase gradually to avoid sudden loud sounds.
- Set Gain: Rotate the GAIN knob (3) to control the amount of distortion. Lower settings provide a mild crunch, while higher settings deliver heavy, saturated distortion.
- Shape Tone with Filter: Adjust the FILTER knob (4) to fine-tune the tonal characteristics. Turning it clockwise generally brightens the sound, while counter-clockwise makes it darker. Experiment to find the sweet spot for your guitar and amplifier.
- Select Mode: Use the MODE Switch (5) to toggle between "Classic" and "Hot" voicings.
- For a more traditional, smooth distortion, select Classic.
- For a more aggressive, modern, and higher-gain sound, select Hot.
- Disengage Effect: Press the TRUE BYPASS Footswitch (8) again to bypass the effect. The LED indicator will turn off, and your signal will pass through the pedal without modification.
Maintenance
- Cleaning: Use a soft, dry cloth to clean the pedal's exterior. Avoid using abrasive cleaners or solvents, as they may damage the finish.
- Storage: Store the pedal in a dry environment, away from extreme temperatures and direct sunlight.
- Power Supply: Always use a regulated 9V DC power supply with a center-negative plug. Incorrect power supplies can damage the unit and void the warranty.
- Connections: Ensure all cables are securely connected but do not overtighten. Periodically check cables for wear and tear.
Troubleshooting
| Problem | Possible Cause | Solution |
|---|---|---|
| No sound when pedal is engaged. | Incorrect power supply, faulty cables, incorrect connections, LEVEL knob set too low. | Verify 9V DC center-negative power supply. Check all instrument cables. Ensure guitar is connected to INPUT and amplifier to OUTPUT. Increase LEVEL knob. |
| Weak or distorted sound (unintended). | Low battery (if applicable, though this pedal is not battery-powered), incorrect impedance, faulty cables. | Ensure proper power supply. Check cable integrity. Ensure correct input/output impedance matching with other gear. |
| Unwanted noise or hum. | Ground loop, faulty power supply, interference from other electronics. | Use a high-quality, isolated power supply. Try a different power outlet. Move pedal away from other electronic devices. Check for faulty cables. |
| LED not lighting up. | No power, pedal not engaged. | Ensure power supply is connected and functional. Press the footswitch to engage the effect. |
Specifications
| Feature | Detail |
|---|---|
| Model Number | QSS-18 |
| Brand | SONICAKE |
| Item Weight | 7.3 ounces (208 Grams) |
| Product Dimensions | 2.05"L x 1.65"W x 3.68"H (52mm L x 42mm W x 93.5mm H) |
| Body Material | Zinc-alloy die-cast casing |
| Power Source | Corded Electric (9V DC, center negative) |
| Voltage | 9 Volts |
| Signal Format | Analog |
| Connector Type | 1/4 inch (6.35mm) audio jack |


Warranty and Support
For warranty information, please refer to the documentation included with your purchase or visit the official SONICAKE website. If you encounter any issues or require technical assistance, please contact SONICAKE customer support through their official channels.
You can find more information and contact details on the SONICAKE Amazon Store.
Important Information
- Serial Number: For product identification and warranty purposes, please note your pedal's serial number: 60190008971.
- UPC: 0843037101667
- EAN: 6971002021666
Video Resources
While this manual provides comprehensive instructions, visual demonstrations can be helpful. Please note that specific product videos were not available in the provided data for embedding. For official product videos and demonstrations, please visit the SONICAKE official website or their official YouTube channel.


