
1. Introduction
This manual provides comprehensive instructions for the safe installation, configuration, operation, and maintenance of your Smart WiFi Touch Switch. Please read this manual thoroughly before installation and keep it for future reference.
The Smart WiFi Touch Switch is an advanced wall switch designed for modern smart homes. It allows you to control your lighting or other household appliances remotely via a mobile application, voice commands, or directly through its high-sensitivity touch panel.
2. Product Features
- Wireless Connectivity: Connects to your local 2.4G WiFi router without the need for a central control host.
- High-Sensitivity Touch Panel: Features a tempered glass panel with high-sensitivity touch keys, resistant to water and shock.
- Durable Construction: The bottom casing is made of ABS V0 flame-retardant material for enhanced safety.
- Wide Voltage Input: Supports an ultra-wide voltage range of 90V-250V.
- Voice Control Compatibility: Works seamlessly with Amazon Alexa, Google Home, and SIRI for convenient voice commands.
- Mobile App Control: Control your lights and appliances remotely from anywhere, anytime, with real-time status updates.
- LED Backlight: The remote wall switch features an LED backlight for easy visibility and operation at night.
- Timer Function: Set schedules and countdown timers for automated control of your devices.
- Multi-Language Support: The accompanying mobile application supports 22 languages globally.

Figure 2.1: Front view of the Smart WiFi Touch Switch, showcasing its sleek black tempered glass panel with a blue WiFi indicator and a central blue circular touch button.
3. Safety Information
Please observe the following safety precautions to prevent injury or damage to the device:
- Electrical Safety: Always disconnect power at the circuit breaker before installing, removing, or servicing the switch. Failure to do so may result in electric shock or death.
- Qualified Electrician: Installation should be performed by a qualified electrician or a person with a thorough understanding of electrical wiring.
- Indoor Use Only: This device is designed for indoor use in dry locations only.
- Voltage Compatibility: Ensure your electrical system's voltage matches the switch's supported range (90V-250V).
- Proper Wiring: Ensure correct connection of live (L) and neutral (N) wires, as well as load wires (L1, L2, L3) as per the wiring diagram. Connecting the live wire and zero wire is crucial for safer operation.
- Certifications: The product is FCC, CE, and RoHS certified, ensuring compliance with safety and environmental standards.
4. Package Contents
Verify that all items are present in the package:
- Smart WiFi Touch Switch (1 unit)
- Mounting Screws (2 units)
- User Manual (1 copy)
5. Installation
5.1 Before You Begin
- Turn off power at the circuit breaker for the switch location.
- Ensure you have identified the Live (L), Neutral (N), and Load (L1, L2, L3) wires from your existing wiring.
5.2 Wiring Diagram

Figure 5.1: Rear view of the Smart WiFi Touch Switch with wiring terminals. N for Neutral, L for Live, and L1, L2, L3 for load connections.
5.3 Installation Steps
- Disconnect Power: At your home's main circuit breaker, turn off the power to the switch you are replacing.
- Remove Old Switch: Carefully remove the faceplate and unscrew the old switch from the wall box. Disconnect the wires, noting which wire was connected to which terminal.
- Connect Wires: Connect the wires from your wall box to the corresponding terminals on the Smart WiFi Touch Switch as shown in Figure 5.1. Ensure secure connections.
- Connect the Neutral wire to the 'N' terminal.
- Connect the Live wire to the 'L' terminal.
- Connect the Load wires (to your lights/appliances) to the 'L1', 'L2', 'L3' terminals as needed.
- Mount Switch: Gently push the wired switch into the wall box and secure it with the provided mounting screws.
- Attach Faceplate: Snap or screw the new faceplate onto the switch.
- Restore Power: Turn the power back on at the circuit breaker. The switch's LED backlight should illuminate.
6. Setup (App & Network)
6.1 Download the App
Search for the recommended smart home application (e.g., Smart Life, Tuya Smart) on your smartphone's app store (iOS or Android) and install it.
6.2 Pairing Process
- Ensure your smartphone is connected to a 2.4GHz WiFi network. The switch does not support 5GHz networks.
- Open the installed smart home app and register or log in to your account.
- Follow the in-app instructions to add a new device. This typically involves selecting 'Electrical Switch' or 'Wall Switch'.
- The app will guide you through putting the switch into pairing mode (often by pressing and holding the touch button until the WiFi indicator blinks rapidly).
- Confirm the WiFi network and enter your WiFi password in the app.
- Wait for the app to discover and connect to the switch. Once connected, you can rename the switch and assign it to a room.

Figure 6.1: Overview of smart switch functionalities including app control, voice control, and scheduling.
7. Operating Instructions
7.1 Touch Control
Simply touch the central circular button on the switch panel to manually turn the connected lights or appliances ON or OFF. The LED backlight will indicate the current status.
7.2 App Control
Use the installed smart home application on your smartphone to control the switch remotely. The app allows you to:
- Turn lights/appliances ON/OFF from anywhere with an internet connection.
- View the real-time ON/OFF status of your devices.
- Set schedules and countdown timers for automated operation.
- Create smart scenes and automations with other smart devices.
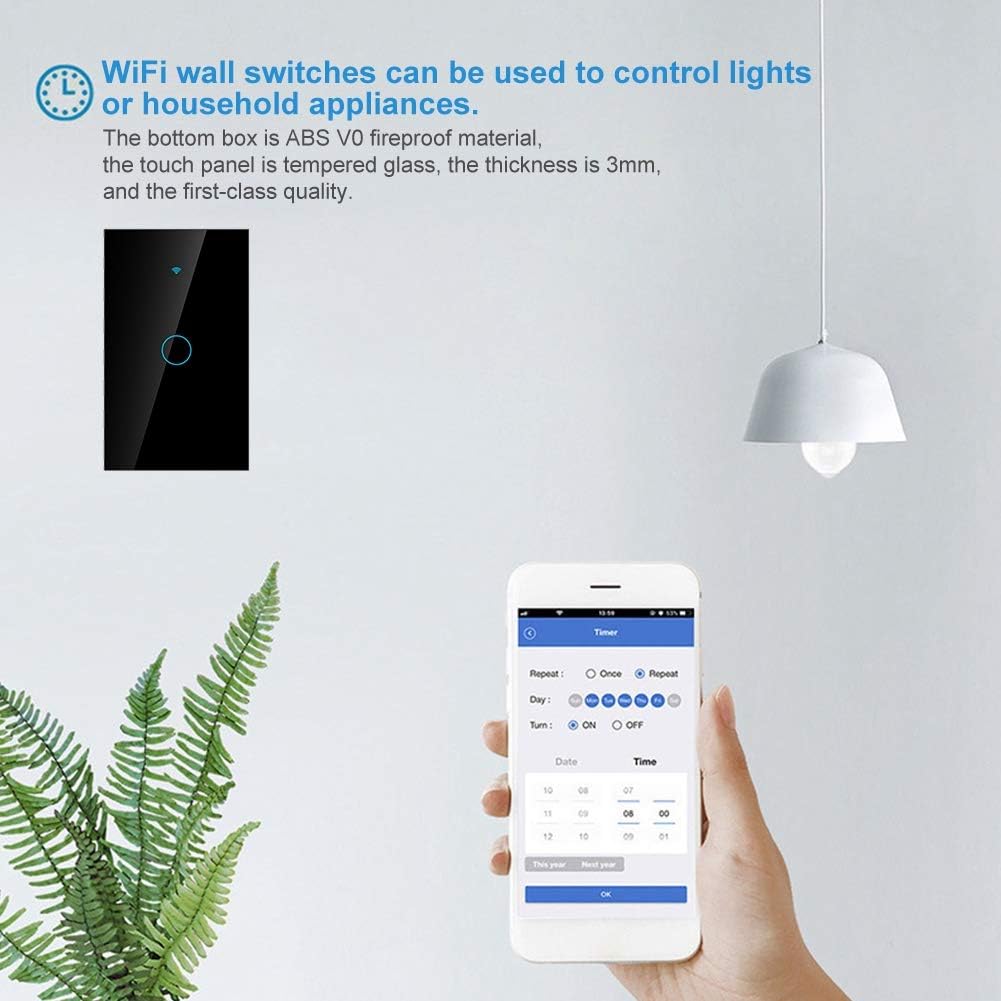
Figure 7.1: Setting a timer for the smart switch using the mobile application.
7.3 Voice Control
After linking your smart home app account with Amazon Alexa, Google Home, or SIRI (via Apple HomeKit if supported by the app), you can control the switch using voice commands. Examples:
- "Alexa, turn on the living room light."
- "Hey Google, turn off the kitchen switch."
- "SIRI, turn on the bedroom lamp."

Figure 7.2: Smart switch integration with voice assistant devices like Amazon Echo.
8. Maintenance
- Cleaning: To clean the switch panel, gently wipe it with a soft, dry, lint-free cloth. Do not use abrasive cleaners, solvents, or harsh chemicals.
- No User Serviceable Parts: The Smart WiFi Touch Switch contains no user-serviceable parts. Do not attempt to disassemble or repair the device yourself. Refer all servicing to qualified personnel.
- Environmental Conditions: Avoid exposing the switch to extreme temperatures, humidity, or direct sunlight.
9. Troubleshooting
| Problem | Possible Cause | Solution |
|---|---|---|
| Switch not responding to touch. | No power; incorrect wiring; internal fault. | Check circuit breaker. Verify wiring connections (Live, Neutral, Load). If problem persists, contact support. |
| Cannot connect to WiFi. | Incorrect WiFi password; 5GHz network used; switch not in pairing mode; weak signal. | Ensure correct 2.4GHz WiFi network and password. Put switch into pairing mode (refer to app instructions). Move router closer or use a WiFi extender. |
| App control not working. | No internet connection; app not linked to switch; app outdated. | Check your home internet connection. Ensure the switch is successfully paired in the app. Update the app to the latest version. |
| Voice control not working. | Voice assistant not linked to app; incorrect device name; poor voice command. | Ensure your smart home app account is linked to Alexa/Google Home/SIRI. Use the exact device name configured in the app. Speak clearly. |
| LED backlight is off. | Backlight feature disabled in app; power issue. | Check app settings to ensure backlight is enabled. Verify power supply to the switch. |
10. Specifications
| Parameter | Value |
|---|---|
| Model Number | 01rhx5gwk0zf5881-01 |
| Input Voltage | 90V-250V AC |
| Max Current | 10A |
| WiFi Frequency | 2.4GHz b/g/n |
| Material | ABS V0 Flame-retardant, Tempered Glass |
| Color | Black |
| Dimensions (L x W x H) | 126mm x 78mm x 45mm (approx. 5in x 3.1in x 1.8in) |
| Weight | 185 Grams |
| Certifications | FCC, CE, RoHS |

Figure 10.1: Dimensions of the Smart WiFi Touch Switch.
11. Warranty and Support
Warranty information for this product is not explicitly provided in the available product details. For specific warranty terms and conditions, please refer to the documentation included with your purchase or contact your retailer.
For technical support, troubleshooting assistance, or inquiries regarding spare parts, please contact the retailer from whom you purchased the product or the manufacturer directly. Please have your product model number (01rhx5gwk0zf5881-01) and purchase details ready when contacting support.


