1. Safety Information
This 3D printer enclosure is designed with safety in mind. The interior features pure aluminum film and flame-retardant exterior material. In the event of a fire, the material is designed to melt without igniting or spreading flames, providing a measure of fire resistance.
Always ensure proper ventilation when operating your 3D printer, especially when printing with materials that produce fumes. Keep the enclosure away from open flames or excessive heat sources.

Image 1.1: Official test report confirming the flame resistance of the enclosure material.
The Creality and Ender Enclosure has passed Flame Resistance Test, ensuring a safer printing environment.
2. Package Contents
Before assembly, verify that all components are present in your package:
- Flame-retardant aluminum foil cloth (Enclosure fabric)
- Glass fiber solid rods (Support poles)
- Three-way support frames (Connectors)
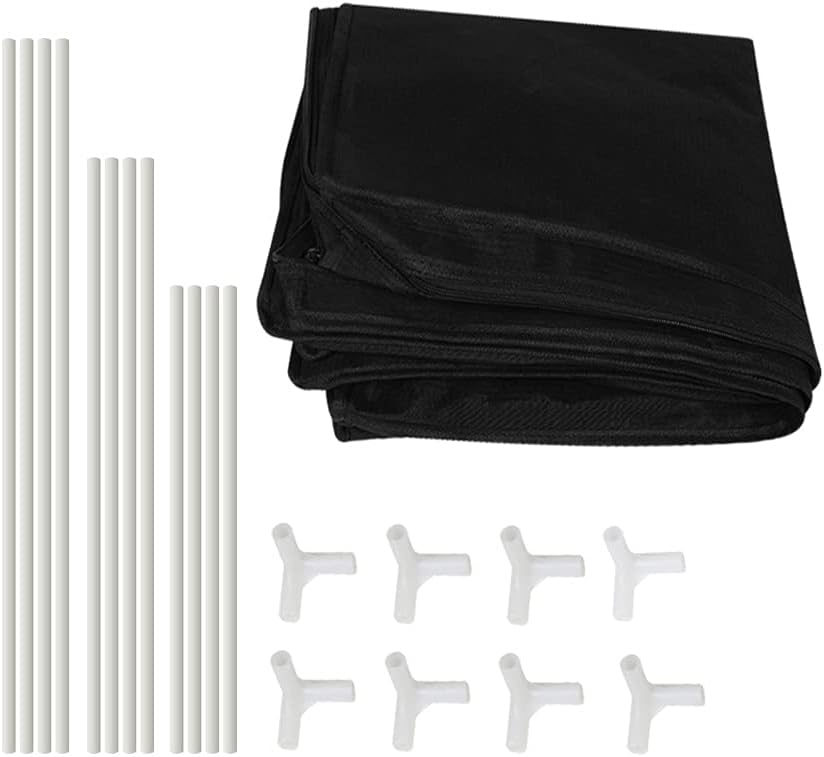
Image 2.1: Overview of all parts included in the package, including the enclosure fabric, support rods, and connectors.
3. Setup and Assembly Instructions
Follow these steps to assemble your Skouphy Creality Ender 3D Printer Enclosure:
- Prepare the Rods: Connect the glass fiber solid rods using the provided connectors to form the frame sections. Ensure all connections are secure.
- Assemble the Frame: Construct the rectangular base and top frames, then connect them with the vertical rods to form a cubic structure. Ensure the frame is stable and all joints are firmly pressed together.
- Install the Enclosure Fabric: Unfold the flame-retardant aluminum foil cloth. Carefully drape the fabric over the assembled frame, ensuring the 'Ender' logo is facing the front.
- Secure the Fabric: Adjust the fabric to fit snugly around the frame. Use the zippers to close the enclosure. The zippers are designed for smooth operation and durability.
- Position Your Printer: Place your compatible 3D printer inside the assembled enclosure.
- Route Cables: Utilize the designated power cord hole to route your printer's power cable and any other necessary connections.

Image 3.1: Detail of how to connect the glass fiber rods using the tee support frame connectors.

Image 3.2: The compact zipper head is designed for anti-corrosion and smooth operation.

Image 3.3: A Creality Ender 3D printer positioned inside the enclosure, showing ample space for operation. Dimensions: 480mm (W) x 600mm (D) x 720mm (H).

Image 3.4: The integrated power cord hole design allows for neat cable management.
For a visual guide, please refer to the official installation video:
Video 3.1: Official installation guide for the Creality Ender Enclosure by Skophy. This video demonstrates the step-by-step assembly process, from unpacking to final setup.
4. Features
- Constant Temperature Environment: The enclosure helps maintain a stable internal temperature, which is crucial for consistent 3D printing, especially with temperature-sensitive filaments like ABS. This improves bed adhesion and overall print quality.
- Fireproof and Dustproof: Constructed with flame-retardant material and a sealed design, the enclosure offers protection against dust accumulation and provides an added layer of safety during operation.
- Stable Structure: The frame is built with glass fiber rods, providing a robust and stable structure for the enclosure.
- Easy Installation and Portability: The design allows for quick and easy assembly and disassembly, making it convenient for storage and transport.
- Observation Window and Tool Pockets: A transparent window allows for monitoring of the printing process without opening the enclosure. Integrated tool pockets provide convenient storage for accessories.

Image 4.1: Demonstration of the flame-retardant aluminum foil cloth material, highlighting its high temperature resistance and non-flammable properties.

Image 4.2: The enclosure features a feed hole for filament and a convenient tool bag for accessories.
5. Operation
Once assembled and your 3D printer is placed inside, the enclosure is ready for use. Ensure all zippers are closed to maintain the internal temperature and prevent dust ingress.
- Temperature Control: The enclosure naturally helps maintain a consistent temperature around your printer. For optimal results with specific filaments, monitor your printer's temperature settings.
- Monitoring Prints: Use the transparent front window to observe the printing progress. For direct access, unzip the front panel.
- Filament Management: Utilize the feed hole to guide filament into the printer, ensuring a smooth path and preventing tangles.
Video 5.1: A demonstration of the Creality Ender Enclosure in use, showcasing its features and how it aids in maintaining a stable printing environment.
6. Maintenance
Regular maintenance ensures the longevity and optimal performance of your enclosure:
- Cleaning: Wipe down the exterior and interior surfaces with a damp cloth to remove dust and debris. Avoid abrasive cleaners.
- Zipper Care: Periodically check zippers for smooth operation. If they become stiff, a small amount of zipper lubricant can be applied.
- Frame Inspection: Ensure all rod connections remain secure. Re-assemble any loose joints to maintain structural integrity.
- Storage: When not in use, the enclosure can be easily disassembled and folded for compact storage.
7. Troubleshooting
If you encounter any issues with your enclosure, consider the following:
- Enclosure Instability: Ensure all glass fiber rods are fully inserted into their connectors and the frame is properly aligned.
- Difficulty Zipping: Check that the fabric is correctly aligned on the frame and not snagged. Avoid forcing the zippers.
- Temperature Fluctuations: Verify that all openings, including the power cord hole, are adequately sealed to maintain a consistent internal temperature.
8. Specifications
| Feature | Detail |
|---|---|
| Product Dimensions | 23.62 x 18.9 x 28.35 inches (480 x 600 x 720mm) |
| Item Weight | 3.5 pounds |
| Material | Flame-retardant aluminum foil cloth, Glass fiber rods |
| Color | Black |
| Model Number | Ender-tent |
| Compatibility | Creality Ender 3V2/Ender 3S1/Ender 3Pro/Ender 3/Ender 3V2 Neo/Ender 3Neo/Ender 5/Ender 5S1/Anycubic Kobra/ELEGOO Neptune 3 3D Printer |
9. Warranty and Support
Skouphy is committed to providing high-quality products and customer satisfaction. We offer lifetime technical assistance for our products.
If you require support or have any questions, please contact us directly via the Amazon Message system. Our customer service team aims to respond within 24 hours.
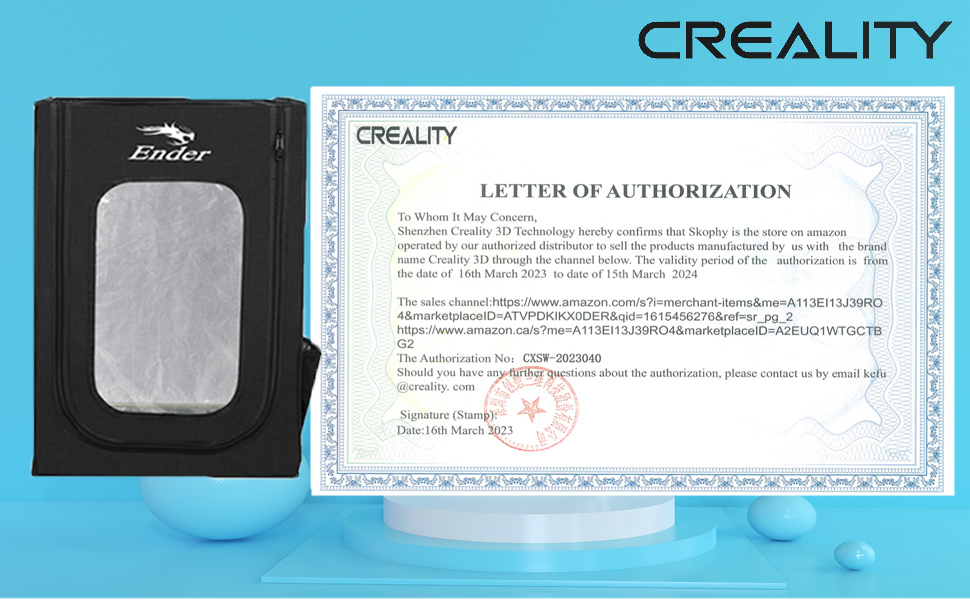
Image 9.1: Skouphy provides lifetime technical assistance and responsive customer service.


