1. Product Overview
The RPNB Electronic Security Safe is designed to protect your valuable possessions from theft and unauthorized access. Constructed with durable materials and featuring advanced locking mechanisms, this safe provides a secure storage solution for your home or office.
Key Features:
- Robust Security Protection: The safe is constructed with reinforced solid steel walls. Double cylinder latches enhance safety and reliability, providing physical protection against forced entry.
- Smart Capacity: 8.5 L capacity, external size: 31x20x20 cm, internal size: 30.5x13.5x19 cm, offering ample space for your valuables.
- Easy to Operate: Opens with a digital code or key. The numeric code can be programmed with 3-8 digits. Three different colored indicator lights flash to show different states, clearly indicating whether the operation is correct or if the battery needs charging.
- Easy Installation: Powered by 4 AA batteries. The safe has two pre-drilled holes on the bottom and back, allowing it to be fixed to the floor, wall, or cabinet using the included mounting bolts, further enhancing security.
- Asset Protection: Conveniently use this digital safe at home or office to protect your valuables such as cash, jewelry, wallets, and laptops.

Figure 1.1: The RPNB Electronic Security Safe with its door open, revealing the spacious interior suitable for storing various valuables. The digital keypad and emergency key lock are visible on the door.
2. Safety Information
IMPORTANT SAFETY WARNINGS:
- DO NOT store the emergency keys inside the safe. In case of forgotten password or dead batteries, you will not be able to open the safe if the emergency keys are stored inside.
- Keep the safe out of reach of children.
- Ensure the safe is placed on a stable, level surface or securely mounted to prevent tipping.
- Avoid exposing the safe to extreme temperatures or humidity.

Figure 2.1: This image illustrates the two primary methods for unlocking the RPNB safe. The top panel shows a hand entering a code on the digital keypad, while the bottom panel shows a hand using the emergency key to open the safe. A warning sign below advises against storing the emergency key inside the safe.
3. Setup
3.1. Battery Installation
- Locate the battery compartment on the inside of the safe door.
- Insert 4 AA batteries, ensuring correct polarity (+/-).
- Close the battery compartment cover.
3.2. Initial Code Setup
- With the safe door open, press the red reset button located on the inside of the door near the hinge.
- The yellow indicator light on the keypad will illuminate.
- Enter your desired 3-8 digit code on the keypad, then press the '#' or 'E' button to confirm.
- The yellow light will turn off, indicating the code has been successfully set.
3.3. Mounting the Safe
For enhanced security, the safe can be fixed to a floor, wall, or cabinet using the included expansion bolts.
- Identify the two pre-drilled holes on the bottom and two on the back of the safe.
- Position the safe in the desired location and mark the drilling points through the holes.
- Drill pilot holes in the marked locations.
- Align the safe with the drilled holes and secure it using the provided expansion bolts.
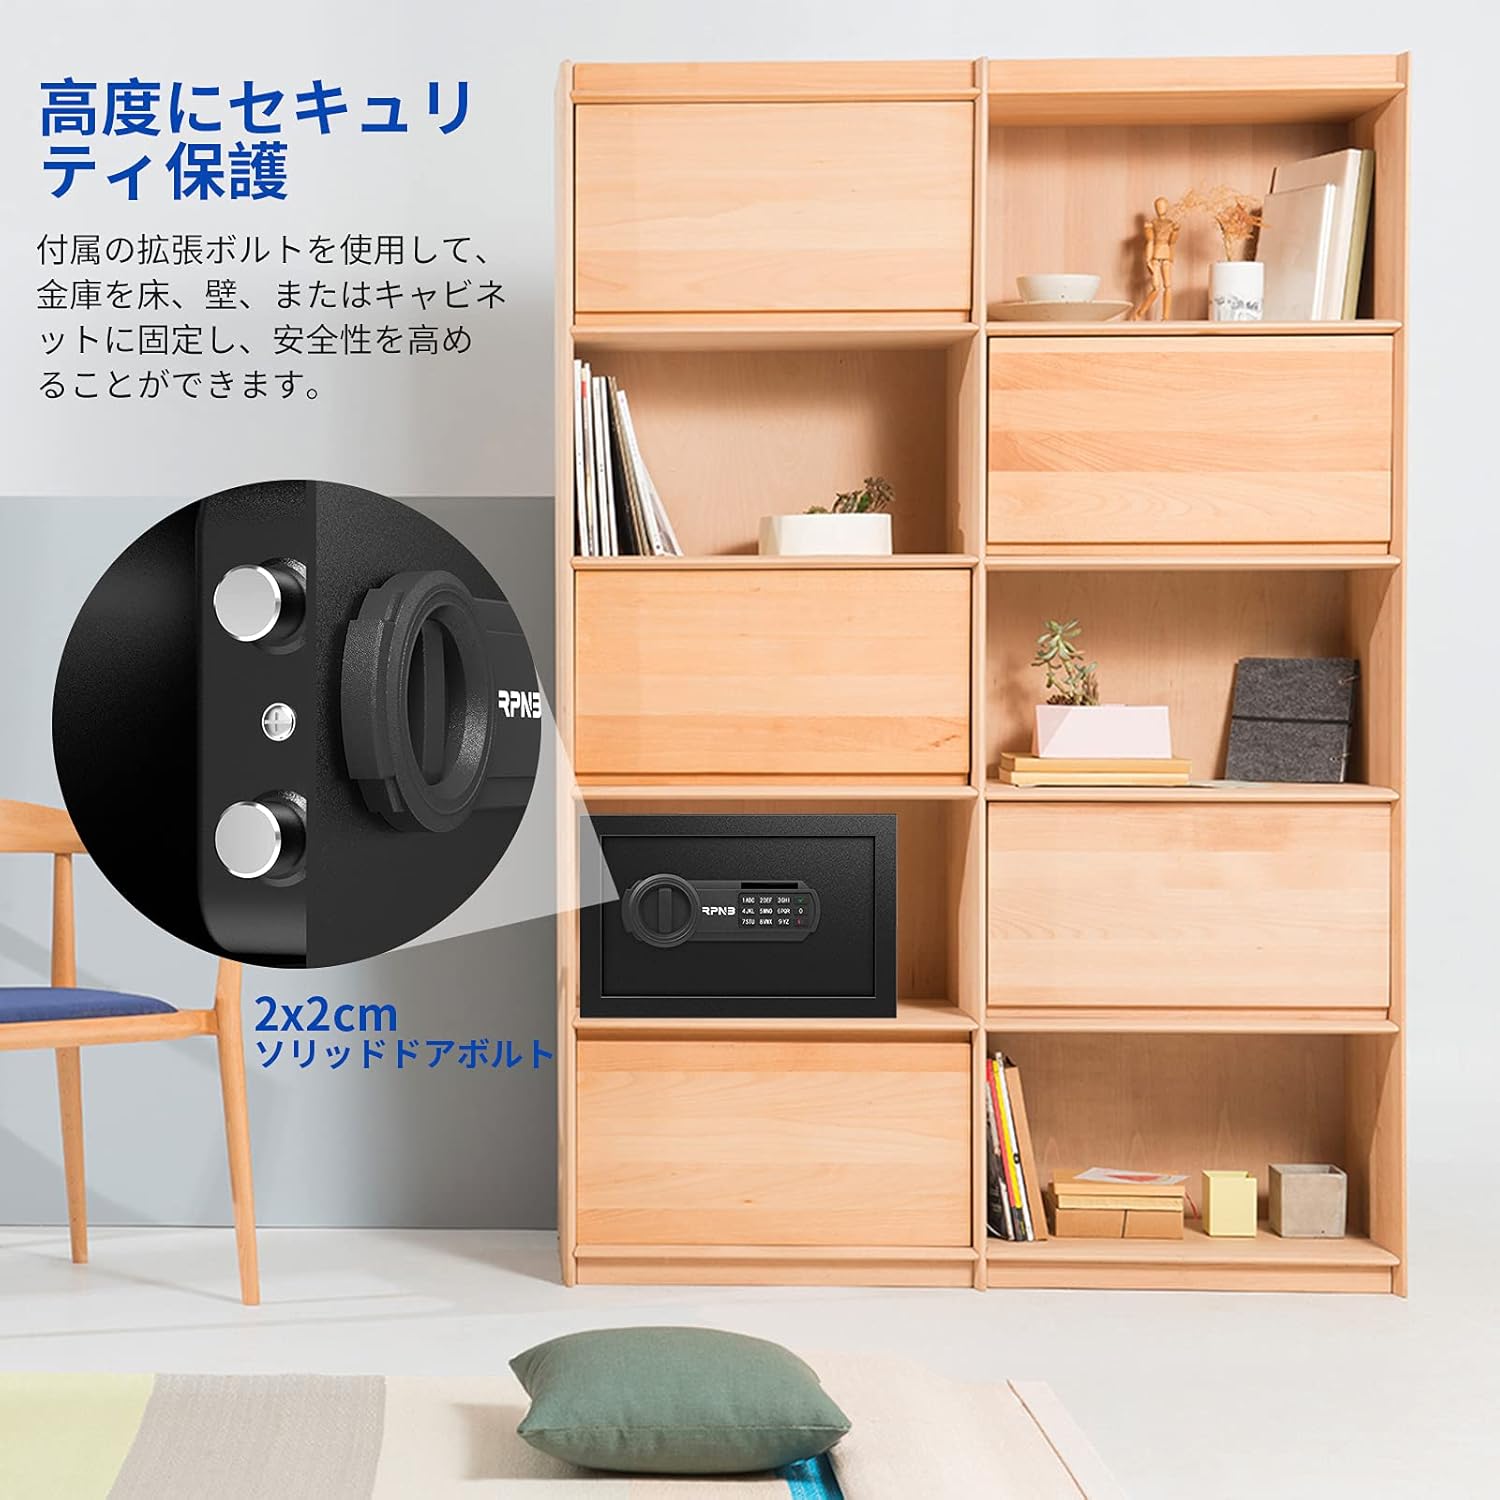
Figure 3.1: This image demonstrates the secure mounting capability of the RPNB safe. The safe is shown integrated into a wooden cabinet, with an inset highlighting the robust 2x2cm solid door bolts that provide enhanced security when fixed to a floor, wall, or cabinet.
4. Operating the Safe
4.1. Opening with Digital Code
- Enter your programmed 3-8 digit code on the keypad.
- Press the '#' or 'E' button.
- If the code is correct, the green indicator light will illuminate. Within 5 seconds, turn the knob clockwise to open the safe door.
4.2. Opening with Emergency Key
The emergency key should be used if you forget your code or if the batteries are dead.
- Locate the emergency keyhole, usually hidden behind a small cover on the keypad panel.
- Insert the emergency key and turn it counter-clockwise.
- While holding the key turned, rotate the main knob clockwise to open the safe door.
4.3. Changing the Digital Code
Follow the same steps as 'Initial Code Setup' (Section 3.2) to change your existing code. Ensure the door is open when performing this action.
4.4. Security Alarm Feature
If an incorrect code is entered three consecutive times, the safe's security alarm will activate for 60 seconds, deterring unauthorized access. This feature helps prevent brute-force password cracking attempts.
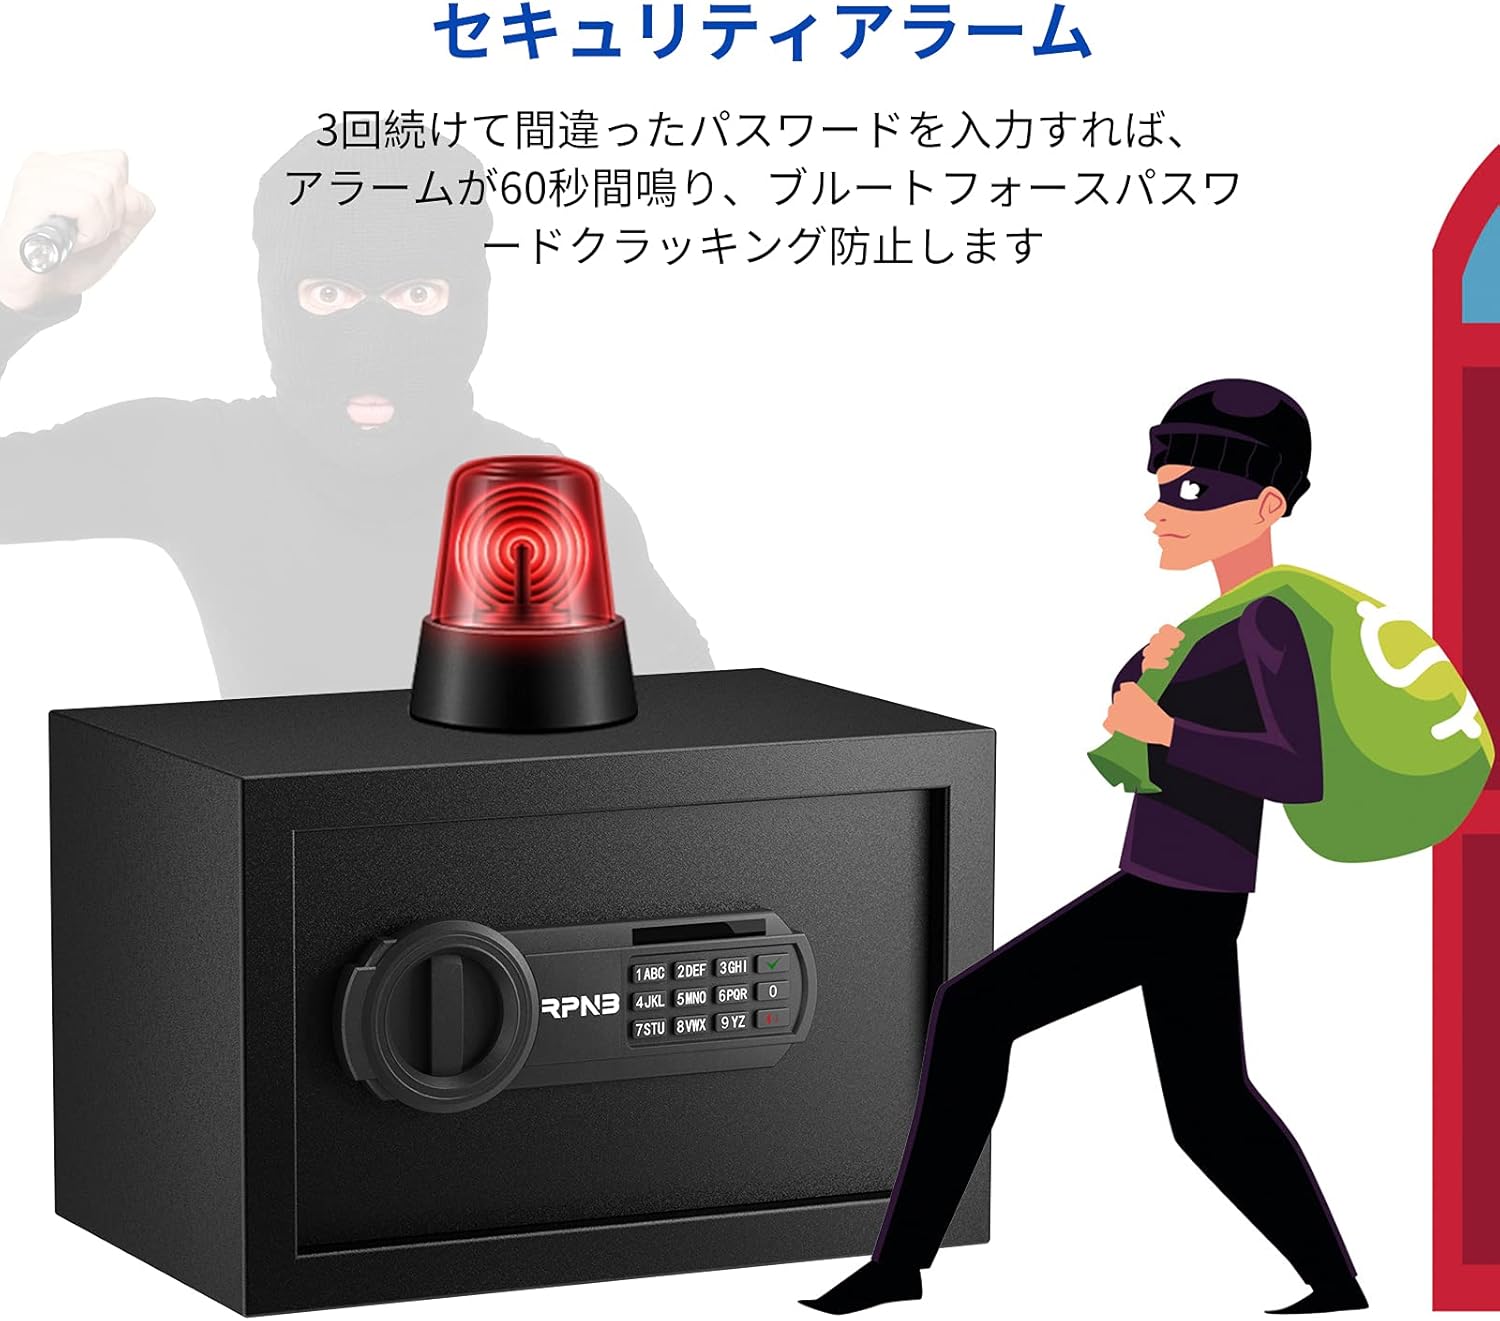
Figure 4.1: This image highlights the security alarm feature of the RPNB safe. An alarm light is shown on top of the safe, with a stylized image of a thief being deterred, indicating the safe's ability to activate an alarm after multiple incorrect password attempts.
5. Maintenance
5.1. Battery Replacement
When the red indicator light flashes or the keypad does not respond, it's time to replace the batteries. Use 4 new AA batteries. Follow the battery installation steps in Section 3.1.
5.2. Cleaning
Wipe the exterior of the safe with a soft, damp cloth. Do not use abrasive cleaners or solvents, as they may damage the finish.
6. Troubleshooting
- Safe will not open with digital code:
- Ensure batteries are not depleted. Replace if necessary.
- Re-enter the code carefully. If you have forgotten the code, use the emergency key.
- If the alarm sounds, wait for it to reset before trying again. - Keypad is unresponsive:
- Check battery installation and replace batteries if needed. - Door does not close properly:
- Ensure no obstructions are preventing the door from closing fully.
- Check if the locking bolts are retracted before closing.
7. Specifications
| Feature | Description |
|---|---|
| Brand | R RPNB |
| Model Number | RP20ESA-JP |
| External Dimensions | 31 x 20 x 20 cm (Length x Width x Height) |
| Internal Dimensions | 30.5 x 13.5 x 19 cm (Length x Width x Height) |
| Capacity | 8.5 Liters |
| Weight | 5.5 kg |
| Color | Black |
| Material | Alloy Steel |
| Lock Type | Electronic with Emergency Key |
| Power Source | 4 x AA Batteries (not included) |

Figure 7.1: This image provides a size guide for the RPNB electronic security home safes (RPESA series), showing different models in comparison to a 1.72m tall adult male, helping users visualize the product dimensions.
8. Warranty and Support
RPNB is committed to honest business quality and after-sales warranty. This product comes with a 1-year warranty from the date of purchase.
For any inquiries, technical support, or warranty claims, please contact RPNB customer service. Refer to the contact information provided in your purchase documentation or visit the official RPNB website.

Figure 8.1: This image presents the reasons to purchase the RPNB safe, showcasing its various certifications such as RoHS, CE, FCC, and ISO 9001, indicating compliance with international standards. It also highlights the 12-month warranty and 24/7 customer service.
9. Box Contents
Please verify that all items listed below are included in your package:
- RPNB Electronic Security Safe Unit
- Expansion Bolts (x2)
- Emergency Keys (x2)
- User Manual (Japanese)

Figure 9.1: This image displays the complete contents included in the RPNB safe package. It shows the main safe unit, two expansion bolts for mounting, two emergency keys, and the Japanese instruction manual, ensuring users know what to expect.


