1. Introduction
Welcome to the instruction manual for the GDAE10 XM-18 Incubator Controller. This advanced device is engineered for precise automatic control of temperature, humidity, and egg turning functions, essential for successful incubation in various environments. Please read this manual thoroughly before installation and operation to ensure optimal performance and safety.

Image: XM-18 Incubator Controller with a chick.
2. Product Overview
The XM-18 Incubator Controller is an intelligent digital display unit designed to manage critical incubation parameters with high accuracy and reliability.
Key Features:
- Intelligent Digital Display: Provides automatic control over temperature, humidity, egg turning, air cooling, and ventilation.
- Seven Signal Alerts: Includes alerts for high temperature, temperature control, low temperature, left egg turn, right egg turn, humidity control, and lighting.
- Safety Features: Equipped with an automatic alarm function and customizable over-temperature and control limit settings for enhanced safety.
- High Accuracy: Utilizes imported high-precision temperature and humidity sensors for reliable data.
- Visual Alert System: A green display light indicates normal operation, while a red alert signifies deviations or prompts for egg turning.
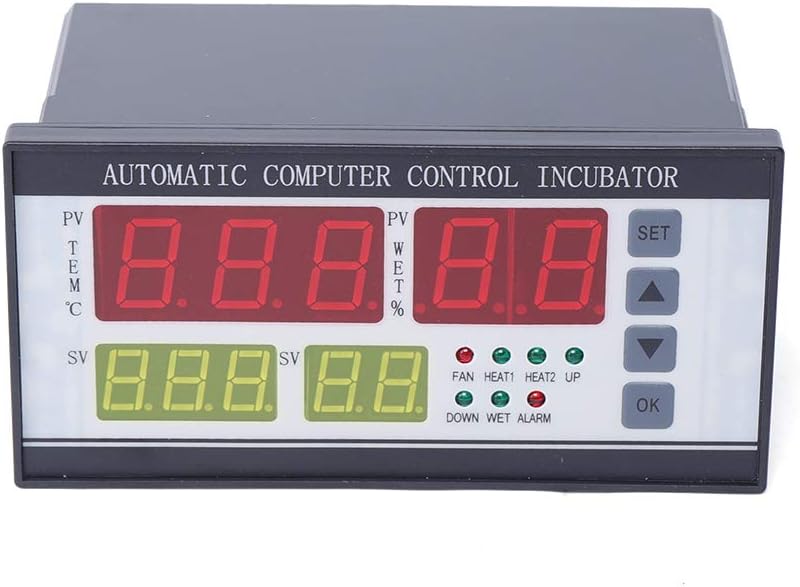
Image: Front view of the XM-18 Incubator Controller.
3. Specifications
| Parameter | Value |
|---|---|
| Model | XM-18 |
| Size (L x W x H) | 16cm x 9cm x 8cm (6.30'' x 3.54'' x 3.15'') |
| Weight | 0.4kg (0.882lbs) |
| Temperature Measuring Range | 0-99℃ |
| Temperature Measurement Accuracy | ±0.1℃ |
| Humidity Measurement Range | 0-99% RH |
| Humidity Measurement Accuracy | ±3% RH |
| Number of Signal Outputs | 7 |
| Max Egg-turning Records | 999 times |
| Egg-turning Cycle Adjustment | 0 - 999 minutes |
| Egg-turning Time Adjustment | 0 - 999 seconds |
| Ventilation Cycle Adjustment | 0 - 999 minutes |
| Ventilation Time Adjustment | 0 - 999 seconds |
| Temperature Sensor Cable Length | Approx. 200cm (78.74inch) |
| Voltage | AC110V, 60HZ |
| Relative Humidity (Operating) | Less than 85% |
| Ambient Temperature (Operating) | -10-60℃ |
| Main Color | Black |
| Material | Plastic |
| Display Type | LCD or LED |

Image: Dimensions of the XM-18 Incubator Controller.
4. Setup and Installation
Proper installation is crucial for the accurate and safe operation of your XM-18 Incubator Controller. Ensure all power is disconnected before proceeding with any wiring.
Components Included:
- 1 x XM-18 Incubator Controller
- 1 x Temperature Sensor
- 1 x Humidity Sensor
Wiring Connections:
Refer to the wiring diagram provided on the back of the controller unit for precise connections. The following steps outline the general wiring process:
- Temperature Sensor: Connect the temperature sensor to its designated terminals on the controller.
- Humidity Sensor: Connect the humidity sensor to its designated terminals.
- Power Supply: Connect the AC110V, 60HZ power supply to the 'L' (Live) and 'N' (Neutral) terminals.
- Output Connections: Connect your incubator's heating elements (HEAT1, HEAT2), fan, egg turning motors (LEFT, RIGHT), and lighting to their respective signal output terminals as required by your incubator setup.

Image: Rear view of the XM-18 Controller with wiring terminals.
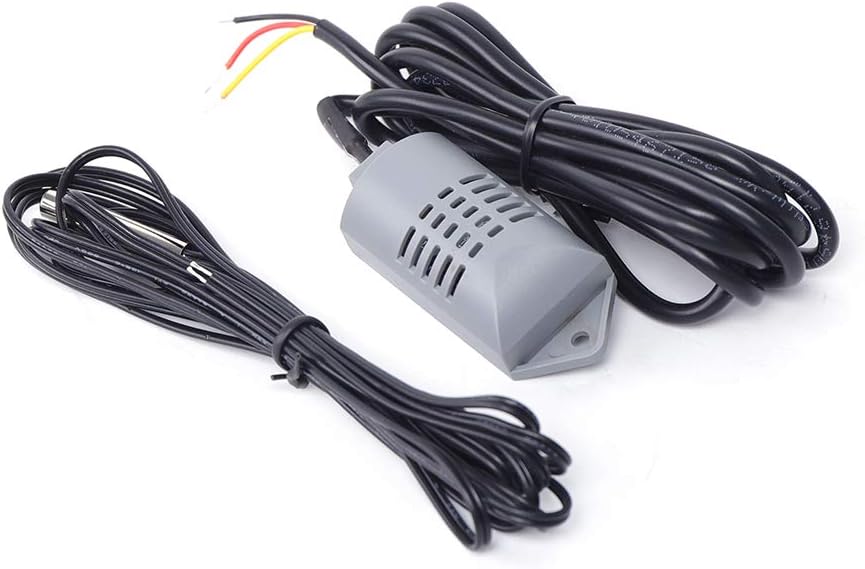
Image: Temperature and humidity sensors.
5. Operating Instructions
The XM-18 controller features a clear digital display and intuitive buttons for setting and monitoring parameters.
Display Indicators:
- PV (Process Value) TEM ℃: Displays the current temperature reading.
- PV WET %: Displays the current humidity reading.
- SV (Set Value) TEM ℃: Displays the user-set target temperature.
- SV WET %: Displays the user-set target humidity.
- Indicator Lights: FAN, HEAT1, HEAT2, UP, DOWN, WET, ALARM lights indicate active functions or alerts.
Basic Operation:
- Power On: After completing all wiring, connect the controller to a 110V AC power source. The digital display will illuminate.
- Setting Temperature: Press the "SET" button once. The temperature set value (SV TEM) will flash. Use the "UP" and "DOWN" arrow buttons to adjust to your desired temperature. Press "SET" again to confirm and save the setting.
- Setting Humidity: Press the "SET" button repeatedly until the humidity set value (SV WET) flashes. Use the "UP" and "DOWN" arrow buttons to adjust. Press "SET" again to confirm.
- Egg Turning Cycle: The controller supports automatic egg turning. To program the egg turning cycle (0-999 minutes) and duration (0-999 seconds), refer to the detailed programming instructions in the comprehensive manual provided with the product.
- Ventilation Cycle: Similarly, ventilation cycles (0-999 minutes) and durations can be set. Consult the full manual for specific programming steps.
- Alarm Settings: The controller features adjustable alarm thresholds for high/low temperature and humidity. Advanced alarm configuration details are available in the complete product manual.
Once parameters are set, the controller will automatically activate heating, ventilation, and egg turning functions based on the set values and real-time sensor readings to maintain optimal incubation conditions.
6. Maintenance
To ensure the longevity, accuracy, and reliable performance of your XM-18 Incubator Controller, adhere to the following maintenance guidelines:
- Cleaning: Gently wipe the exterior of the controller with a soft, dry cloth. Avoid using abrasive cleaners, solvents, or excessive moisture, which can damage the electronic components.
- Sensor Care: Keep the temperature and humidity sensors clean and free from dust, debris, or any obstructions. Avoid bending or physically damaging the sensor probes.
- Ventilation: Ensure that the controller's ventilation slots are not blocked. Proper airflow is essential to prevent internal overheating.
- Storage: If the controller will not be used for an extended period, disconnect it from the power supply and store it in a dry, dust-free environment, away from direct sunlight and extreme temperatures.
- Periodic Inspection: Regularly check all wiring connections to ensure they are secure and show no signs of wear, corrosion, or damage.
Do not attempt to open the controller casing for internal repairs. Such actions may void your warranty and could lead to electrical hazards. For internal issues, contact qualified service personnel.
7. Troubleshooting
This section provides solutions for common issues you might encounter with your XM-18 Incubator Controller.
Common Issues and Solutions:
- Controller Not Powering On:
- Verify that the power supply cable is securely connected to both the controller and a functional 110V AC outlet.
- Check for any tripped circuit breakers or blown fuses in your electrical system.
- Inaccurate Temperature/Humidity Readings:
- Ensure both temperature and humidity sensors are correctly connected to the controller and are not damaged.
- Clean the sensors if they appear dirty or have any buildup.
- Verify that the sensors are placed appropriately within the incubator for accurate environmental readings, away from direct heat sources or drafts.
- Heating/Cooling Not Activating:
- Check that the set temperature/humidity values are correctly configured and that the current readings necessitate activation.
- Confirm that the heating/cooling elements are properly wired to the controller's output terminals.
- Test the heating/cooling elements independently to ensure they are functional.
- Egg Turning Not Working:
- Inspect the connections to the egg turning motor(s).
- Verify that the egg turning cycle and duration settings are correctly programmed in the controller.
- Ensure the egg turning motor itself is functional and not obstructed.
- Alarm Constantly Triggering:
- Review the alarm threshold settings to ensure they are appropriate for your incubation needs.
- Check if the actual temperature or humidity is consistently outside the desired range, which may indicate an underlying issue with your incubator's heating, cooling, or humidification system.
For persistent issues not resolved by the steps above, please contact customer support for further assistance.
8. Warranty and Support
Specific warranty details for the GDAE10 XM-18 Incubator Controller are not provided within this instruction manual. For comprehensive warranty information, please refer to your original purchase documentation, contact the retailer from whom you purchased the product, or reach out directly to the manufacturer.
For technical support, operational inquiries, or assistance with any product-related issues, please contact GDAE10 customer service through the contact information provided with your product or on the official GDAE10 website.


