1. Introduction
This manual provides comprehensive instructions for the installation, operation, and maintenance of your FITNATE Smart Fingerprint Door Knob. Please read this manual thoroughly before installation and use to ensure proper function and safety.
2. Safety Information
- Do not attempt to disassemble or repair the lock yourself. This may void the warranty and cause damage.
- Use only specified batteries (4 x LR6 / 1.5V AA alkaline batteries). Incorrect battery installation can lead to malfunction.
- Keep mechanical keys in a safe place outside the premises.
- Avoid exposing the lock to direct sunlight or rain for prolonged periods.
- Ensure the door is properly aligned and closes smoothly before installation.
3. Package Contents
Verify that all components are present before beginning installation:
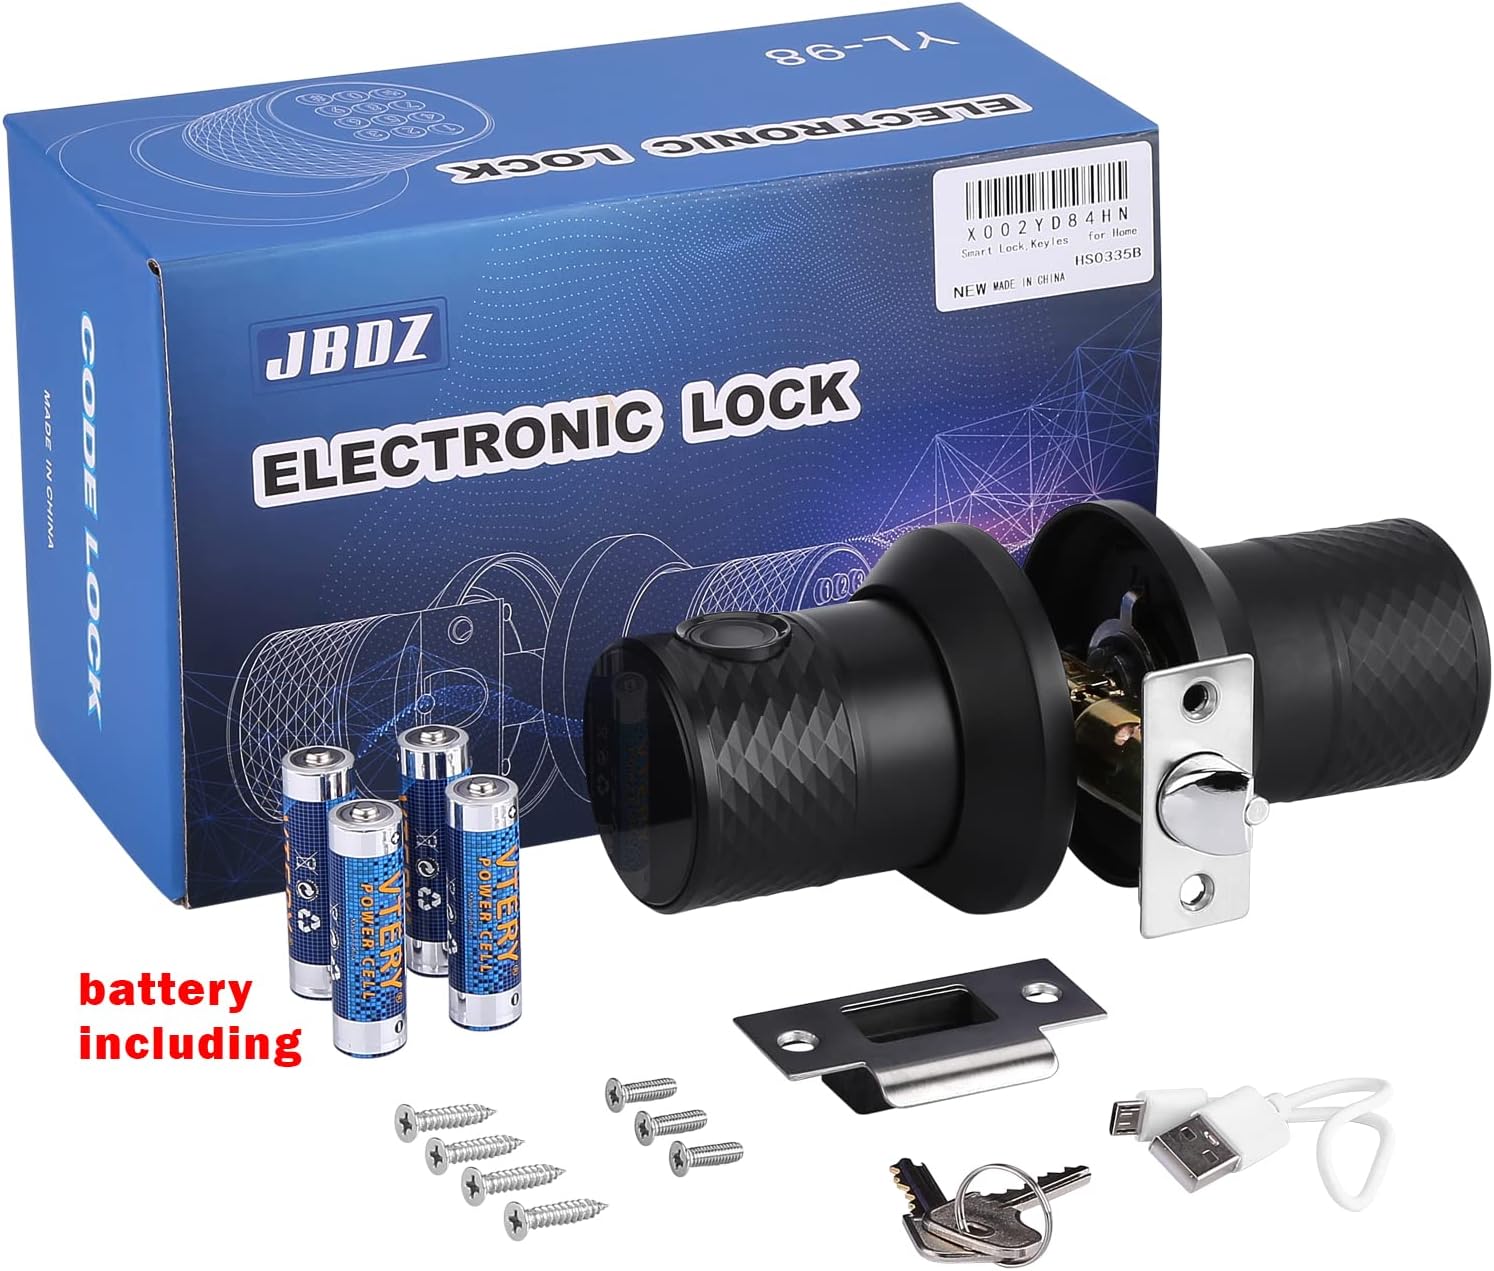
Image Description: An image displaying the complete package contents of the FITNATE Smart Fingerprint Door Knob. This includes the main door knob unit with keypad and fingerprint sensor, the interior knob, a latch mechanism, mounting screws, two mechanical keys, and a USB charging cable for emergency power.
- Exterior Door Knob with Keypad and Fingerprint Sensor
- Interior Door Knob
- Latch Mechanism
- Strike Plate
- Mounting Screws
- Mechanical Keys (2)
- USB Emergency Power Cable
- Installation Template
4. Product Overview
The FITNATE Smart Fingerprint Door Knob offers multiple access methods for enhanced security and convenience.
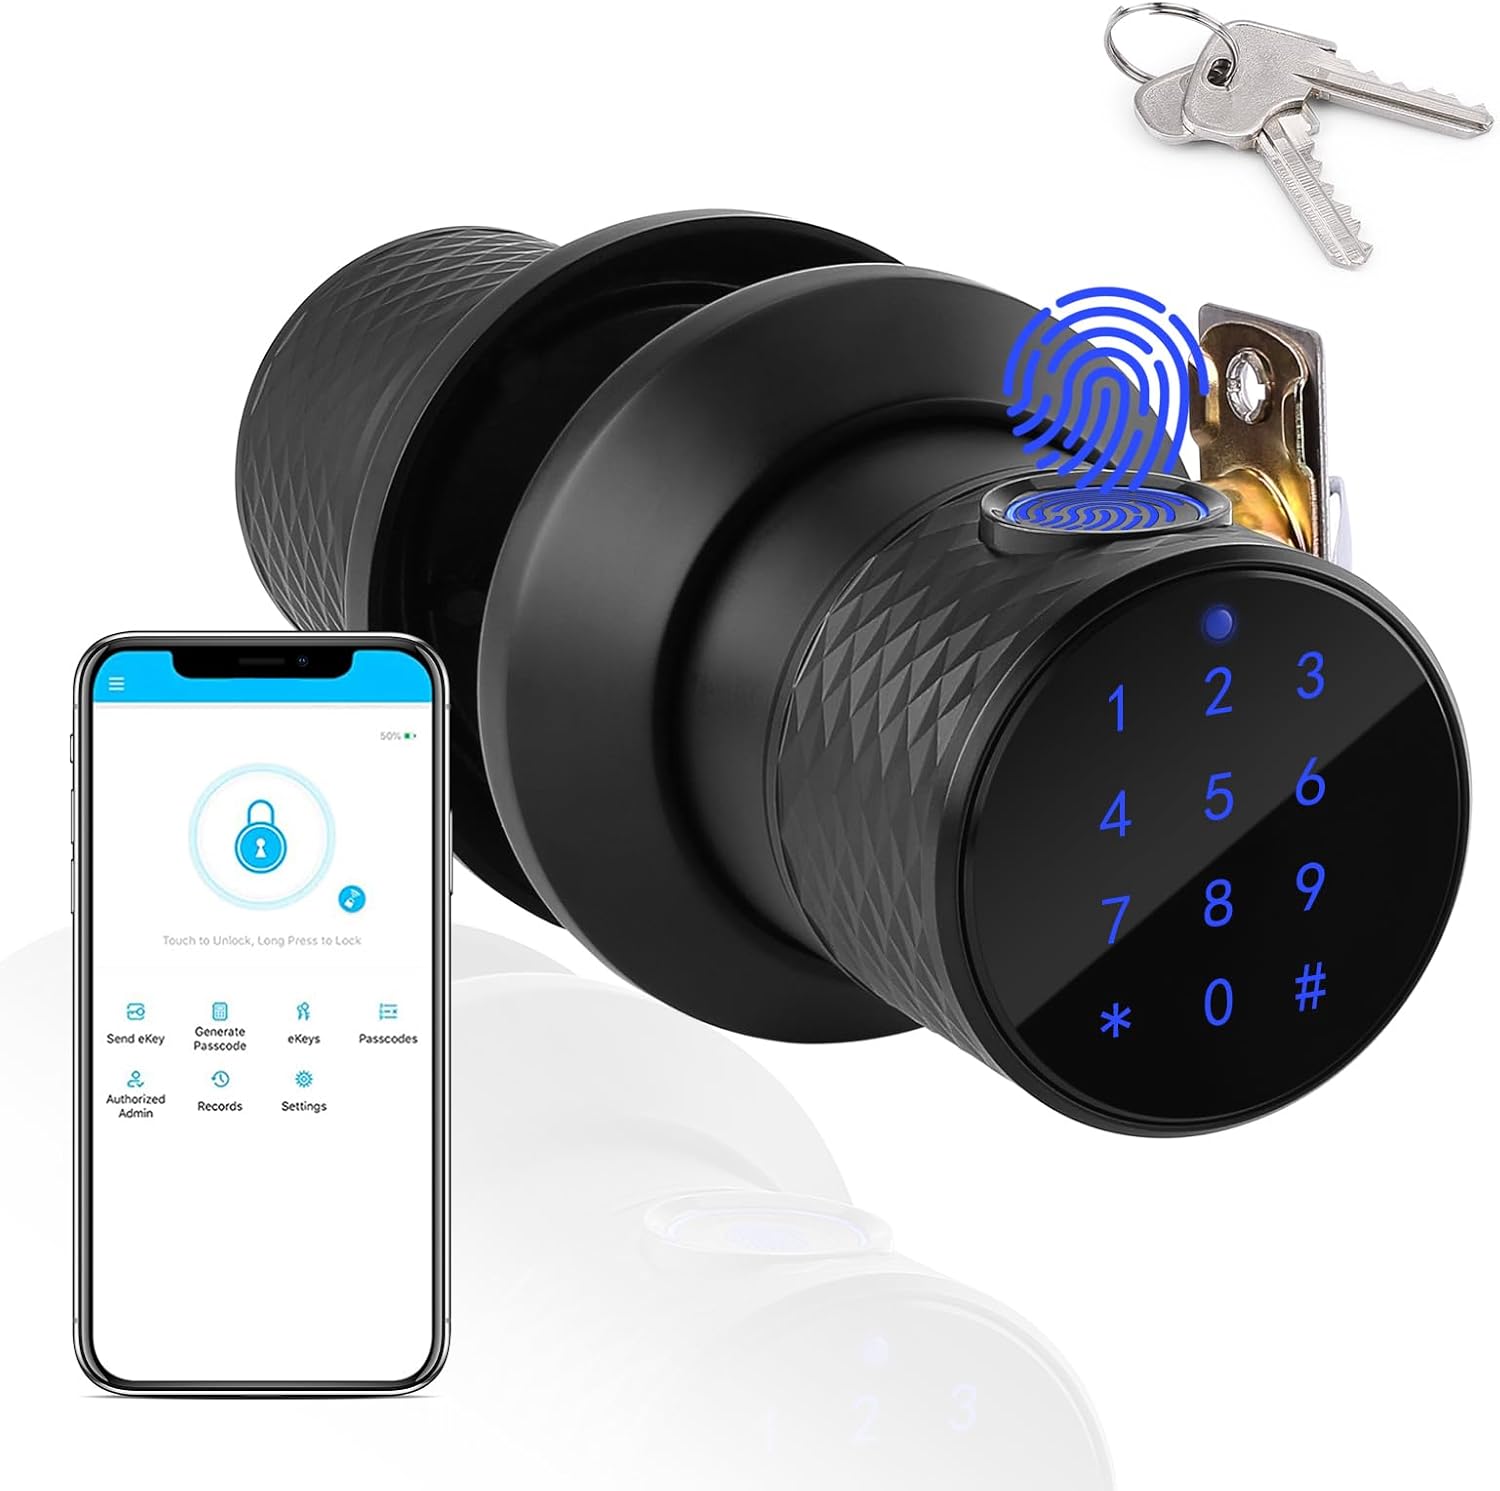
Image Description: A black smart door knob with a digital keypad and fingerprint sensor, shown alongside a smartphone displaying the Tuya app interface and a set of mechanical keys. This illustrates the multiple unlocking methods available.
- Fingerprint Sensor: For quick and secure biometric access.
- Keypad: For password entry. Features a touchable blue backlight for visibility in low light.
- Mechanical Key: Traditional backup access.
- Tuya App Control: Bluetooth connectivity for remote management, unlocking, and access record viewing.

Image Description: A diagram showing the dimensions of the FITNATE Smart Fingerprint Door Knob. Key measurements include a knob diameter of 3.15 inches and suitability for door thicknesses between 1.26 to 1.89 inches.
5. Setup and Installation
Follow these steps carefully for proper installation. A screwdriver is required.
Video Description: An animated instructional video demonstrating the step-by-step installation process of the smart fingerprint door knob. It covers marking the door, drilling holes, installing the latch, and assembling the interior and exterior knob components, including battery installation.
5.1. Prepare the Door
- Mark Door: Using the provided template, mark the hole on both sides of the door at the required backset. Then, mark the latch hole on the door edge.
- Drill Holes: Bore a 2.13-inch hole on the door face. Then drill a 0.98-inch hole in the door edge to intersect with the center of the 2.13-inch hole. Note: Drill the 2.13-inch hole from both sides of the door to prevent wood splintering.
5.2. Install Latch and Strike Plate
- Install Latch: Insert the latch into the hole and mark a line around the edge of the latch plate. Remove the latch. Chisel approximately 0.12 inches deep or until the latch plate sits flush with the door edge. Re-insert the latch, then drill 0.08 x 0.12-inch holes for mounting screws and fasten the latch.
- Install Strike: Close the door and mark the horizontal center of the latch on the door frame. Mark a vertical line where the door edge meets the frame and measure in half of the door thickness to find the vertical center. Extend both lines until they intersect and drill a 0.98-inch hole to 0.59 inches in depth. Position the strike plate and mark around its edge. Chisel the frame to approximately 0.06 inches in depth or until the strike sits flush. Drill 0.08 x 0.12-inch screw holes and fix the strike to the frame.
5.3. Assemble the Lock
- Install Outside Knob: Feed the power cable through the latch and guide the spindle through until the outside rose sits flush.
- Install Inside Knob: Feed the power cable through the hole in the knob and guide the spindle into the handle. Screw the inside knob to the outside knob using mounting screws.
- Install Batteries: Install 4 pieces of LR6 / 1.5V AA alkaline batteries into the battery box. Install the + / - batteries in strict accordance with the arrow shown in the figure. Incorrect battery installation will prevent the product from working and may cause damage.
- Connect Power Cable: Plug the power cord into the power socket. Recycle any excess power cord into the hole. Install the battery cover in the correct orientation and fasten with 2 mounting screws.
5.4. Initial Test
After installation, perform an initial test:
- Input the default password (e.g., 0123#) to prompt a sound and turn the knob to verify that the unlocking mechanism functions normally.
6. Operating Instructions
6.1. Unlocking Methods
- Fingerprint Unlock: Place your registered finger on the sensor. The lock will unlock if the fingerprint is recognized.

Image Description: A hand pressing a finger onto the fingerprint sensor of the smart door knob, indicating the biometric unlock feature.
- Password Unlock: Enter your registered password on the backlit keypad followed by '#'.

Image Description: A close-up of the smart door knob's digital keypad with a blue backlight, showing the numbers 1-9, 0, *, and #, ready for password input.
- Mechanical Key: Insert the mechanical key into the keyhole and turn to unlock. This is for emergency access.
- Tuya App Control: Use the Tuya Smart app on your smartphone to unlock the door via Bluetooth.

Image Description: A smartphone displaying the Tuya app interface, showing options for voice control, app unlock, and one-time password generation, alongside images of an Amazon Echo and Echo Dot, indicating smart home integration.
6.2. User Management (via Tuya App)
The Tuya Smart app allows for comprehensive user management:

Image Description: An illustration showing the smart door knob installed on a door, with dotted lines connecting it to four different user profiles (George, Paul, Elaine, Susan), indicating the ability to set up multiple user passwords.
- Add Fingerprints: Follow the in-app instructions to register new fingerprints. The lock can store up to 255 user fingerprints.
- Add Passwords: Create and manage passwords for different users. Maximum length is up to 10 digits.
- Generate Temporary Passcodes: Share temporary access with guests or service providers.
- View Access Records: Monitor unlocking and wrong passcode attempts in real-time.
6.3. Automatic Locking
The electronic door knob features an automatic locking retractor. It will automatically lock approximately 3 seconds after being opened.
7. Maintenance
- Battery Replacement: When the battery is low, the lock will alarm. Replace all four AA alkaline batteries promptly. Ensure correct polarity.

Image Description: The smart door knob installed on a door, with an icon indicating a low battery alarm and a USB cable for emergency charging. Mechanical keys are also shown as a backup.
- Emergency Power: If batteries die completely, use the provided USB charging cable to temporarily power the lock for access.
- Cleaning: Wipe the lock surface with a soft, dry cloth. Avoid abrasive cleaners or solvents.
8. Troubleshooting
| Problem | Possible Cause | Solution |
|---|---|---|
| Lock does not respond. | Dead batteries. | Replace batteries or use emergency USB power. |
| Fingerprint not recognized. | Finger is wet/dirty, or not properly registered. | Ensure finger is clean and dry. Re-register fingerprint if necessary. |
| Password not working. | Incorrect password entered, or password not registered. | Verify password. Re-register password via Tuya App. |
| Door does not lock/unlock smoothly. | Misalignment of lock components or door frame. | Check installation for proper alignment of latch and strike plate. |
9. Specifications
| Feature | Detail |
|---|---|
| Brand | FITNATE |
| Model Name | Door Knob (HS0335KSB) |
| Lock Type | Combination Lock, Deadbolt, Keypad |
| Unlock Methods | Fingerprint, Password, Mechanical Key, Tuya App (Bluetooth) |
| Material | Metal (Handle: Glass, Stainless Steel) |
| Color | Black |
| Dimensions (L x W x H) | 8.7 x 5.5 x 4 inches |
| Item Weight | 2.68 pounds |
| Door Thickness Compatibility | 1.26 ~ 1.89 inches |
| Battery Type | 4 x LR6 / 1.5V AA Alkaline Batteries (included) |
| Connectivity | Bluetooth |
| Controller Type | Amazon Alexa (via Tuya App integration) |
10. Warranty and Support
For warranty information and technical support, please refer to the product packaging or contact FITNATE customer service directly. Keep your purchase receipt for warranty claims.
Online resources and FAQs may be available on the official FITNATE website.