
REDTIGER F7NP-PLUS
REDTIGER F7NP Dash Cam User Manual
Model: F7NP-PLUS
1. Product Overview
The REDTIGER F7NP Dash Cam is a high-performance dual-channel recording system designed to capture clear video footage of your journeys. Featuring Ultra HD 4K (front) and FHD 1080P (rear) resolutions, it provides comprehensive coverage with wide-angle lenses and advanced night vision capabilities. Built-in Wi-Fi and GPS offer seamless connectivity and tracking, while intelligent features like G-sensor and loop recording ensure critical moments are always captured.

Image: Overview of the REDTIGER F7NP Dash Cam, including the front camera, rear camera, 32GB SD card, and smartphone app interface.
2. What's in the Box
Please check the contents of your package to ensure all items are present:
- 1 x F7N 4K Dash Cam (Front Unit)
- 1 x 1080P In-car Rear Camera
- 1 x Suction cup mount with built-in GPS
- 1 x 32GB Memory Card
- 1 x 11.5ft Power Supply Cable with Car Charger
- 1 x 21.3ft Rear Camera Cable
- 2 x Electrostatic Stickers
- 1 x Car Wire Trim Tool
- 1 x User Manual (this document)

Image: Visual representation of all components included in the REDTIGER F7NP Dash Cam package.
3. Setup and Installation
3.1 Installing the Front Dash Cam
- Clean the windshield area where you intend to mount the dash cam.
- Apply one of the electrostatic stickers to the clean windshield. This helps protect your windshield and makes removal easier.
- Attach the suction cup mount to the electrostatic sticker, ensuring a firm grip. The suction cup has built-in GPS.
- Slide the main dash cam unit onto the mount until it clicks into place.
- Adjust the angle of the front camera to ensure it captures the road ahead clearly, avoiding obstruction from the rearview mirror or wipers.
3.2 Installing the Rear Camera
- Identify a suitable location on your rear windshield, typically at the top center, ensuring a clear view.
- Clean the area thoroughly.
- Attach the rear camera using its adhesive mount. The rear camera features a 360° adjustable angle for optimal positioning.
- Route the 21.3ft rear camera cable from the rear camera to the front dash cam, tucking it neatly along the vehicle's headliner and A-pillar trim.
- Connect the rear camera cable to the AV-IN port on the main dash cam unit.
3.3 Power Connection
- Insert the 32GB memory card into the dash cam's SD card slot. Ensure it is inserted correctly until it clicks.
- Connect the 11.5ft power supply cable to the Type-C port on the dash cam.
- Plug the car charger end of the power supply cable into your vehicle's cigarette lighter socket.
- Start your vehicle. The dash cam should power on automatically and begin recording.

Image: A diagram illustrating the simple installation process for both the front and rear dash cameras, including cable routing and power connection.
4. Operating Instructions
4.1 Recording Modes
- Loop Recording: The dash cam continuously records video in 1, 3, or 5-minute segments. When the memory card is full, the oldest unlocked files are automatically overwritten to make space for new recordings.
- G-Sensor (Emergency Recording): In the event of a sudden collision or impact, the built-in G-sensor automatically detects the event and locks the current video segment, preventing it from being overwritten by loop recording. These files are stored in a separate folder.

Image: Visual explanation of the endless loop recording feature, showing how older files are overwritten when the memory card is full.
4.2 Parking Monitor (Requires Hardwire Kit)
For 24-hour parking surveillance, the REDTIGER F7NP requires a hardwire kit (ASIN: B09WCTZ3Y8, sold separately). Once connected, the dash cam can monitor your vehicle even when parked, utilizing:
- G-Sensor Mode: Automatically records and locks video if an impact or collision is detected while parked.
- Time-Lapse Mode: Records continuously at a low frame rate, compressing hours of footage into minutes, saving storage space.

Image: Depiction of the 24-hour parking monitor feature, highlighting G-sensor and time-lapse recording modes, and the necessity of a hardwire kit.
4.3 Wi-Fi and Smart App Control
Connect your F7NP dash cam to the "Redtiger" smartphone app (available on iOS and Android) via Wi-Fi for convenient control and access to your recordings.
- Download the "Redtiger" app from your device's app store.
- Enable Wi-Fi on your smartphone and connect to the dash cam's Wi-Fi network (SSID and password usually displayed on the dash cam screen).
- Within the app, you can:
- View live footage from both cameras.
- Playback recorded videos.
- Download videos directly to your phone.
- Manage dash cam settings.
- Share your travel scenery and moments with friends and family.

Image: A smartphone displaying the Redtiger app interface, showing options to view, replay, share, and download dash cam footage, with the dash cam and Wi-Fi symbol.
4.4 GPS Tracking
The built-in GPS module records your driving route, real-time speed, and location data. This information can be viewed on Google Maps via the "Redtiger" app or with the dedicated GPS Player software for Windows and Mac, providing crucial evidence in case of an incident.

Image: A laptop and smartphone displaying GPS tracking data, including vehicle location, speed, and route on a map, demonstrating the dash cam's GPS capabilities.
4.5 Superior Night Vision
The F7NP driving recorder is equipped with an F1.5 aperture lens and 6 layers of optical glass, combined with HDR/WDR technology. This ensures clear capture of important details even in low-light conditions, enhancing visibility during nighttime driving.

Image: An illustration highlighting the dash cam's superior night vision, showing a clear view of a car from behind on a dark road, with icons representing light-balanced tech, f/1.5 aperture, WDR/HDR, and a 6-layer lens.
5. Maintenance
5.1 Memory Card Management
- Regularly format the memory card (at least once a month) through the dash cam's settings to ensure optimal performance and prevent data corruption.
- Use a high-quality Class 10 or U3 microSD card from a reputable brand for reliable recording.
- If the dash cam displays a "Memory Card Full" error, it may indicate that too many locked files are present or the card needs formatting/replacement.
5.2 Cleaning
- Gently wipe the camera lenses with a soft, lint-free cloth to remove dust or smudges.
- Do not use harsh chemicals or abrasive materials, as they may damage the lens coating or camera body.
5.3 Super Capacitor Technology
The F7NP utilizes a super capacitor instead of a traditional lithium battery. This provides enhanced durability, heat resistance (up to 158°F), and cold resistance (down to -4°F), making it more reliable in extreme temperatures and extending its lifespan. It also offers a safer power solution with no risk of overheating or melting.
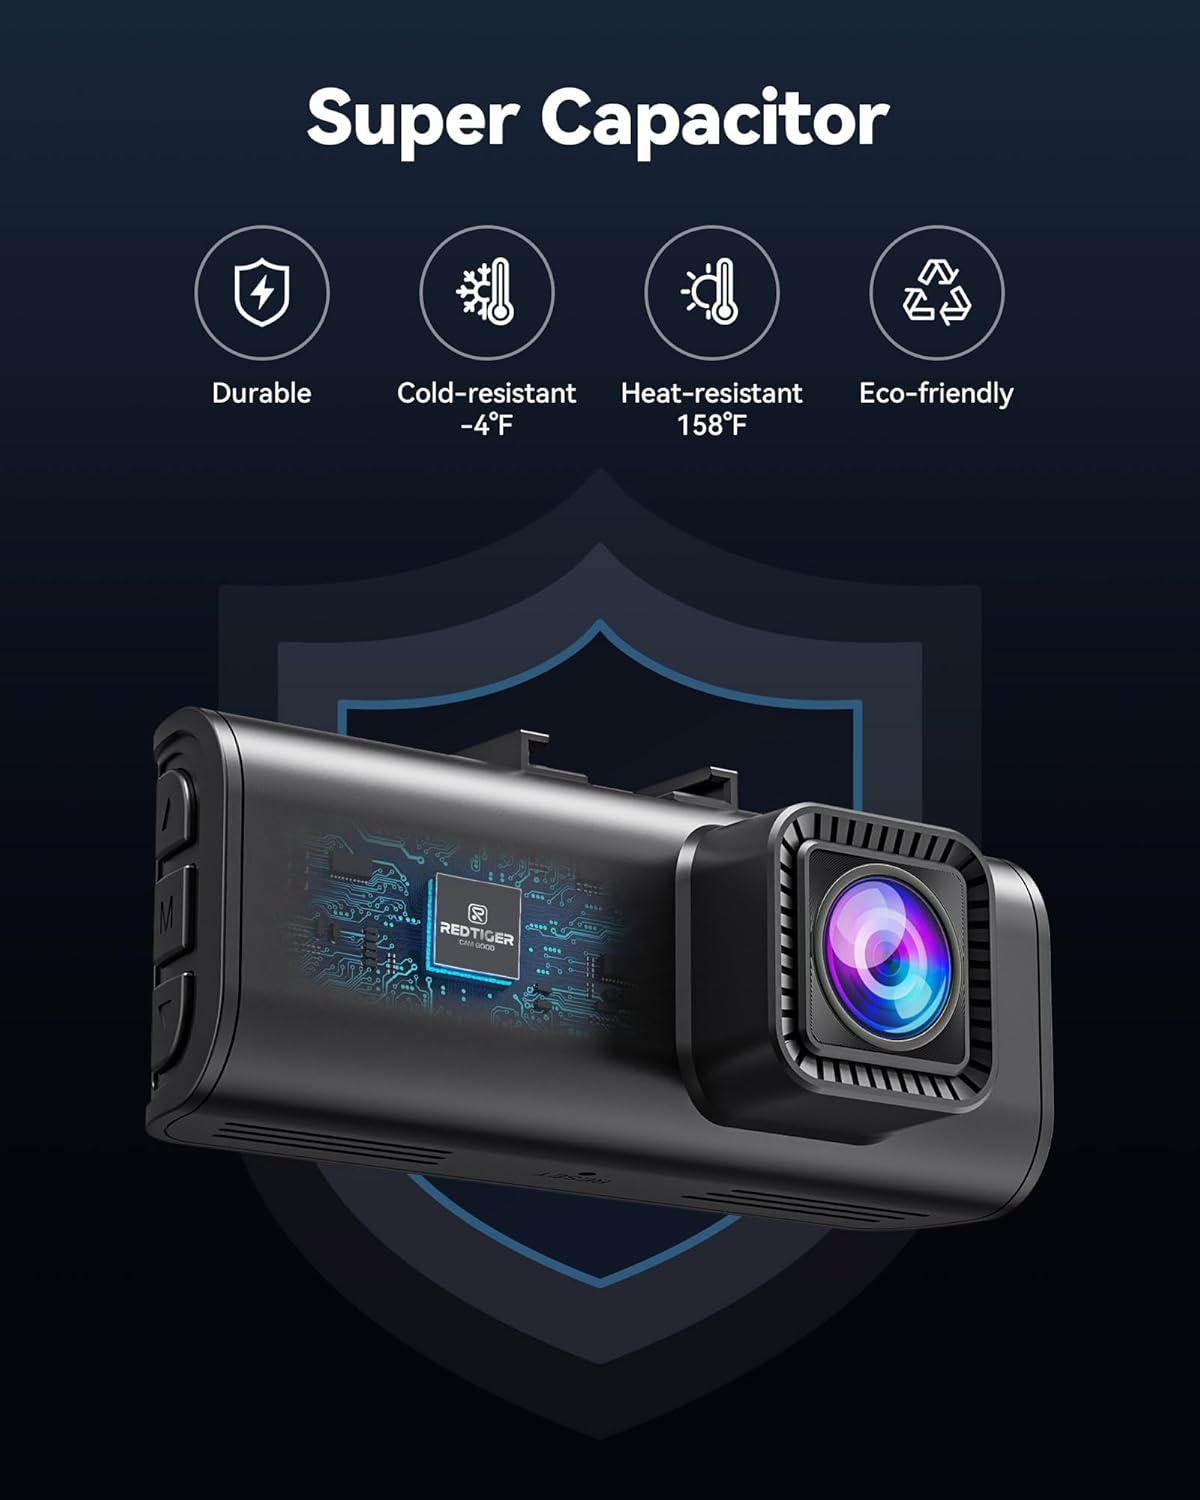
Image: An illustration highlighting the benefits of the super capacitor, including durability, resistance to extreme temperatures (-4°F to 158°F), and eco-friendliness.
6. Troubleshooting
| Problem | Possible Cause / Solution |
|---|---|
| Dash cam does not power on. | Check if the car charger is properly connected to the cigarette lighter socket and the dash cam. Ensure the vehicle's power outlet is active. |
| Video footage is blurry or unclear. | Clean the camera lenses. Ensure the protective film has been removed from the lenses. Check if the camera angle is correctly adjusted. |
| Memory card error / Recording stops. | Format the memory card. Replace the memory card if the issue persists (ensure it's a high-quality Class 10/U3 card). Too many locked files might be filling the card. |
| Wi-Fi connection issues. | Ensure the dash cam's Wi-Fi is enabled. Restart both the dash cam and your smartphone. Make sure you are within close proximity to the dash cam. |
| GPS not tracking location/speed. | Ensure the GPS suction cup mount is used and properly connected. Position the dash cam where it has a clear view of the sky. |
| Dash cam feels warm during operation. | It is normal for the dash cam to feel warm during operation, especially with 4K recording. The super capacitor design allows it to withstand high temperatures. |
| Rear camera view is sideways (as mentioned in a review). | Ensure the rear camera is installed right-side up. The camera can be fully rotated to adjust the orientation. |
| Rear camera view is too high/low (as mentioned in a review). | Adjust the 360° rotating lens of the rear camera to achieve the desired vertical angle. |
7. Specifications
| Feature | Detail |
|---|---|
| Product Dimensions | 3.15 x 1.57 x 2.36 inches |
| Item Weight | 1.43 pounds |
| Model Number | F7NP-PLUS |
| Video Capture Resolution | Front: 4K (3840*2160P), Rear: 1080P |
| Front Wide Angle | 170 degrees |
| Rear Wide Angle | 140 degrees |
| Aperture | F1.5 |
| Special Features | Built-In GPS, Night Vision (HDR/WDR), Parking Monitor, Built-In Display, Built-In Supercapacitor, Built-In WiFi, App Control, Compact Design, G-Sensor, Loop Recording |
| Connectivity Technology | Wi-Fi |
| Mounting Type | Windshield Mount (Suction Cup) |
| Power Source | Car Charger (Cigarette Lighter) |
| Operating Temperature | Resistant to -4°F to 158°F (Super Capacitor) |
8. Official Product Videos
How to Use the Redtiger App
Video: A detailed guide on how to connect and use the Redtiger smartphone application to view, playback, and manage your dash cam recordings.
Redtiger F7NP Dual Dash Cam Review
Video: A comprehensive review of the Redtiger F7NP Dual Dash Cam, demonstrating its features and performance in real-world scenarios.
9. Warranty and Support
REDTIGER stands behind its products with a commitment to customer satisfaction.
- Warranty: The REDTIGER dash cam is backed by a full 18-MONTH Assurance.
- Return Policy: Enjoy a 7-Day Return Policy.
- Defects: Returns are accepted for defects.
Customer Support:
- Email: help@redtigercam.com
- Phone (US): +1 888 966 8028
Our greatest pursuit is to satisfy the needs of consumers. Please note: The car charger needs to be connected to the car's cigarette lighter. If your car doesn't have a cigarette lighter, you can opt to purchase a USB-C power cable separately (ASIN: B0D76CWMPF).
Related documentsF7NP-PLUS


Ask a question about this manual
Ask about setup, troubleshooting, compatibility, parts, safety, or missing instructions. Manuals+ will review the question and use this page’s manual context to help answer it.