1. Introduction
Thank you for purchasing the VILINICE 6500 Lumens 720P Native Portable Projector. This manual provides essential information for the safe and efficient operation of your device. Please read it thoroughly before use and retain it for future reference.
2. Safety Information
To ensure safe operation and prolong the lifespan of your projector, please observe the following safety precautions:
- Do not block the ventilation openings. Ensure adequate airflow around the projector to prevent overheating.
- Avoid direct exposure to the projector lens light. The bright light can cause eye strain or damage.
- Do not place the projector in unstable locations. Ensure it is on a flat, stable surface to prevent falls.
- Keep the projector away from water, moisture, and flammable materials.
- Use only the power adapter supplied with the projector.
- Do not attempt to repair the projector yourself. Refer all servicing to qualified personnel.
- Unplug the projector during lightning storms or when unused for long periods.
3. Package Contents
Please check the package contents upon opening. If any items are missing or damaged, contact customer support.
- VILINICE 6500 Lumens 720P Native Portable Projector
- Remote Control
- Power Cable
- HDMI Cable
- AV Cable
- User Manual
- 100-inch Projector Screen (as indicated in product images)
4. Product Overview
Familiarize yourself with the projector's components and interfaces.

Image: The VILINICE projector shown with its remote controls, highlighting its compact design.
4.1 Front and Side View
- Projection Lens: Emits the image onto the screen.
- Focus Ring: Adjusts image clarity.
- Keystone Correction Ring: Corrects trapezoidal image distortion.
- Ventilation Openings: For heat dissipation. Do not block.

Image: The projector's rear and side panels displaying multiple connectivity options including AV, AUX, HDMI, USB, VGA, and SD card slot.
4.2 Rear and Side Interfaces
- AV Port: For connecting older devices using an AV cable.
- AUX (Audio Out) Port: For connecting external speakers or headphones.
- HDMI Ports (x2): For connecting devices like laptops, gaming consoles, or TV sticks.
- USB Ports (x2): For connecting USB drives to play media or power devices.
- VGA Port: For connecting computers with a VGA output.
- SD Card Slot: For playing media directly from an SD card.
- Power Input: Connects to the power adapter.
5. Setup
5.1 Placement and Projection
Position the projector on a stable surface. The optimal projection distance and screen size can vary. Ensure the projector is perpendicular to the screen for the best image quality.

Image: The projector set up for an outdoor movie night, demonstrating its portability and the included 100-inch screen.
The projector also features a mounting hole for ceiling or tripod installation.
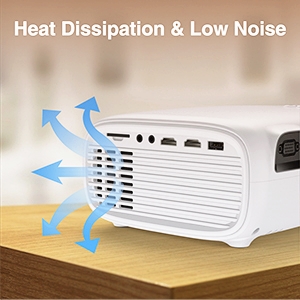
Image: A detailed view of the projector's mounting hole, suitable for various installation methods.
5.2 Power Connection
Connect the power cable to the projector's power input and then plug it into a power outlet.
5.3 Focus and Keystone Correction
After powering on, adjust the focus ring on the projector lens until the image is clear. If the image appears trapezoidal, use the keystone correction ring to adjust it to a rectangular shape.

Image: Visual guide demonstrating how to adjust the focus and keystone correction for a clear and properly shaped image.
5.4 Connecting Devices
The projector supports various input sources:
- HDMI: Connect laptops, TV sticks, gaming consoles (PS4, Xbox), or DVD players using an HDMI cable.
- USB: Insert a USB disk to play photos, videos, or music directly.
- VGA: Connect older computers or laptops using a VGA cable.
- AV: Connect legacy devices like VCRs or older DVD players.
- SD Card: Insert an SD card into the slot to access media files.
- Smartphones: For smartphone connectivity, an external MHL HDMI adapter (not included) may be required.
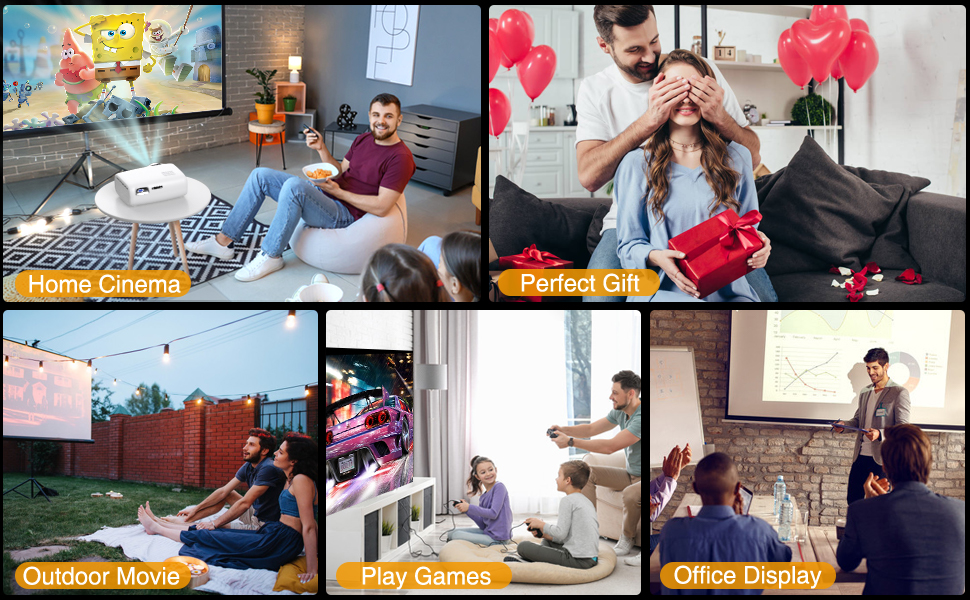
Image: Illustration of connecting a smartphone or laptop to the projector, emphasizing ease of use.
6. Operation
6.1 Powering On/Off
Press the power button on the projector or the remote control to turn the device on or off.
6.2 Input Source Selection
Use the "Source" button on the remote control or the projector's control panel to select the desired input source (HDMI1, HDMI2, USB, VGA, AV, SD Card).
6.3 Adjusting Settings
Navigate the on-screen menu using the remote control to adjust various settings:
- Picture Settings: Adjust brightness, contrast, color, and aspect ratio.
- Sound Settings: Control volume and audio modes. The projector features a built-in HiFi stereo speaker for an immersive audio experience.
- Zoom Function: The projector supports a 100%-75% zoom function, allowing you to adjust the screen size without moving the projector.
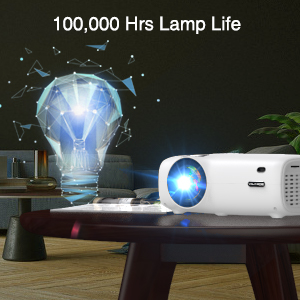
Image: Visual representation of the projector's zoom function, showing how the image size can be reduced from 100% to 75%.

Image: A family enjoying a movie projected by the VILINICE projector, highlighting the built-in HiFi stereo speaker for a great auditory experience.
7. Maintenance
Proper maintenance ensures optimal performance and longevity of your projector.
- Lens Cleaning: Use a soft, lint-free cloth and lens cleaning solution specifically designed for optical lenses. Do not use abrasive cleaners.
- Dust Removal: Regularly clean the projector's exterior with a soft, dry cloth. Use a can of compressed air to gently clear dust from ventilation openings.
- Storage: When not in use, store the projector in a cool, dry place, away from direct sunlight and extreme temperatures.
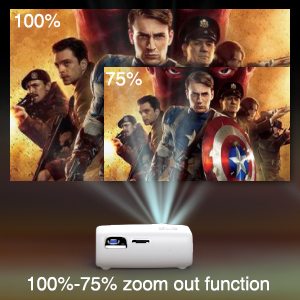
Image: Illustration of the projector's heat dissipation system, designed for efficient cooling and low noise operation.
The projector is designed with a long-lasting lamp life of up to 100,000 hours.

Image: A visual representation emphasizing the projector's extended lamp lifespan of 100,000 hours.
8. Troubleshooting
If you encounter issues, refer to the following common problems and solutions:
- No Power:
- Ensure the power cable is securely connected to both the projector and the power outlet.
- Check if the power outlet is functional.
- No Image:
- Verify the input source is correctly selected (e.g., HDMI1, USB).
- Check the connection cable (HDMI, VGA, AV) between the projector and the source device.
- Ensure the source device is powered on and outputting a signal.
- Blurry Image:
- Adjust the focus ring on the projector lens.
- Ensure the projection distance is within the recommended range.
- Clean the projector lens if it is dirty.
- Trapezoidal Image:
- Adjust the keystone correction ring until the image is rectangular.
- Ensure the projector is placed on a flat surface and is perpendicular to the screen.
- No Sound:
- Increase the volume on both the projector and the source device.
- Check if external speakers are connected and properly functioning.
- Ensure the audio output settings on the source device are correct.
9. Specifications
Below are the technical specifications for the VILINICE 6500 Lumens 720P Native Portable Projector:
| Feature | Specification |
|---|---|
| Brand | VILINICE |
| Display Resolution | Native 1280 x 720 (720P) |
| Supported Resolution | 1080P Full HD |
| Brightness | 6500 Lumens |
| Display Type | LCD |
| Connectivity Technology | HDMI, MHL, USB, VGA |
| Special Feature | Portable, 100%-75% Zoom Function |
| Speaker Type | Built-In, Surround (HiFi Stereo) |
| Lamp Life | Up to 100,000 hours |
| Item Weight | 4.92 pounds |
| Product Dimensions | 12.6 x 5.51 x 8.27 inches |
10. Warranty and Support
VILINICE products come with a standard manufacturer's warranty. For detailed warranty information, product support, or technical assistance, please refer to the warranty card included in your package or visit the official VILINICE website. Do not attempt to open or modify the projector, as this may void your warranty.


