Introduction
This manual provides essential information for the safe and efficient operation, setup, and maintenance of your Lexon Gener8 Battery Operated Sewing Machine. Please read this manual thoroughly before using the machine to ensure proper functionality and to prevent damage or injury.
The Gener8 Battery Operated Sewing Machine is designed for light-weight fabrics and paper crafts, making it suitable for hobbyists and beginners. It features a compact design, an LED worklight, and a foot pedal for convenient operation.
Safety Instructions
WARNING:
- This toy contains functional sharp points and functional sharp edges.
- Adult supervision is recommended during operation.
- Keep fingers away from the needle area during operation.
- Do not immerse the machine in water or other liquids.
- Use only the specified battery type and ensure correct polarity.
- Remove batteries if the machine will not be used for an extended period.
Package Contents
Verify that all items are present in the package:
- Gener8 Battery Operated Sewing Machine
- Foot Pedal
- Thread Spools (pre-installed or included separately)
- Bobbins (pre-installed or included separately)
- Instruction Manual (this document)

Image: The Gener8 Battery Operated Sewing Machine shown in its retail box, highlighting key features and warnings.
Setup
1. Battery Installation
The sewing machine requires four (4) 1.5V AA alkaline batteries. Batteries are NOT included.
- Locate the battery compartment on the underside or back of the machine.
- Open the battery compartment cover.
- Insert four (4) 1.5V AA alkaline batteries, ensuring correct polarity (+/-) as indicated inside the compartment.
- Close the battery compartment cover securely.
2. Threading the Machine
Proper threading is crucial for the machine to sew correctly. Refer to the diagrams on the machine itself or the included quick-start guide for detailed threading paths.
- Place a spool of thread onto the spool pin.
- Guide the thread through the tension disc and take-up lever according to the numbered path.
- Thread the needle from front to back.
- Ensure the bobbin is correctly inserted into its casing with the thread coming out in the correct direction.
- Turn the handwheel to bring the bobbin thread up through the needle plate.
3. Connecting the Foot Pedal
Insert the foot pedal plug into the designated port on the side or back of the sewing machine.
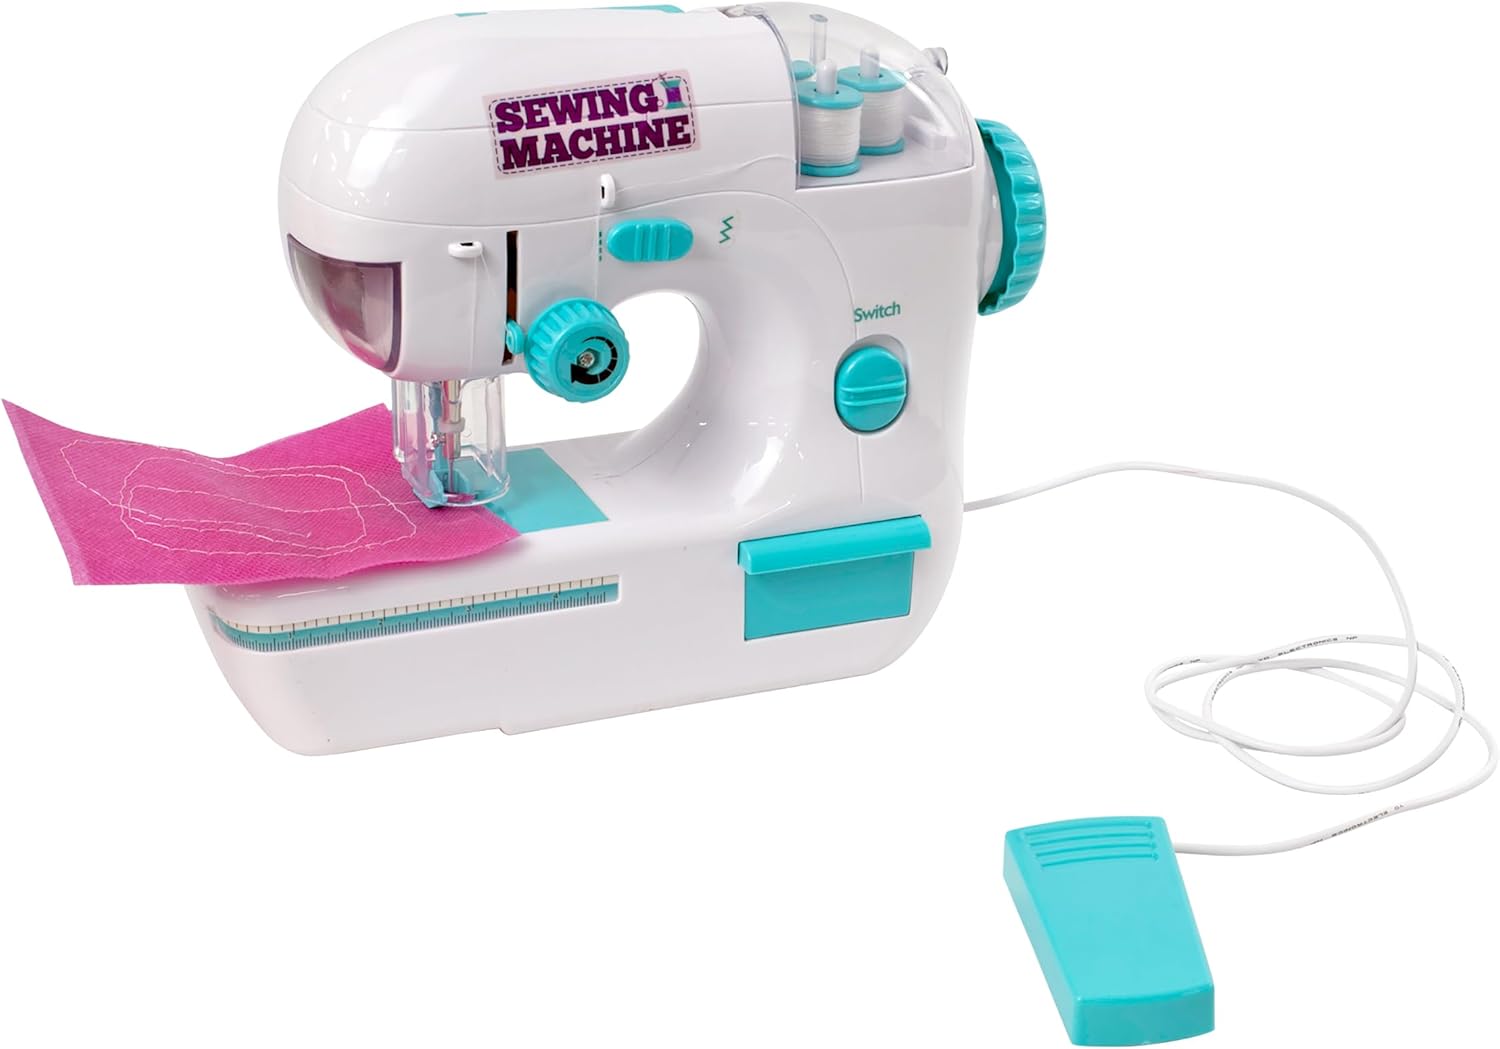
Image: The Gener8 Battery Operated Sewing Machine, showing its compact design and the connected foot pedal.
Operating Instructions
1. Preparing to Sew
- Lift the presser foot lever.
- Place the fabric under the presser foot, aligning the edge with the desired seam allowance markings on the needle plate.
- Lower the presser foot lever to hold the fabric in place.
- Ensure the needle is in the up position before starting.
2. Starting and Stopping
The machine can be operated using the foot pedal or the ON/OFF switch on the machine body.
- Foot Pedal Operation: Press the foot pedal to start sewing. Release the foot pedal to stop.
- Manual Switch Operation: Slide the switch to the "ON" position to start sewing. Slide it to "OFF" to stop.
Always ensure the machine is stopped before adjusting fabric or changing settings.
3. Adjusting Stitch Type and Tension
This model typically offers basic stitch types and tension adjustments.
- Stitch Type: Rotate the stitch selection dial (if present) to choose between straight stitch or zigzag stitch.
- Tension: Adjust the tension dial to achieve balanced stitches. Test on a scrap piece of fabric. If the top thread is loose, increase tension. If the bottom thread is loose, decrease tension.
4. Using the LED Worklight
The integrated LED worklight illuminates the sewing area for better visibility. It typically activates when the machine is turned on or when a dedicated light switch is engaged (refer to machine for specific control).
Maintenance
Regular maintenance ensures the longevity and smooth operation of your sewing machine.
- Cleaning: Use a soft brush to remove lint and dust from the bobbin area and feed dogs after each use. Do not use liquid cleaners.
- Needle Replacement: Replace the needle regularly, especially if it becomes bent, dull, or if stitches are skipping. Use only needles compatible with this machine type.
- Storage: Store the machine in a clean, dry place away from direct sunlight and extreme temperatures.
Troubleshooting
| Problem | Possible Cause | Solution |
|---|---|---|
| Machine not turning on | No batteries, dead batteries, incorrect battery polarity. | Check battery installation, replace with fresh batteries, ensure correct polarity. |
| Skipped stitches | Incorrect threading, bent or dull needle, wrong needle size for fabric. | Re-thread the machine, replace the needle, use appropriate needle. |
| Thread breaking | Incorrect tension, poor quality thread, burr on needle plate, incorrect threading. | Adjust tension, use good quality thread, check for burrs, re-thread. |
| Fabric not feeding | Presser foot not lowered, lint in feed dogs. | Lower presser foot, clean feed dogs. |
Specifications
- Model: LD-LH95S-BZ
- Brand: Lexon
- Power Source: 4 x 1.5V AA Alkaline Batteries (not included)
- Product Dimensions: 4.7"D x 12.9"W x 9.6"H (approx. 11.9cm D x 32.8cm W x 24.4cm H)
- Item Weight: 4.9 ounces (approx. 139 grams)
- UPC: 810011121256
- Features: LED Worklight, Foot Pedal Operation, Thread Storage, Storage Compartment
Warranty and Support
For warranty information and customer support, please refer to the contact details provided on the product packaging or visit the official Lexon website. Keep your purchase receipt as proof of purchase.
Lexon Official Website: www.lexon-design.com
Note: Specific warranty terms may vary by region and retailer.


