Introduction
The AmicoElectric MIG-160 is a versatile 3-in-1 welding machine designed for MIG, MAG, Lift-TIG, and Stick welding processes. It incorporates advanced IGBT inverter technology to ensure stable arc performance and high-quality welds across various metals, including stainless steel, carbon steel, alloy steel, and aluminum (with a spool gun). This manual provides essential information for safe operation, setup, and maintenance of your MIG-160 welder.
Safety Information
WARNING: Welding can be hazardous. Always follow safety precautions to prevent injury or death. Read and understand all safety warnings and instructions before operating this equipment.
- Electric Shock: Can kill. Do not touch live electrical parts. Wear dry insulating gloves and protective clothing.
- Fumes and Gases: Can be hazardous to your health. Keep your head out of the fumes. Use ventilation or exhaust to remove fumes and gases from the breathing zone.
- Arc Rays: Can burn eyes and skin. Wear a welding helmet with a proper shade filter and protective clothing.
- Fire and Explosion: Welding sparks can cause fire or explosion. Keep flammable materials away from the welding area. Have a fire extinguisher readily available.
- Hot Parts: Can cause severe burns. Allow equipment to cool before touching.
- Noise: Excessive noise can damage hearing. Wear ear protection.
Product Overview and Components
The AmicoElectric MIG-160 welder is designed for portability and multi-process functionality. Familiarize yourself with its main components and included accessories.

Figure 1: Front view of the AmicoElectric MIG-160 welder, showing the control panel, digital display, and output terminals.
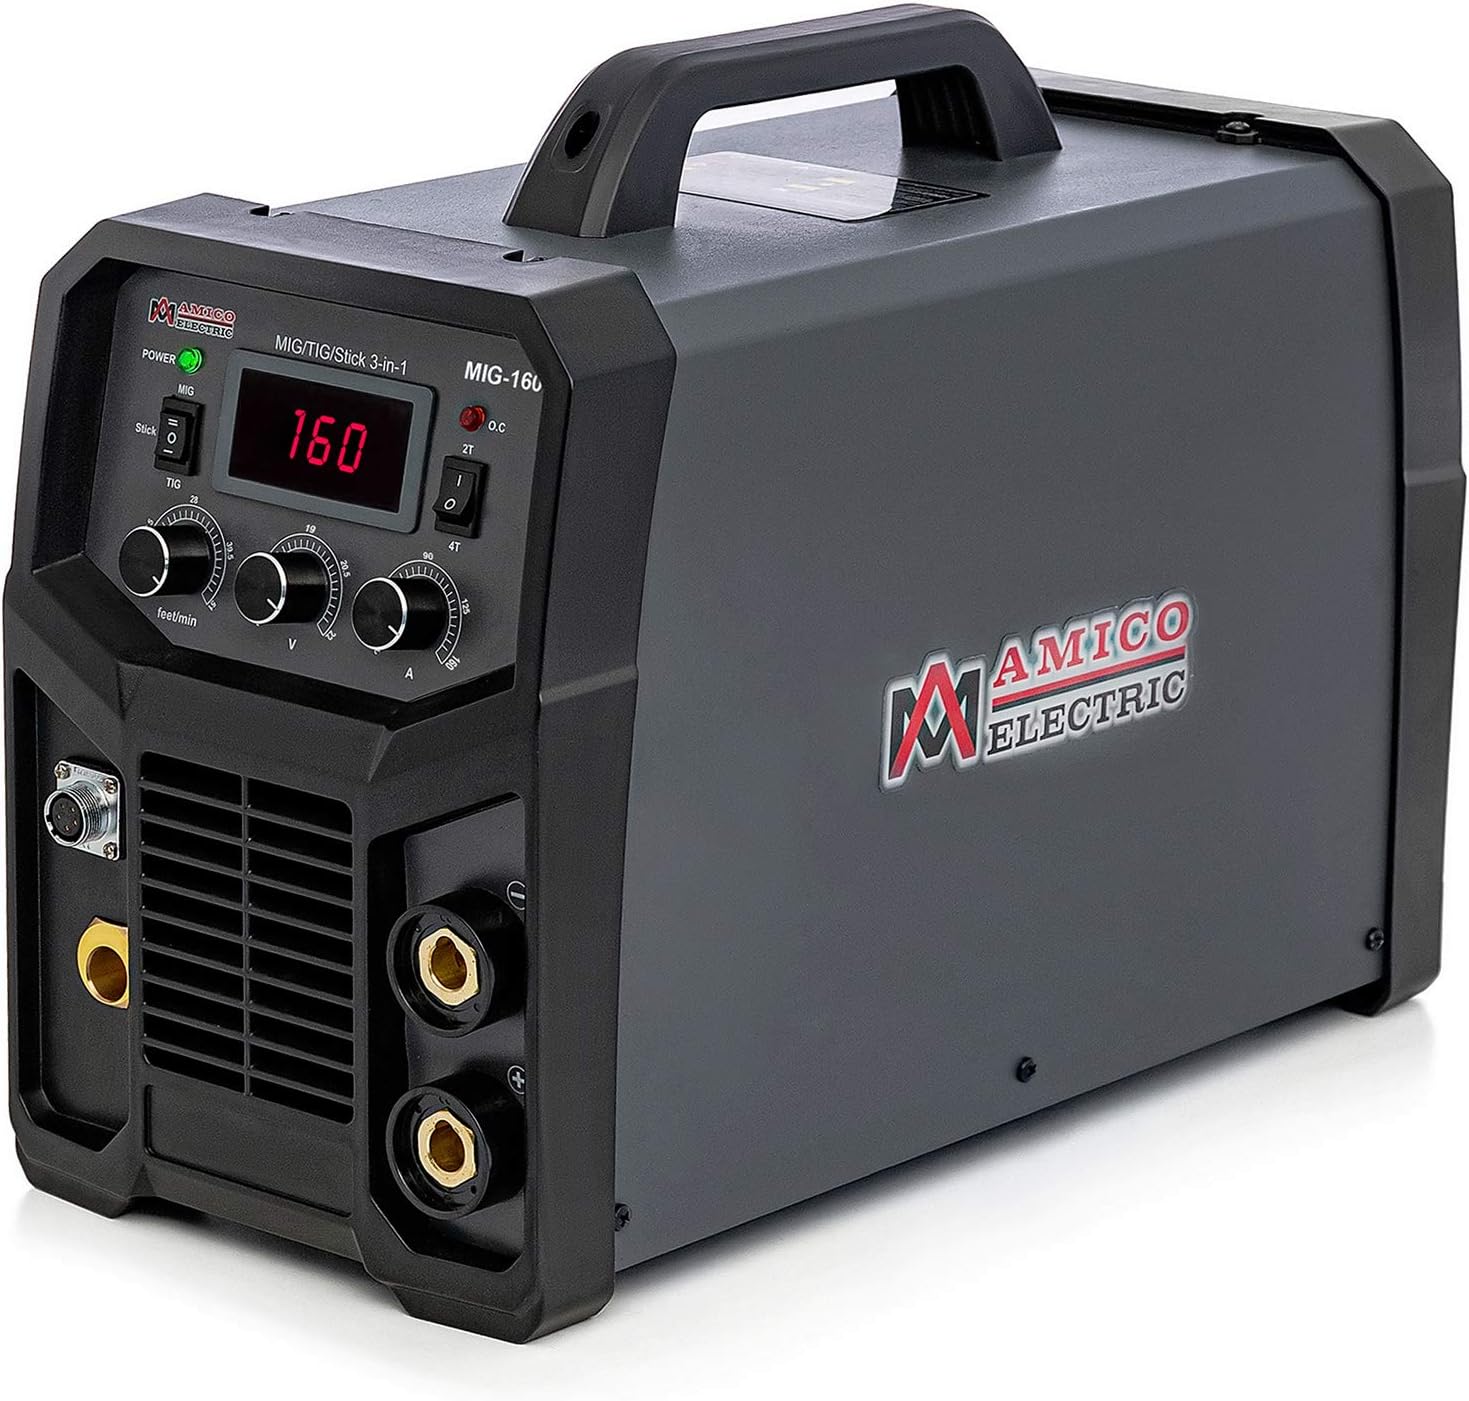
Figure 2: Angled view of the AmicoElectric MIG-160 welder, highlighting its compact design and integrated handle for portability.

Figure 3: Close-up of the MIG-160 control panel, featuring the digital display, mode selection switches, and adjustment knobs for wire feed speed, voltage, and amperage.
Included Accessories:
- 10 ft. Pro. MIG Torch Assembly
- 10 ft. Electrode Holder Assembly
- 10 ft. Work Clamp Assembly
- 230V to 115V Power Adapter
- 7 ft. Power Cord N6-50P Plug

Figure 4: Image showing the included accessories: MIG torch, electrode holder, work clamp, and power adapter.
Setup
1. Power Connection:
The MIG-160 features an intelligent power supply system that automatically detects input voltage, allowing operation on both 115V and 230V AC power (50-60Hz). Use the appropriate power cord and adapter for your power source.
- Ensure the power source matches the welder's requirements.
- Connect the 7 ft. power cord (N6-50P plug) to a suitable 230V outlet.
- For 115V operation, use the provided 230V to 115V power adapter.
- The machine can resist power fluctuations and cable attenuation, even with extended power cords up to 700 feet.
2. Wire Spool Installation (MIG/MAG/Flux-Core):
The welder accommodates 10-pound (8-inch) and 2-pound (4-inch) wire spools.
- Open the side panel of the welder to access the wire feeder compartment.
- Place the wire spool onto the spool holder, ensuring it rotates freely.
- Thread the welding wire through the wire feeder mechanism, ensuring it passes through the correct groove for the wire size.
- Close the wire feeder tension arm and adjust the tension knob to prevent slippage or crushing of the wire.
- Ensure the wire is properly seated in the drive rollers.

Figure 5: Internal view of the wire spool compartment, showing a 10-pound spool installed.

Figure 6: Close-up of the high-performance double-gear drive wire feeder mechanism.
3. Connecting Welding Accessories:
- Work Clamp: Connect the work clamp assembly to the negative (-) terminal on the front panel. Securely attach the clamp to the workpiece or welding table to ensure a good electrical connection.
- MIG Torch: Connect the MIG torch assembly to the designated MIG connector on the front panel. Ensure the gas line (if using shielding gas) is also connected to the appropriate inlet on the welder and to a gas cylinder with a regulator.
- Electrode Holder (STICK): For STICK welding, connect the electrode holder assembly to the positive (+) terminal.
- TIG Torch (Lift-TIG): For Lift-TIG welding, connect the TIG torch to the negative (-) terminal. A separate gas line for argon shielding gas will be required for the TIG torch.
Operating Instructions
The MIG-160 offers multiple welding processes. Select the desired mode using the switch on the control panel.
1. MIG/MAG/Flux-Core Welding:
- Switch the mode selector to "MIG".
- Adjust the wire feed speed (feet/min) and voltage (V) using the corresponding knobs on the control panel. Refer to welding charts for recommended settings based on material thickness and wire type.
- For aluminum welding, a spool gun (SPG15180 & SPG15250, sold separately) is recommended for optimal performance.
- Ensure shielding gas is flowing if using MIG/MAG with gas. For Flux-Core welding, no external shielding gas is required.
2. STICK Welding:
- Switch the mode selector to "Stick".
- Insert the appropriate electrode (e.g., E6010, E6011, E6013, E7014, E7018) into the electrode holder.
- Adjust the amperage (A) using the control knob.
- The machine features built-in hot start, anti-stick, and thrust adjustment functions for improved arc control and ease of use.
3. Lift-TIG Welding:
- Switch the mode selector to "TIG".
- Ensure the TIG torch is connected and argon shielding gas is flowing.
- Adjust the amperage (A) for the desired weld.
- Initiate the arc by gently touching the tungsten electrode to the workpiece and then lifting it slightly. The machine will automatically sense the contact and initiate the arc without high-frequency interference.
Maintenance
Regular maintenance ensures the longevity and optimal performance of your welder.
- Cleaning: Periodically clean the internal components of the welder using dry compressed air to remove dust and metal particles. Ensure the machine is unplugged before cleaning.
- Wire Feeder: Inspect the wire feeder rollers for wear and cleanliness. Clean any debris that may impede smooth wire feeding.
- Cables and Connections: Regularly check all welding cables, torch connections, and power cords for damage, fraying, or loose connections. Replace damaged components immediately.
- Cooling Fan: Ensure the cooling fan vents are clear of obstructions to maintain proper airflow and prevent overheating. The automatic temperature control function helps manage heat.
Troubleshooting
If you encounter issues with your MIG-160 welder, refer to the following common troubleshooting steps:
- No Power: Check the power cord connection, circuit breaker, and ensure the power switch on the welder is in the "ON" position. Verify the input voltage is within the specified range (115V/230V).
- No Arc: Ensure the work clamp is securely attached to the workpiece. Check all cable connections. For MIG, verify wire feed and gas flow. For STICK, ensure the electrode is making proper contact. For TIG, ensure the tungsten is clean and the gas is flowing.
- Poor Weld Quality: Adjust welding parameters (amperage, voltage, wire feed speed) according to the material and process. Ensure proper shielding gas coverage (if applicable) and clean workpiece surfaces. Check for correct electrode/wire size and type.
- Overheating: If the welder shuts down due to overheating, allow it to cool down. Ensure cooling vents are clear and the duty cycle is not exceeded. The automatic temperature control will reactivate the machine once it cools.
Specifications
| Feature | Specification |
|---|---|
| Welder Type | 3-IN-1 MIG/TIG/STICK Combo Welder |
| Power Supply | AC 115V & 230V/1-Phase/50-60Hz |
| Current Range Output (MIG) | 230V: 40A-160A, 115V: 30A-130A |
| Current Range Output (TIG) | 230V: 15A-160A, 115V: 10A-130A |
| Current Range Output (STICK) | 230V: 15A-160A, 115V: 10A-130A |
| Nominal DC Open Circuit Voltage (OCV) | 56V |
| Duty Cycle (MIG/TIG/STICK) | 60% at 160-Amp |
| Max. Wire Feeding Speed | 610 inch/min |
| Efficiency | 93% |
| Power Factor | 0.85 |
| Cooling Method | Fan Cooled |
| Product Dimensions | 17.75 x 8.25 x 13.8 in. (45.09 x 20.96 x 35.05 cm) |
| Product Weight | 30.0 lbs (13.6 kg) |
| Manufacturer | Amico Electric Corp |
| Certification | ETL Listed |
Warranty and Support
For warranty information, technical support, or service inquiries, please contact AmicoElectric customer service. Keep your purchase receipt and product model number (MIG-160) readily available when contacting support.
Manufacturer: Amico Electric Corp
Model: MIG-160