1. Introduction
Thank you for choosing the RBROHANT Gold Shower System. This system is designed to provide a luxurious and efficient showering experience with its 10-inch high-pressure round rain shower head, handheld spray, and durable brass construction. This manual provides detailed instructions for installation, operation, maintenance, and troubleshooting to ensure optimal performance and longevity of your shower system.
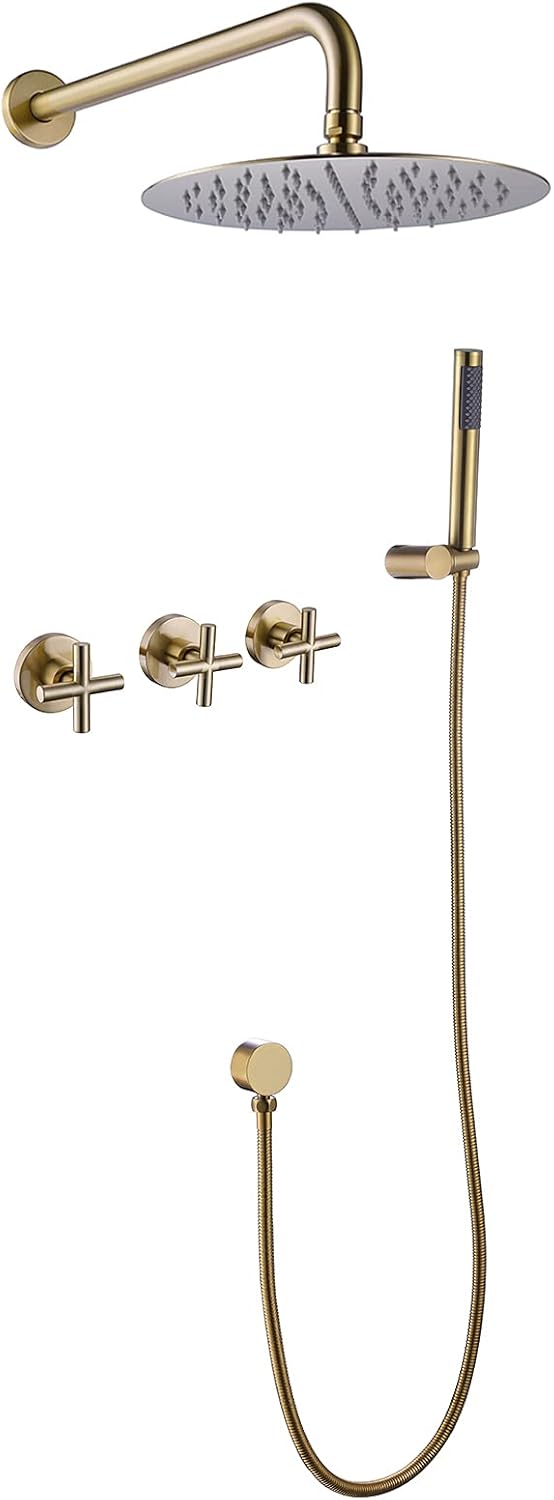
Image 1.1: Overview of the RBROHANT Gold Shower System components.
2. Safety Information
Please read all instructions carefully before installation and use. Failure to follow these instructions may result in property damage, personal injury, or voiding of the warranty.
- Always turn off the main water supply before beginning any plumbing work.
- Wear appropriate personal protective equipment (PPE), such as safety glasses and gloves, during installation.
- If you are unsure about any part of the installation process, consult a qualified plumber.
- Ensure all connections are secure and watertight to prevent leaks.
- Protect the finish of the faucet fixtures carefully during installation to prevent scratches or damage.
3. Package Contents
Verify that all components are present and undamaged before proceeding with installation:
- 1 x 10-inch Round Gold Rain Shower Head (304 stainless steel)
- 1 x Extra Long 15.74-inch Shower Arm (solid brass, Flange Included)
- 1 x Handheld Sprayer (solid brass)
- 1 x 59-inch Shower Hose (304 stainless steel)
- 1 x Shower Mixer Rough-in Valve (solid brass) and Handle Trim Kit (Zinc Alloy)
- 1 x Necessary Screws Tool Kit

Image 3.1: All included components of the shower system.
4. Installation Instructions
This shower system is designed for wall-mounted installation and uses standard 1/2-inch NPT connectors, compatible with American and Canadian plumbing pipe supply. Professional installation is recommended.
4.1. Pre-Installation Steps
- Turn off Water Supply: Locate and turn off the main water supply to your bathroom.
- Prepare Wall: Ensure the wall where the shower system will be installed is prepared according to plumbing codes and is structurally sound to support the fixture.
- Review Diagram: Carefully study the installation diagram provided to understand the required dimensions and connections.
4.2. Rough-in Valve Installation
The solid brass rough-in valve is the core of your shower system. It must be securely installed within the wall.
- Position the rough-in valve at the desired height, ensuring it is level.
- Connect the hot and cold water lines to the appropriate inlets on the valve using 1/2-inch NPT connections.
- Connect the outlets for the rain shower head and handheld spray to the corresponding ports on the valve.
- Secure the valve to the wall studs or blocking using appropriate fasteners.

Image 4.1: Installation diagram with recommended dimensions (all dimensions are indicative and can be adjusted to user needs).
4.3. Shower Arm and Rain Shower Head Installation
- Apply plumber's tape to the threaded ends of the shower arm.
- Thread the shower arm into the wall outlet connected to the rough-in valve. Tighten securely.
- Attach the 10-inch rain shower head to the end of the shower arm. Ensure the connection is tight but do not overtighten.

Image 4.2: The 10-inch round rain shower head.
4.4. Handheld Spray and Hose Installation
- Install the wall supply elbow for the handheld spray at the desired height, connecting it to the appropriate outlet from the rough-in valve.
- Connect one end of the 59-inch shower hose to the wall supply elbow.
- Connect the other end of the shower hose to the handheld sprayer.
- Mount the handheld sprayer holder to the wall at a convenient height.

Image 4.3: The handheld shower spray.
4.5. Handle Trim Kit Installation
Once the rough-in valve is installed and the wall is finished, install the handle trim kit.
- Follow the specific instructions provided with the trim kit to attach the handles and escutcheons over the rough-in valve.
- Ensure the handles operate smoothly and are properly aligned.

Image 4.4: Example of the rough-in valve and handles.
5. Operating Instructions
The RBROHANT Gold Shower System features three handles for precise control over water temperature and flow.
- Water Temperature Control: Use the two outer handles to control the hot and cold water supply. Turn them to adjust the desired water temperature.
- Diverter Handle: The central handle acts as a diverter. Turn this handle to switch water flow between the main rain shower head and the handheld spray.
- Rain Shower Head: The 10-inch rain shower head utilizes Air-in technology to inject air into the water, providing a high-pressure, bubble-infused shower experience while conserving water.
- Handheld Spray: The separate wall supply elbow design allows the handheld sprayer to reach farther, offering flexibility for showering and cleaning the bathroom.

Image 5.1: The shower system in operation, showcasing the rain shower head.

Image 5.2: The handheld shower spray in use.
6. Maintenance
Proper care and maintenance will help preserve the brushed gold finish and ensure the long-term functionality of your shower system.
- Cleaning: Clean the shower system regularly with a soft cloth and mild soap or a non-abrasive cleaner specifically designed for brushed finishes. Avoid harsh chemicals, abrasive cleaners, or scouring pads, as these can damage the finish.
- Mineral Deposits: For hard water areas, mineral deposits may accumulate on the shower head nozzles. Gently rub the rubber nozzles to dislodge any buildup. For stubborn deposits, a solution of white vinegar and water can be used, but ensure to rinse thoroughly afterward.
- Leak Prevention: Periodically check all connections for any signs of leaks. Tighten connections as needed, but do not overtighten.
7. Troubleshooting
If you encounter any issues with your RBROHANT Gold Shower System, refer to the following common problems and solutions:
| Problem | Possible Cause | Solution |
|---|---|---|
| Low Water Pressure | Clogged shower head nozzles; partially closed shut-off valves; water restrictor buildup. | Clean shower head nozzles. Ensure shut-off valves are fully open. Check for and clean any water restrictors if applicable. |
| Leaking from Connections | Loose connections; worn out O-rings or gaskets; improper installation. | Tighten all connections. Replace O-rings or gaskets if damaged. Re-evaluate installation steps. |
| Water Temperature Issues | Improper adjustment of hot/cold handles; issue with water heater. | Adjust hot and cold water handles. Check your water heater settings. |
| Diverter Not Working | Internal diverter mechanism issue; debris in valve. | Contact customer support for assistance. |
If the problem persists after attempting these solutions, please contact RBROHANT customer support.
8. Specifications
| Feature | Detail |
|---|---|
| Brand | RBROHANT |
| Model Number | RCS81010 |
| Color | Brushed Gold |
| Material | Brass (Valve, Shower Arm, Handheld Sprayer), 304 Stainless Steel (Rain Shower Head, Shower Hose), Zinc Alloy (Handle Trim Kit) |
| Finish Type | Brushed |
| Number of Handles | 3 |
| Mounting Type | Wall Mount |
| Head Size | 10 inches (Rain Shower Head) |
| Shower Arm Length | 15.74 inches |
| Shower Hose Length | 59 inches |
| Connection Size | Standard 1/2-inch NPT |
| Item Weight | 9.7 pounds (approx. 4.41 kg) |
| Product Dimensions | 17.32 x 13.78 x 5.31 inches |
| Certifications | cUPC Certified Cartridge |
9. Warranty and Support
RBROHANT stands by the quality of its products and offers a comprehensive warranty and customer support.
9.1. Lifetime Warranty
The RBROHANT Gold Shower System comes with a lifetime warranty. RBROHANT fully supports the Amazon Return Policy and offers lifetime after-sale service. If you encounter any problems during installation or usage, please contact us for free replacements for any part of this shower system.
9.2. Customer Support
For any questions, concerns, or assistance with your product, please contact RBROHANT customer service. We aim to provide a 12-hour fast reply to all inquiries.

Image 9.1: RBROHANT customer-oriented services.


