
1. Introduction
This manual provides essential information for the safe and efficient operation of your GIGABYTE AORUS FO48U 48" 4K OLED Gaming Monitor. Please read this manual thoroughly before using the product and retain it for future reference. The AORUS FO48U is designed to deliver a high-performance visual experience with its 4K OLED display, fast refresh rate, and advanced features.
2. Safety Information
Observe the following safety precautions to prevent damage to the monitor and ensure user safety:
- Do not expose the monitor to rain or moisture to avoid fire or shock hazards.
- Do not open the monitor casing. There are no user-serviceable parts inside. Refer all servicing to qualified personnel.
- Place the monitor on a stable, flat surface to prevent it from falling.
- Ensure proper ventilation around the monitor. Do not block ventilation openings.
- Use only the power adapter and cables provided or specified by the manufacturer.
- Unplug the monitor from the power outlet during lightning storms or when unused for long periods.
- Avoid touching the screen with sharp objects to prevent damage.
3. Package Contents
Verify that all items listed below are included in your package:
- GIGABYTE AORUS FO48U 48" 4K OLED Gaming Monitor
- Power cable
- HDMI 2.1 cable
- DP 1.4 cable
- USB 3.0 B to A cable
- Quick Start Guide (QSG)
- Warranty card
- AORUS Remote Control
4. Setup
4.1 Physical Setup
The monitor can be set up using its included stand or a VESA-compatible wall mount.
Stand Assembly:
Follow the instructions in the Quick Start Guide to securely attach the stand to the monitor base. Ensure all screws are tightened.
VESA Wall Mount Installation:
The AORUS FO48U supports VESA wall mounts with a 300 x 300mm pattern. Remove the stand if already attached. Use appropriate screws and a VESA-compatible bracket (not included) to mount the monitor. Refer to your wall mount's instructions for specific installation steps.

Image: Rear view of the AORUS FO48U monitor, highlighting the VESA 300x300mm mounting points for wall installation.
4.2 Connecting Cables
Connect the necessary cables to the monitor's I/O ports. Ensure the monitor is powered off before connecting or disconnecting cables.

Image: Detailed side view of the monitor's I/O ports, including USB 3.0, USB Upstream, USB Type-C (KVM), DisplayPort 1.4, HDMI 2.1, Headphone Jack, and Audio Line-Out.
- Power Connection: Connect the power cable to the monitor's power input and then to a power outlet.
- Video Input: Connect your PC or gaming console using either the provided HDMI 2.1 cable or DisplayPort 1.4 cable. The monitor features two HDMI 2.1 ports and one DisplayPort 1.4.
- USB Connections: Connect the USB 3.0 B to A cable from your PC to the monitor's USB Upstream port to enable the monitor's USB 3.0 ports and KVM functionality.
- USB Type-C (KVM): For KVM functionality, connect a USB Type-C cable (10Gbps Type-C cable required, not always included) from your device to the monitor's USB Type-C port. This allows control of multiple devices with a single keyboard and mouse connected to the monitor.
- Audio Output: Use the Headphone Jack or Audio Line-Out for external audio devices.
4.3 Initial Power On
After connecting all necessary cables, press the power button on the monitor to turn it on. The monitor will automatically detect the active input source. If no signal is detected, ensure your source device is powered on and correctly connected.
5. Operating Instructions
5.1 On-Screen Display (OSD) Navigation
The monitor's settings can be adjusted using the OSD menu, typically accessed via a joystick or buttons on the monitor's rear or bottom edge, or with the included AORUS Remote Control.
- Use the joystick/buttons or remote to navigate through menu options.
- Press to select an option or enter a sub-menu.
- Move left/right or up/down to adjust values or select different settings.
- Press the back button or move the joystick in a specific direction (as indicated on-screen) to exit menus.
5.2 Key Features
The AORUS FO48U offers several features for an enhanced viewing and gaming experience:
- 4K UHD Resolution (3840x2160): Provides crisp, detailed visuals.
- 120Hz Refresh Rate: Ensures smooth motion for gaming and fast-paced content.
- 1ms (GTG) Response Time: Minimizes ghosting and motion blur.
- FreeSync Premium Support: Synchronizes the monitor's refresh rate with your GPU for tear-free gaming.
- 10-bit Color / 98% DCI-P3 / 130% sRGB: Delivers accurate and vibrant color reproduction.

Image: Visual comparison demonstrating the difference between 1ms response time at 120Hz refresh rate and 5ms response time at 60Hz, illustrating smoother motion with higher specifications.
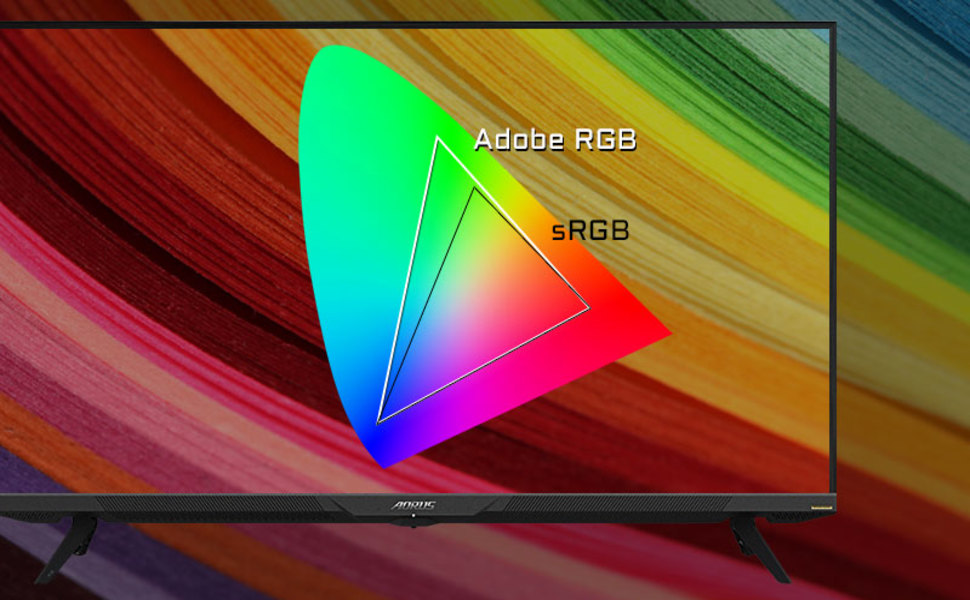
Image: A visual representation of color gamut, comparing Adobe RGB and sRGB color spaces, indicating the monitor's wide color coverage.
5.3 Special Features
The monitor includes several advanced features accessible via the OSD or OSD Sidekick software:
- OSD Sidekick: A software utility that allows you to control OSD settings directly from your desktop.
- Picture-in-Picture (PiP) / Picture-by-Picture (PbP): Display content from multiple sources simultaneously on the screen.
- Dashboard: Real-time hardware information display (e.g., CPU/GPU temperature, fan speed).
- Black Equalizer: Enhances visibility in dark areas without overexposing bright areas.
- Game Assist: Provides in-game enhancements like crosshairs, timers, and refresh rate counters.
- Space Audio: Offers 5 modes of audio experiences for immersive sound.
- KVM Feature: Allows you to control multiple devices (e.g., two PCs) connected to the monitor using a single keyboard and mouse. Connect devices via USB Type-C and USB 3.0 Upstream ports.

Image: A diagram showing how the Type-C KVM feature allows switching between a desktop PC and a laptop connected to the monitor using one keyboard and mouse.
6. Maintenance
6.1 Cleaning the Monitor
To clean the monitor, first unplug the power cord. Use a soft, lint-free cloth lightly dampened with water or a mild, non-abrasive screen cleaner. Do not spray cleaner directly onto the screen. Avoid using alcohol, ammonia, or abrasive cleaners, as they can damage the screen surface.
6.2 OLED Care and Burn-in Prevention
OLED displays are susceptible to image retention (burn-in) if static images are displayed for extended periods. To prolong the life of your OLED panel:
- Avoid displaying static images (e.g., desktop icons, taskbars, logos) for long durations.
- Utilize screen savers or dynamic wallpapers.
- Enable the monitor's built-in OLED care features (e.g., pixel shift, pixel refresh, logo luminance adjustment) through the OSD menu.
- Reduce screen brightness when not needed.
- Power off the monitor when not in use.
7. Troubleshooting
If you encounter issues with your monitor, refer to the following common problems and solutions:
| Problem | Possible Cause | Solution |
|---|---|---|
| No image on screen | Power cable disconnected; Video cable disconnected or loose; Incorrect input source selected; Source device off. | Check power and video cable connections; Ensure source device is on; Select correct input source via OSD. |
| Image is blurry or distorted | Incorrect resolution; Video cable quality; Graphics card driver issues. | Set display resolution to 3840x2160; Use high-quality HDMI 2.1 or DP 1.4 cables; Update graphics drivers. |
| Screen randomly turns off/on | Loose video cable; Power supply issue; Monitor firmware issue; Source device instability. | Ensure video cables are securely connected; Try a different power outlet; Check for and install the latest monitor firmware updates from GIGABYTE's website; Test with a different source device. |
| No sound | Volume too low or muted; Incorrect audio output selected; Audio cable disconnected. | Adjust monitor volume; Select correct audio output in PC settings; Ensure external speakers/headphones are connected. |
| KVM feature not working | Incorrect USB cable; USB Upstream cable not connected; Devices not properly configured. | Ensure a 10Gbps USB Type-C cable is used for Type-C connection; Connect the USB 3.0 B to A cable to your primary PC; Refer to the OSD Sidekick software for KVM setup. |
8. Specifications
Key technical specifications for the GIGABYTE AORUS FO48U monitor:
| Feature | Detail |
|---|---|
| Screen Size | 48 Inches |
| Panel Type | OLED |
| Resolution | 3840 x 2160 (4K UHD) |
| Refresh Rate | 120Hz |
| Response Time | 1ms (GTG) |
| Color Gamut | 98% DCI-P3 / 130% sRGB |
| Color Depth | 10-bit |
| Viewing Angle | 178°(H)/178°(V) |
| Connectivity | 2x HDMI 2.1, 1x DisplayPort 1.4, 1x USB Type-C (KVM), 2x USB 3.0, 1x USB 3.0 Upstream, Earphone Jack, Audio Line-Out |
| Speakers | 2x 15W, 1x 20W (Space Audio) |
| VESA Mount | 300 x 300mm |
| Dimensions (WxHxD) | 26.58 x 42.07 x 9.89 inches (with stand) |
| Weight | 39.8 pounds (with stand) |
9. Warranty and Support
For detailed warranty information, please refer to the warranty card included in your product package or visit the official GIGABYTE website. For technical support, driver downloads, and further assistance, please visit the GIGABYTE support page or contact their customer service.
GIGABYTE Official Website: www.gigabyte.com


