Introduction
This manual provides comprehensive instructions for the setup, operation, and maintenance of your Browning BTC-5HD-MXP Strike Force HD MAX Plus Outdoor Trail Camera. Designed for robust outdoor use, this camera captures high-quality photos and videos, making it ideal for wildlife monitoring and surveillance. Please read this manual thoroughly before using the device to ensure proper function and longevity.
Safety Information
- Do not expose the camera to extreme temperatures or direct sunlight for prolonged periods.
- Ensure all battery compartments and covers are securely closed to prevent water ingress.
- Use only recommended battery types (AA batteries). Do not mix old and new batteries or different battery types.
- Keep the camera away from strong magnetic fields.
- Do not attempt to disassemble or modify the camera. This will void the warranty.
- Dispose of batteries responsibly according to local regulations.
Package Contents
Verify that all items listed below are included in your package:
- Browning BTC-5HD-MXP Strike Force HD MAX Plus Trail Camera
- 6-Foot Tree Mount Strap
- Blucoil 32GB Class 10 SDHC SD Card
- Blucoil 6.5-Foot Multi-Functional Combination Cable Lock with 4-Digit Password Code
- 4-Pack of Blucoil AA Batteries
- 5-Pack of Blucoil Reusable Velcro Cable Ties
- VidPro USB 2.0 Card Reader

Image: The complete Browning BTC-5HD-MXP Strike Force HD MAX Plus bundle, including the trail camera, SD card, cable lock, batteries, cable ties, and USB card reader.
Setup
1. Battery Installation
The camera requires 6 AA batteries for operation. Ensure correct polarity when inserting the batteries.
- Open the camera's main compartment latch.
- Locate the battery compartment.
- Insert 6 AA batteries, matching the positive (+) and negative (-) terminals as indicated.
- Close the battery compartment securely.
2. SD Card Installation
A Blucoil 32GB Class 10 SDHC SD Card is included. The camera supports SDXC memory cards up to 512GB.
- With the camera open, locate the SD card slot, typically near the control panel.
- Insert the SD card with the label facing the front of the camera until it clicks into place.
- To remove, press the SD card gently to eject it.

Image: The Browning trail camera with its front panel open, revealing the control screen, navigation buttons, and the SD card slot. The "SD CARD" and "Eject" labels are visible.
3. Mounting the Camera
Use the included 6-foot tree mount strap to secure the camera to a tree or post.
- Thread the tree mount strap through the slots on the back of the camera.
- Wrap the strap around the desired mounting surface (e.g., tree trunk).
- Pull the strap tight and secure it to ensure the camera is stable and does not move.
- Position the camera to capture the desired area, ensuring no obstructions are in the field of view.
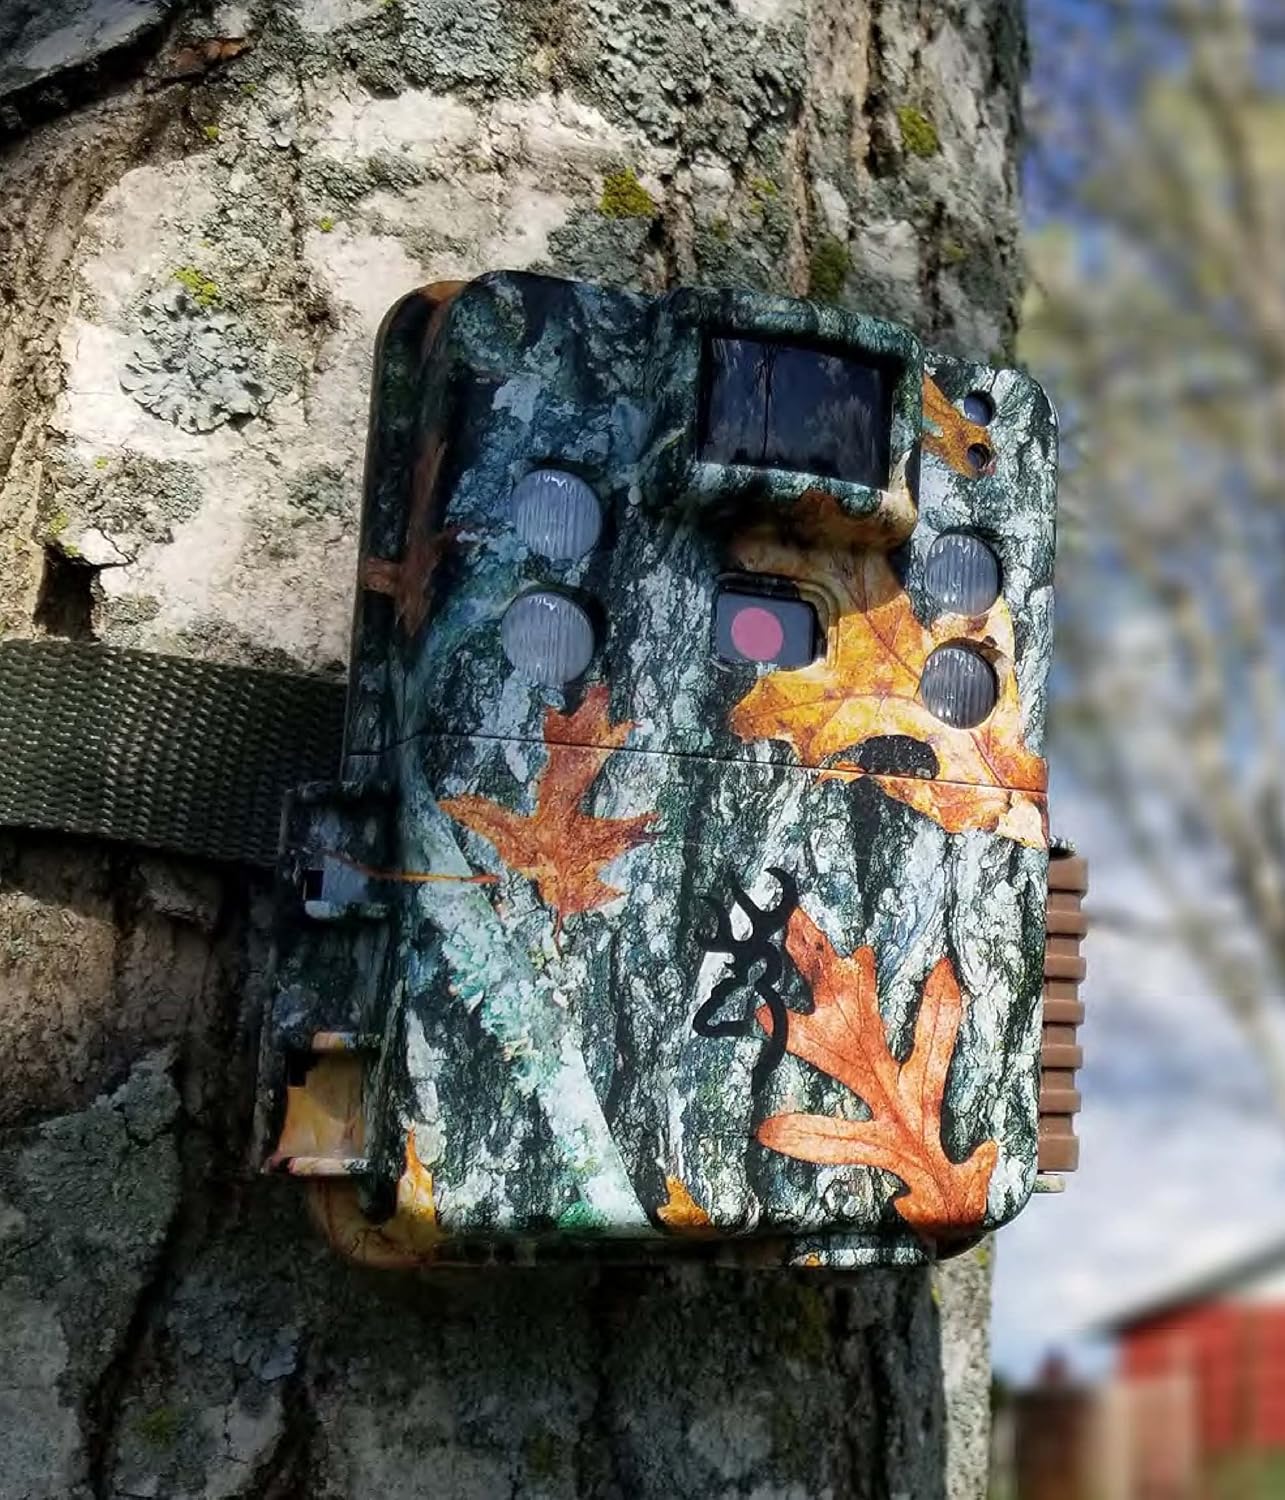
Image: The Browning trail camera securely mounted on a tree trunk using its strap, blending into the natural environment with its camouflage pattern.
4. Securing with Cable Lock
The Blucoil 6.5-Foot Multi-Functional Combination Cable Lock provides additional security for your camera.
- Locate the security cable slots on the camera body.
- Thread the cable lock through these slots and around the mounting surface.
- Set your desired 4-digit combination (initial password is 0000) and secure the lock. Refer to the cable lock's instructions for changing the combination.

Image: A Browning trail camera secured to a tree with a Blucoil 6.5-foot combination cable lock, demonstrating its anti-theft feature.
Operating the Camera
Powering On/Off
To power on the camera, slide the power switch to the "ON" position. To power off, slide it to "OFF".
Basic Modes
The Strike Force HD MAX Plus offers various capture modes:
- Photo Mode: Captures still images.
- Video Mode: Records video clips with sound.
- Timelapse Plus Mode: Captures images at pre-set intervals over a period. These can be compiled into a video using the Buck Watch Timelapse Viewer software.
Use the "MODE" button on the control panel to cycle through these options and the navigation buttons to select settings.
Adjusting Settings
The camera allows for customization of several parameters:
- Trigger Speed: Adjustable from 0.135s to 0.7s for faster or slower detection response.
- Recovery Time: A shorter 0.5s recovery time between images allows for more frequent captures.
- Capture Timer: This function allows you to specify the operational hours of the camera.
- Resolution: Set desired photo (up to 20MP) and video (up to 1600 x 900p HD+) resolution.
Nighttime Operation
The camera features Illuma-Smart technology that automatically adjusts the 90-FT IR flash power for clear nighttime photos. The infrared illumination range extends up to 100-FT.
Viewing Recordings
To view captured images and videos:
- Remove the SD card from the camera.
- Insert the SD card into the VidPro USB 2.0 Card Reader.
- Connect the card reader to your computer (Mac or Windows).
- Access the files on the SD card through your computer's file explorer.
- For Timelapse videos, download the Buck Watch Timelapse Viewer Software from Browning's official webpage. Note: This software is not compatible with Mac. Mac users can view timelapse images by changing the file extension from .TLS to .AVI format.

Image: The VidPro USB 2.0 Card Reader, a compact device for transferring data from various memory card types to a computer.
Maintenance
Cleaning
- Wipe the camera's exterior with a soft, damp cloth. Avoid abrasive cleaners.
- Gently clean the lens and IR sensors with a lens cleaning cloth or brush to ensure clear images.
- Ensure no debris is obstructing the motion sensor.
Battery Replacement
Replace all 6 AA batteries when the low battery indicator appears on the camera's screen or when performance degrades. Always replace all batteries at once with new ones of the same type.
SD Card Management
Regularly format your SD card using the camera's internal formatting function or a computer to maintain optimal performance and prevent data corruption. Back up important files before formatting.
Storage
When not in use for extended periods, remove batteries from the camera and store it in a cool, dry place away from direct sunlight.
Troubleshooting
| Problem | Possible Cause | Solution |
|---|---|---|
| Camera not powering on. | Dead or incorrectly inserted batteries. | Replace batteries with new ones, ensuring correct polarity. |
| No images/videos captured. | SD card full, not inserted correctly, or corrupted; motion sensor obstructed; camera in wrong mode. | Check SD card, format if necessary. Clear sensor. Ensure camera is in active capture mode. |
| Poor quality nighttime images. | IR flash obstructed; object too far; low batteries. | Clear obstructions. Ensure target is within 100-FT IR range. Replace batteries. |
| Timelapse videos not playing on Mac. | Buck Watch Timelapse Viewer not Mac compatible. | Change file extension from .TLS to .AVI. |
Specifications
| Feature | Detail |
|---|---|
| Model | BTC-5HD-MXP |
| Effective Still Resolution | 20 MP |
| Video Capture Resolution | 1920 x 1080 FHD (with Sound) / 1600 x 900p HD+ |
| Trigger Speed | 0.135 - 0.7 seconds (adjustable) |
| Recovery Time | 0.5 seconds |
| Detection Range | 80-FT |
| IR Flash Range | 100-FT (Illuma-Smart) |
| Power Source | 6 AA Batteries |
| Memory Card Support | Up to 512GB SDXC (32GB SDHC included) |
| Connectivity Technology | Wireless (Wi-Fi) |
| Indoor/Outdoor Usage | Outdoor |
| Material | Zinc |
| Dimensions (L x W x H) | 1 x 1 x 1 inches |
| Item Weight | 1 pound |
| International Protection Rating | IP54 |
Warranty and Support
For warranty information and technical support, please refer to the official Browning Trail Cameras website or contact their customer service. Keep your purchase receipt as proof of purchase for any warranty claims.
For additional support regarding Blucoil accessories (SD card, cable lock, batteries, cable ties), please visit the Blucoil official website or contact their customer support.


