1. Introduction
This user manual provides essential information for the safe and efficient operation, installation, and maintenance of your Cole-Parmer Gravity Convection Drying Oven, 96 L, 120 VAC. Please read this manual thoroughly before operating the oven to ensure proper usage and to prevent potential hazards or damage to the equipment.
The Cole-Parmer Gravity Convection Drying Oven is designed for applications requiring uniform sample temperature, such as sterilization, powder drying, and high-temperature storage, utilizing natural convection heating.
2. Safety Information
General Safety Precautions:
- Always operate the oven on a stable, level, and heat-resistant surface.
- Ensure adequate ventilation around the oven to prevent heat buildup.
- Do not operate the oven near flammable materials or in explosive atmospheres.
- Wear appropriate personal protective equipment (PPE), such as heat-resistant gloves, when handling hot items or surfaces.
- Never place sealed containers or volatile substances inside the oven.
- Disconnect power before performing any maintenance or cleaning.
Electrical Safety:
- Connect the oven only to a grounded 120 VAC power outlet.
- Do not use extension cords unless absolutely necessary and ensure they are rated for the oven's power requirements.
- Inspect the power cord regularly for damage. Do not use if damaged.
3. Product Overview
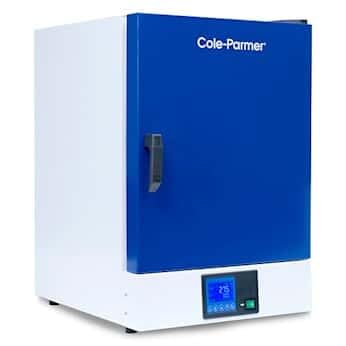
The Cole-Parmer Gravity Convection Drying Oven is designed for precise temperature control and uniform heating. Key features include a PID controller, an easy-to-view LCD, and a corrosion-resistant stainless steel interior.
3.1 Key Components
- PID Controller: Provides accurate and reliable temperature control up to 392°F (200°C).
- LCD Display: Shows time, current temperature, set temperature, running status, and fan status.
- Silicone Rubber Gasket: Ensures a tight seal for heat retention and low energy consumption.
- Stainless Steel Interior: Corrosion-resistant mirror stainless steel chamber for durability and easy cleaning.
- Powder-Coated Steel Exterior: Durable and easy to maintain.
- Adjustable Shelves: Multiple shelf positions for flexible sample placement.
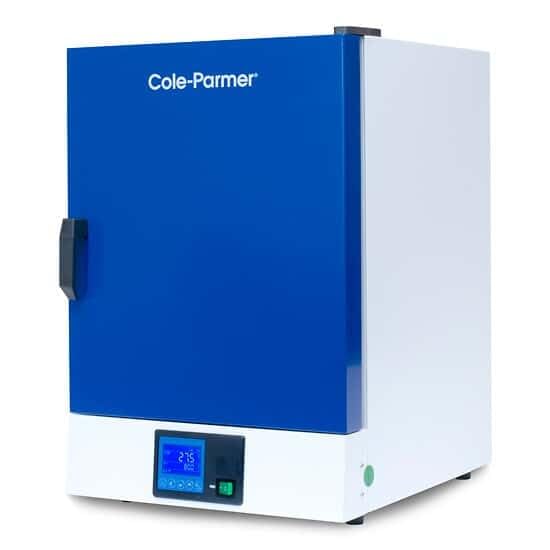
3.2 Product Views
4. Setup
Follow these steps to properly set up your drying oven:
- Unpacking: Carefully remove the oven from its packaging. Inspect for any shipping damage. Report any damage to the carrier immediately. Retain all packaging materials for future transport or service.
- Placement:
- Place the oven on a sturdy, level, non-combustible surface capable of supporting its weight.
- Ensure there is at least 15 cm (6 inches) of clearance on all sides and the top for proper ventilation.
- Avoid placing the oven in direct sunlight, near heat sources, or in areas with excessive dust or humidity.
- Electrical Connection:
- Verify that the local power supply matches the oven's requirements (120 VAC, 60 Hz).
- Plug the power cord into a grounded electrical outlet.
- Shelf Installation:
- Open the oven door.
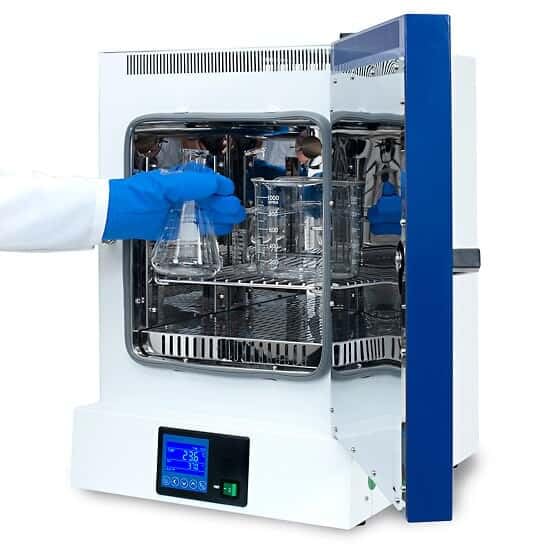
- Insert the provided shelves into the desired positions within the chamber. Ensure shelves are securely seated.
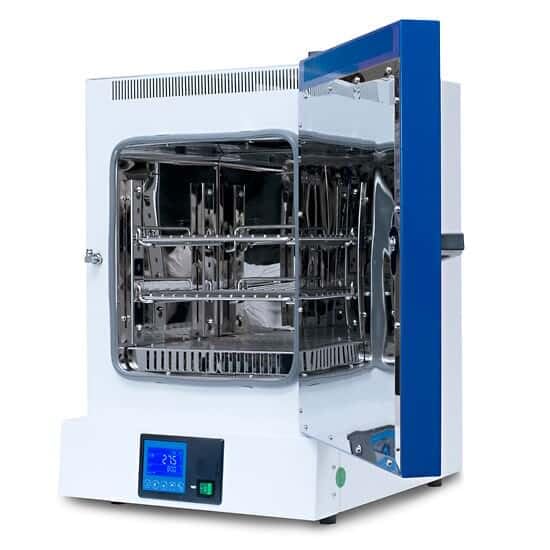
Figure 4.1: Oven interior showing multiple shelf positions. - Initial Cleaning: Before first use, wipe the interior chamber with a damp cloth and mild detergent. Rinse with distilled water and dry thoroughly.
5. Operating Instructions
5.1 Powering On/Off
- To power on, press the main power switch located on the front panel. The LCD display will illuminate.
- To power off, press the main power switch again.
5.2 Setting Temperature
- Press the "SET" button on the PID controller. The set temperature value will flash.
- Use the "Up" and "Down" arrow buttons to adjust the desired temperature.
- Press "SET" again to confirm the new temperature. The oven will begin heating to the set point.
5.3 Setting Timer
The oven features a timer function (0 to 99 hours, 59 minutes).
- Refer to the controller's specific instructions for timer setting, typically involving a dedicated "TIMER" button or a combination with the "SET" button.
- Adjust hours and minutes using the arrow buttons.
- Confirm the timer setting. The oven will operate for the set duration and then automatically shut off or signal completion.
5.4 Loading Samples
- Open the oven door.
- Carefully place samples on the shelves, ensuring even distribution and allowing space for air circulation. Do not overload shelves.
- Close the oven door securely to maintain the seal.
5.5 Monitoring Operation
- The LCD display provides real-time information on current temperature, set temperature, and remaining time (if timer is active).
- The oven includes an auto-start feature after power loss/return and alarms for temperature deviation and overtemperature set point.
6. Maintenance
Regular maintenance ensures optimal performance and extends the lifespan of your oven.
- Cleaning the Interior:
- Allow the oven to cool completely and disconnect from power.
- Remove shelves and clean with a mild, non-abrasive detergent and a damp cloth.
- Wipe down the interior chamber. Avoid harsh chemicals or abrasive cleaners that could damage the stainless steel.
- Dry all surfaces thoroughly before reassembling and operating.
- Cleaning the Exterior: Wipe the exterior surfaces with a damp cloth and mild detergent.
- Gasket Inspection: Periodically inspect the silicone rubber door gasket for cracks, tears, or signs of wear. A damaged gasket can compromise heat retention. The gasket is designed for easy replacement when needed.
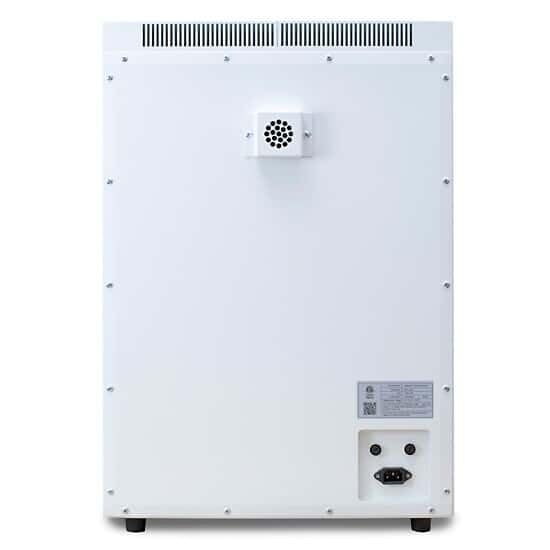
- Ventilation: Ensure the ventilation openings at the rear and sides of the oven remain clear of obstructions.
7. Troubleshooting
This section addresses common issues you might encounter. For problems not listed here, contact Cole-Parmer technical support.
| Problem | Possible Cause | Solution |
|---|---|---|
| Oven does not power on. | No power supply; power cord disconnected; main power switch off. | Check power connection; ensure main power switch is on; check circuit breaker. |
| Oven not heating to set temperature. | Incorrect temperature setting; door not fully closed; faulty heating element. | Verify set temperature; ensure door is sealed; contact service if heating element is suspected. |
| Temperature fluctuations or inaccuracy. | Poor ventilation; damaged temperature sensor; door gasket leak. | Ensure proper clearance around oven; inspect door gasket; contact service for sensor issues. |
| Alarm sounds. | Temperature deviation; overtemperature set point reached; overcurrent protection activated. | Check temperature settings and actual temperature; identify and resolve the condition triggering the alarm. |
8. Specifications
| Parameter | Value |
|---|---|
| Model | 96 L Gravity Convection Drying Oven |
| Brand | Cole-Parmer |
| Control Type | PID Temperature Controller (Knob) |
| Display | LCD |
| Min Temperature | 10°C (50°F) |
| Max Temperature | 200°C (392°F) |
| Temperature Control Accuracy | ±0.5°C |
| Temperature Uniformity | ±3.5% at 100°C |
| Resolution | 0.1°C |
| Rise Time (to 100°C) | 15 to 30 minutes |
| Timer Range | 0 to 99 hours, 59 minutes |
| Power | 120 VAC, 60 Hz |
| Interior Construction | Corrosion-resistant mirror stainless steel |
| Exterior Construction | Powder-coated steel plate |
| Capacity | 96 Liters |
| Number of Shelf Positions | Multiple Adjustable Positions |
9. Warranty and Support
For warranty information, technical assistance, or to order replacement parts, please contact Cole-Parmer customer support. Refer to your purchase documentation for specific warranty terms and contact details.
You can visit the official Cole-Parmer website for additional resources: www.coleparmer.com


