1. Safety Instructions
Please read and understand all safety information before using this battery charger. Failure to follow these instructions may result in electric shock, fire, or serious injury.
- Electrical Safety: Ensure the charger is connected to a grounded outlet. Do not expose the charger to rain or wet conditions. Disconnect the AC power before making or breaking connections to the battery.
- Battery Safety: Always connect the red (+) clamp to the positive battery terminal and the black (-) clamp to the negative battery terminal. Ensure good ventilation when charging lead-acid batteries, as they can produce explosive gases. Do not charge frozen batteries.
- Personal Safety: Wear eye protection and protective clothing when working with batteries. Avoid touching battery acid. Keep children and unauthorized persons away from the charging area.
- Charger Operation: Do not operate the charger if it has received a sharp blow, been dropped, or otherwise damaged. Do not attempt to disassemble the charger. Refer all servicing to qualified service personnel.
2. Product Overview
The FOXSUR 12V/24V 12-Amp 7-Stage Smart Battery Charger is a microprocessor-controlled device designed for charging and maintaining various types of 12V and 24V batteries. It features multiple protection mechanisms and an intelligent digital display for ease of use.

Image 2.1: The FOXSUR Smart Battery Charger, showing its main unit, battery clamps (red for positive, black for negative), and AC power plug.
Key Features:
- Microprocessor Control (CPU): Automatically adjusts charging current and maintains battery health.
- 7-Stage Charging: Optimized charging process for various battery types.
- Wide Compatibility: Suitable for 12V/24V Calcium, GEL, AGM, LiFePO4, Wet, EFB, and Lead-Acid batteries.
- Intelligent Digital Display: LCD screen shows voltage, current, charging status, and battery status.
- Multiple Protection: Includes reverse-polarity, output short, overcharging, overvoltage, over-temperature, and over-current protection.
- Pulse Repair Function: Helps to restore depleted batteries and extend battery life.
Package Contents:
- 1 x FOXSUR Car Battery Charger
- 1 x User Manual (this document)

Image 2.2: The FOXSUR Smart Battery Charger, its cables, and user manual, as typically found in the product packaging.
3. Specifications
| Specification | Value |
|---|---|
| Input Voltage | 100-240V AC, 50-60Hz |
| Rated Output | 12V 12A, 24V 6A |
| Minimum Start Voltage | 8.0V |
| Battery Range | 6-200Ah |
| Thermal Protection | 65°C +/- 5°C |
| Cooling | Fan Cooling |
| Types of Batteries | Most types of 12V/24V batteries, including Calcium, Gel, AGM, SLA, Wet, EFB, Lead Acid, LiFePO4 |
| Product Dimensions | 6.69 x 3.94 x 2.56 inches (17 x 10 x 6.5 cm) |
| Item Weight | 1.58 pounds (0.72 kg) |

Image 3.1: The charger features a heat dissipation fan for efficient cooling during operation.
4. Setup
Follow these steps to safely connect the battery charger to your battery:
- Identify Battery Terminals: Locate the positive (+) and negative (-) terminals on your battery. The positive terminal is usually marked with a plus sign and is larger, while the negative terminal is marked with a minus sign.
- Connect Red Clamp: Connect the red (+) battery clamp from the charger to the positive (+) terminal of the battery.
- Connect Black Clamp: Connect the black (-) battery clamp from the charger to the negative (-) terminal of the battery.
- Connect AC Power: Plug the charger's AC power cord into a standard 100-240V AC wall outlet. The charger will power on and begin its diagnostic process.
- Select Charging Mode: Use the mode button on the charger to select the appropriate charging mode for your battery type (e.g., AGM, CAR, MOTO, LiFePO4, REPAIR). The charger will automatically detect 12V or 24V.
Important: Ensure all connections are secure before plugging into AC power. Disconnect the AC power source before disconnecting the battery clamps.
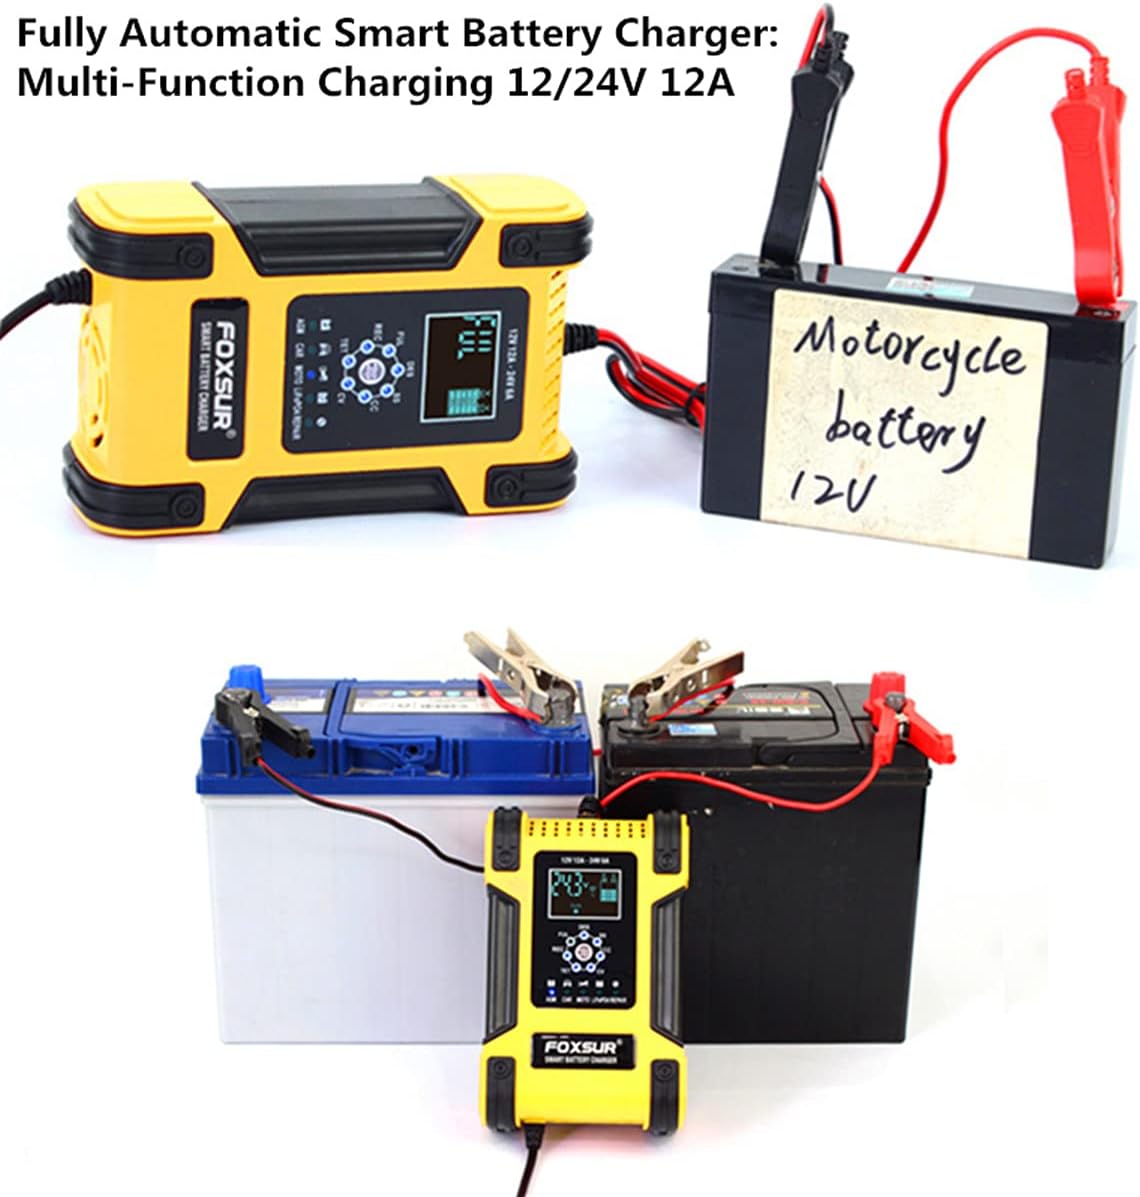
Image 4.1: Example of the charger connected to different battery types, demonstrating proper clamp attachment.
5. Operating Instructions
Once connected and powered on, the charger will automatically begin its 7-stage charging process based on the detected battery voltage and selected mode.
5.1 Digital Display Information
The backlit LCD display provides real-time information:
- Voltage (V): Current battery voltage.
- Current (A): Charging current.
- Charging Status: Icons indicating charging progress.
- Battery Status: Indicates battery health or charge level.
- Temperature: Internal temperature of the charger.
- Battery Full: Indication when charging is complete.

Image 5.1: The charger's LCD display showing current voltage and charging indicators.
5.2 Automatic Mode Selection (Winter/Summer)
The charger features an automatic temperature compensation function:
- Below 10°C (50°F): The charger will automatically enter Winter Mode, adjusting charging parameters for colder conditions.
- Above 28°C (82.4°F): The charger will automatically enter Summer Mode, adjusting charging parameters for warmer conditions.

Image 5.2: Visual representation of the charger automatically switching between Winter and Summer modes based on ambient temperature.
6. Maintenance
The FOXSUR charger includes a pulse repair function designed to help restore depleted and sulfated batteries, potentially extending their lifespan. To use this function, select the 'REPAIR' mode on the charger.
Note: This function cannot activate completely dead batteries or repair batteries that are severely damaged. It also cannot restore a battery to 100% new condition.
General Care:
- Keep the charger clean and dry.
- Store in a cool, dry place when not in use.
- Inspect cables and clamps for damage before each use.
7. Troubleshooting
This section addresses common issues you might encounter with your battery charger.
- Charger does not turn on: Ensure the AC power cord is securely plugged into a live outlet and the battery clamps are correctly connected to the battery terminals.
- Charger displays an error or 'bad battery': The charger has multiple protection features (Image 7.1). If an error is displayed, check for reverse polarity, short circuits, or if the battery voltage is below the minimum start voltage (8.0V). The charger cannot activate batteries with 0V or those severely damaged.
- Charging is slow or not reaching full charge: Ensure the correct charging mode is selected for your battery type. The charger's output current is 12A for 12V batteries and 6A for 24V batteries. Charging time varies significantly based on battery capacity and discharge level.
- Screen appears scratched or cloudy: The LCD screen is covered with a protective film. Gently peel off this film to reveal a clear screen.
Image 7.1: The charger's display indicates various protection statuses, which can help diagnose issues.
8. Warranty and Support
For warranty information and technical support, please refer to the documentation provided at the time of purchase or contact your retailer. Keep your purchase receipt as proof of purchase.
For further assistance, you may also visit the FOXSUR official website or contact their customer service department directly. Contact details are typically found on the product packaging or the manufacturer's website.


