1. Product Overview
The LILYGO TTGO T-Echo is a versatile wireless communication module featuring the NRF52840 microcontroller, LoRa SX1262 transceiver, L76K GPS, and a 1.54-inch E-Paper display. This device is designed for long-range, low-power communication, making it suitable for off-grid messaging, tracking, and various IoT applications. It supports mesh networking protocols like Meshtastic, allowing devices to relay messages to extend communication range.

Figure 1: LILYGO TTGO T-Echo NRF52840 LoRa Wireless Module
2. Key Features
- Microcontroller: NRF52840
- LoRa Transceiver: SX1262 (915MHz) for long-range, low-power communication.
- GPS Module: L76K Multi-System Positioning GNSS (GPS, GLONASS, BeiDou, QZSS) with improved receiving and anti-interference attributes.
- Display: 1.54-inch E-Paper display (200x200 resolution, 2 grey levels, 2s full refresh time).
- Wireless Connectivity: Bluetooth 5, Thread, Bluetooth Mesh, ANT, 802.15.4, Zigbee.
- Bus Interfaces: UART, SPI, TWI, PDM, I2S, QSPI.
- Memory: 2MB Flash, 256KB RAM.
- Optional Sensor: BME280 temperature and pressure sensor (depending on model).
3. Package Contents
Verify that all items are present in your package:
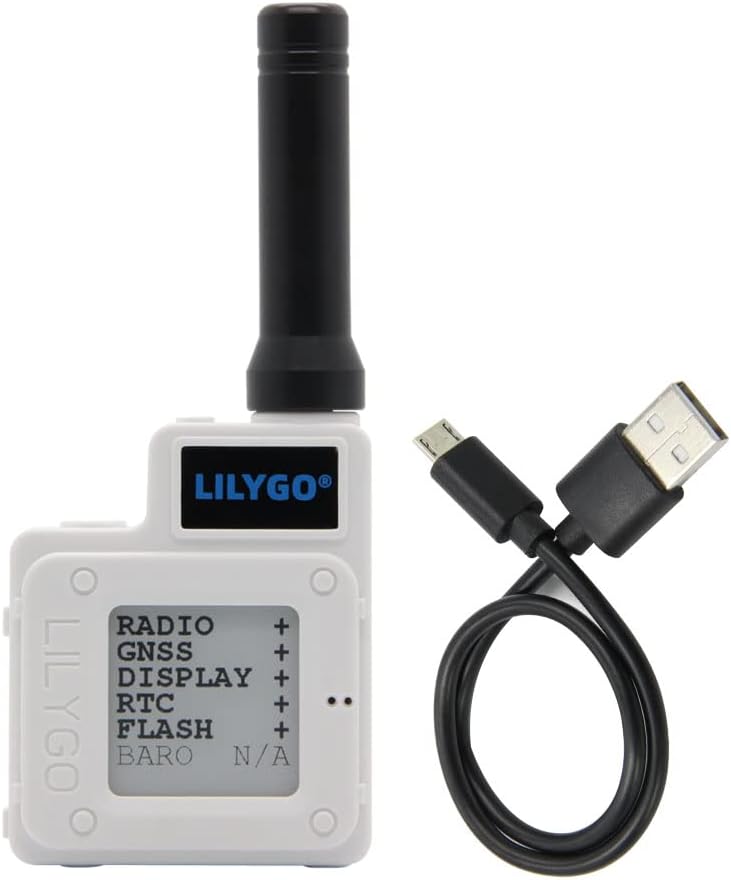
Figure 2: T-Echo module and USB cable
- 1 x SoftRF Motherboard
- 1 x GPS Antenna
- 1 x LORA 915MHz Antenna
- 1 x NFC Antenna
- 1 x Touch Cable
- 1 x Jst 2pin1.25mm Battery Cable
- 1 x TYPE-C USB Cable
- 1 x 850mA Capacity Battery
- 1 x ABS Material Enclosure White
4. Component Identification

Figure 3: Back view with labeled components

Figure 4: Detailed Pinout Diagram
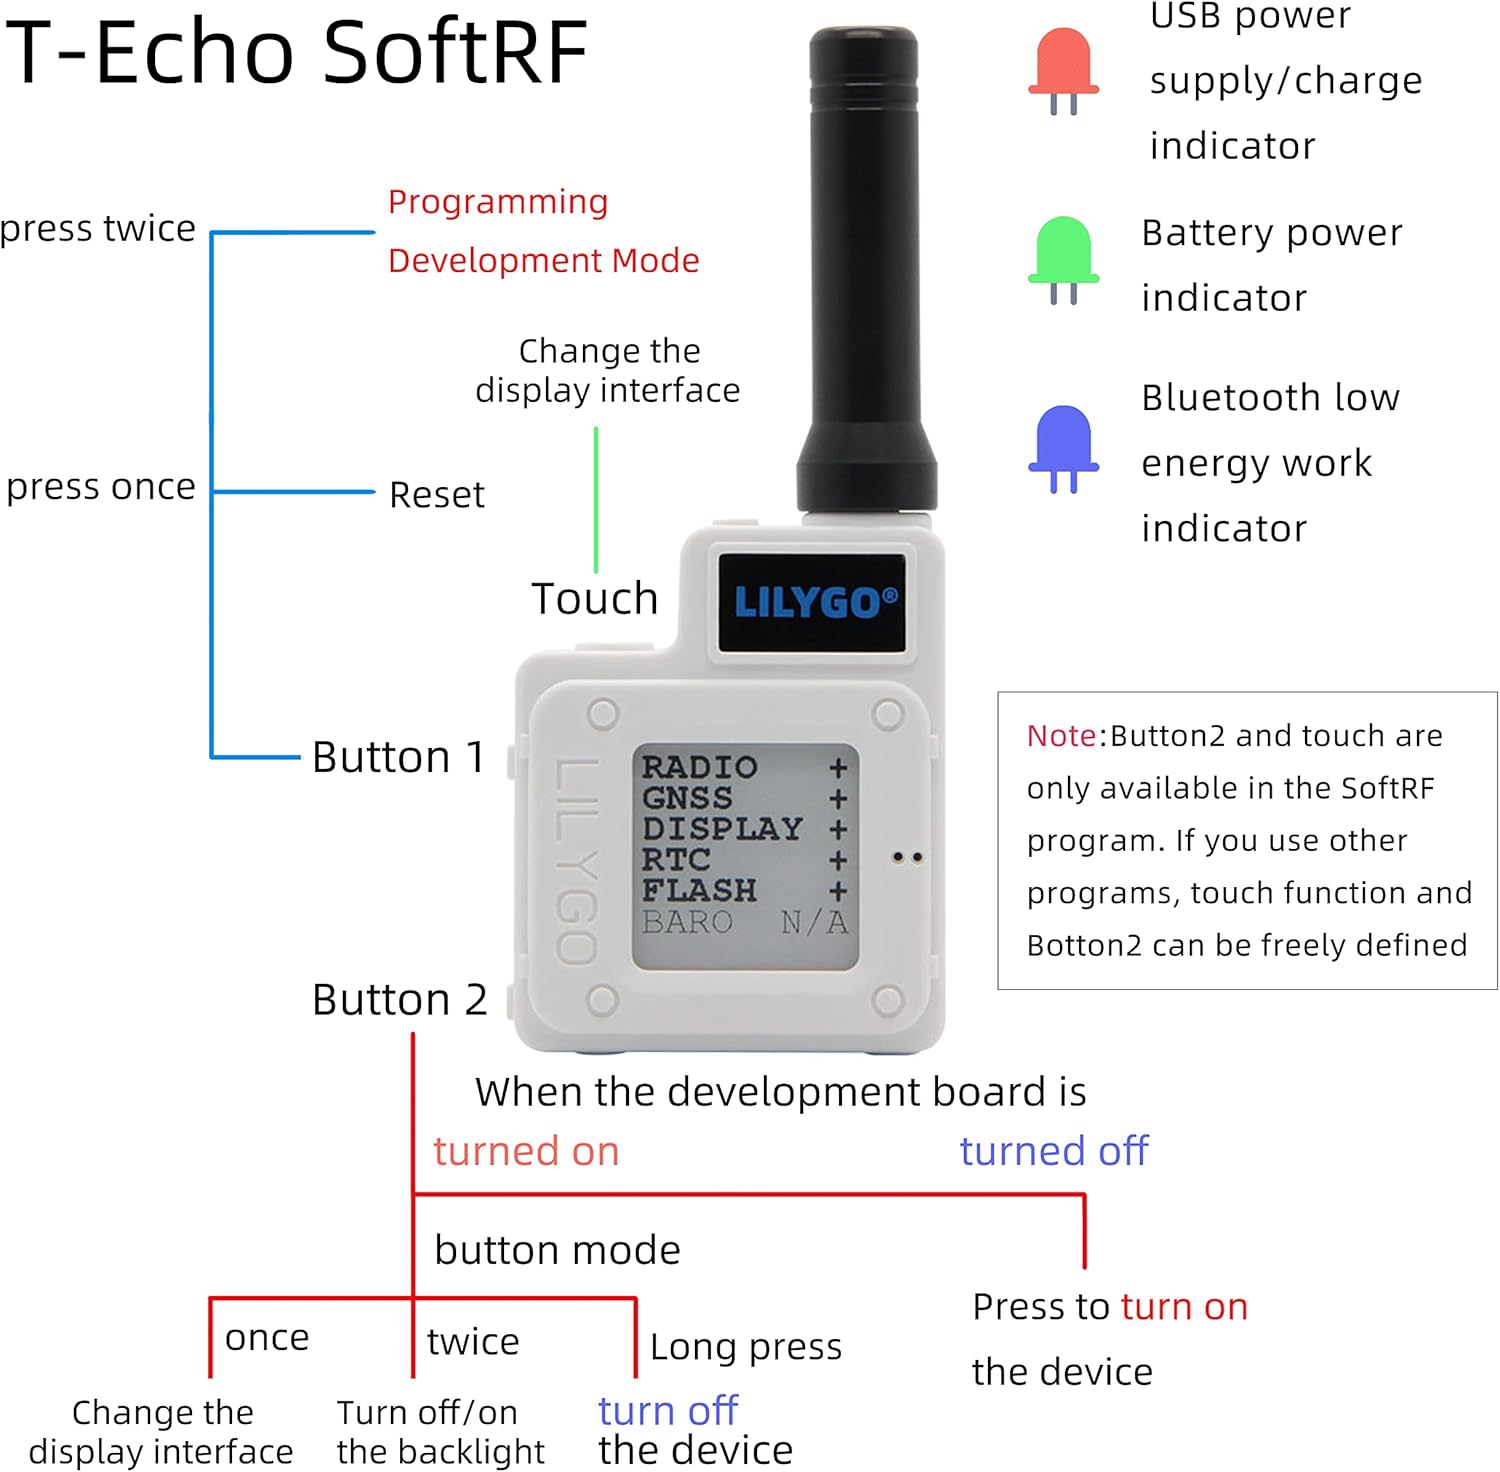
Figure 5: Button functions and LED indicators
5. Setup
5.1 Hardware Assembly
The T-Echo module comes with an ABS enclosure. Follow these steps to assemble the device:
- Connect the LoRa antenna to the module's SMA connector.
- Carefully place the main board into the bottom part of the enclosure.
- Connect the battery to the appropriate JST connector on the board.
- Secure the battery within the enclosure, often using double-sided adhesive foam for isolation and stability.
- Attach the top part of the enclosure and secure it with the provided screws.
Video 1: Installation for Mesh Node T114 Board+Battery+N36 Case Set
Video 2: N30 Protective Case for ESP32 LoRa V3 Board Antenna Battery
5.2 Firmware Installation
To utilize the full capabilities of your LILYGO T-Echo, it is recommended to install the Meshtastic firmware. This firmware enables mesh networking capabilities for off-grid communication.
- Download the Meshtastic firmware for the LILYGO T-Echo from the official Meshtastic website.
- Connect your T-Echo device to your computer using the provided USB-C cable.
- Follow the instructions on the Meshtastic website or the provided video to flash the firmware onto your device. This typically involves using a web flasher tool or a command-line interface.
Video 3: How to Install Meshtastic to LILYGO T-Echo
6. Operating Instructions
6.1 Basic Device Operation
The T-Echo features two buttons (Button 1 and Button 2) and a touch interface for navigation and control, especially when running the SoftRF program. LED indicators provide visual feedback on device status.
- Button 1:
- Press once to reset the device.
- Press twice to enter Programming Development Mode.
- Button 2 (when device is turned on, in button mode):
- Press once to change the display interface.
- Press twice to turn off/on the backlight.
- Long press to turn off the device.
- Touch Interface: Changes the display interface (available in SoftRF program).
- LED Indicators:
- Red LED: USB power supply/charge indicator.
- Green LED: Battery power indicator.
- Blue LED: Bluetooth low energy work indicator.
Figure 6: Button functions and LED indicators
6.2 Sending and Receiving Messages
After installing the Meshtastic firmware and connecting your device to a mobile phone via Bluetooth, you can use the Meshtastic app to send and receive text messages.
- Ensure your T-Echo is powered on and connected to your phone via Bluetooth.
- Open the Meshtastic application on your smartphone.
- Select the desired channel or recipient within the app.
- Type your message and send it. The T-Echo will transmit the message over the LoRa network.
- Incoming messages will be displayed on the T-Echo's E-Paper screen and within the Meshtastic app.
Video 4: How to use
7. Wiring and Sensor Integration
The LILYGO T-Echo can be integrated with external sensors and relays for various applications, such as door monitoring or remote control. The following diagram illustrates a typical wiring setup for a door monitoring system using a Hall Effect sensor and a relay.
Video 5: ESP32 LoRa V3 N32 Set DIY Project - Door Monitor
8. Maintenance
- Battery Charging: Charge the device using the provided USB-C cable. The red LED indicates charging status, and the green LED indicates battery level.
- Firmware Updates: Periodically check the official Meshtastic website for firmware updates to ensure optimal performance and access to new features.
- Cleaning: Use a soft, dry cloth to clean the device. Avoid using harsh chemicals or abrasive materials.
- Storage: Store the device in a cool, dry place away from direct sunlight and extreme temperatures.
9. Troubleshooting
- Device Not Powering On: Ensure the battery is charged. Connect the device to a power source via USB-C.
- No Bluetooth Connection: Verify Bluetooth is enabled on your smartphone and the T-Echo. Ensure the blue LED is active. Try restarting both devices.
- Unable to Send/Receive Messages: Check the LoRa antenna connection. Ensure both devices are within range and running compatible Meshtastic firmware. Verify channel settings in the Meshtastic app.
- GPS Not Working: Ensure the GPS antenna is properly connected and the device has a clear view of the sky.
- E-Paper Display Issues: If the display is unresponsive or shows artifacts, try resetting the device.
10. Specifications
| Item Model Number | H472-A |
| Display Size | 1.54 Inches |
| Display Type | E-Paper |
| Supports Bluetooth | Bluetooth |
| Connectivity Technology | Bluetooth |
| Memory Storage Capacity | 2 MB |
| Human Interface Input | Buttons |
| Mounting Type | Panel Mount |
11. Warranty and Support
For warranty information and technical support, please refer to the documentation provided with your purchase or visit the official LILYGO website. Specific warranty terms may vary by region and retailer.


