
1. Introduction
The wiiyii Car HUD P17 is an advanced OBD+GPS Smart Gauge designed to enhance your driving experience by displaying crucial vehicle information directly in your line of sight. This device combines both OBD (On-Board Diagnostics) and GPS functionalities to provide comprehensive data, ensuring compatibility with a wide range of vehicles. It features a stable and compatible program, offering multiple display interfaces and customizable options.
This manual provides essential information for the proper installation, operation, and maintenance of your P17 Smart Gauge. Please read it thoroughly before use.
2. Product Features
- Dual System Compatibility: Operates with both OBD and GPS modes, ensuring broad vehicle compatibility.
- Enhanced Stability: Features a new program with reconstructed bottom layer and support for multiple protocols for improved stability and compatibility.
- Multiple Display Interfaces: Offers 9 distinct interface styles for a personalized driving experience.
- Customizable Display: Choose from 8 interface colors and over 100 small interface combinations.
- Two Installation Methods: Can be placed on the dashboard or affixed to the windshield.
- Comprehensive Data Display: Shows Speed, RPM, Water Temperature, Battery Voltage, Fuel Consumption, Altitude, Speed Up Test, Intake Pressure, Driving Distance, Driving Time, Data Stream, Clock, Brake Test, Auto Brightness, Oil Temperature, Satellite Numbers, Driving Direction, Turbo Pressure, Engine Failure, and Air-Fuel Ratio.
- Alarm Functions: Includes Speed Alarm, RPM Alarm, Voltage Alarm, Water Temperature Alarm, and Shift Reminder.

Image: Core functions and alarm indicators displayed on the wiiyii P17 HUD. This image illustrates the various data points the device can monitor and the types of alerts it can provide, such as speed, RPM, voltage, and water temperature alarms.
3. Setup and Installation
The wiiyii P17 Smart Gauge offers flexible installation options to suit your vehicle's interior and your preference.
3.1 Package Contents
Before installation, ensure all components are present:
- P17 Meter Unit
- OBD Cable
- User Manual
- 3M Sticker
- USB Cable
- Rotary Suction Cup Bracket (for windshield mounting)

Image: All accessories included with the wiiyii P17 HUD. This shows the main unit, OBD cable, USB cable, 3M sticker, suction cup bracket, and user manual.
3.2 Installation Methods
Choose one of the following methods for mounting your P17 Smart Gauge:
- Dashboard Placement:
- Select a flat, non-obstructive area on your dashboard.
- Clean the surface thoroughly to ensure proper adhesion.
- Apply the provided 3M sticker to the bottom of the P17 unit and firmly press it onto the chosen dashboard location.
- Windshield Mounting:
- Attach the rotary suction cup bracket to the P17 unit.
- Clean a suitable area on your windshield, ensuring it does not obstruct your view.
- Press the suction cup firmly against the windshield and engage the locking mechanism.
- Adjust the angle of the P17 unit for optimal visibility.

Image: Two installation methods for the wiiyii P17 HUD. One shows the device placed on the dashboard, and the other shows it mounted to the windshield using a suction cup bracket.
3.3 Connecting the Device
- Locate your vehicle's OBD-II port. This is typically found under the dashboard on the driver's side.
- Connect one end of the provided OBD cable to the P17 unit.
- Connect the other end of the OBD cable to your vehicle's OBD-II port.
- Once connected, start your vehicle. The P17 unit should power on automatically.
4. Operating Instructions
The wiiyii P17 Smart Gauge is designed for intuitive operation. Upon powering on, it will automatically detect your vehicle's data via the OBD connection or switch to GPS mode if OBD data is unavailable or incompatible.
4.1 Button Functions
The device features three buttons on its top edge:
- Power Button: Short press to turn on/off. Long press to enter/exit settings.
- "+" Button: Used to navigate up or increase values in settings.
- "-" Button: Used to navigate down or decrease values in settings.

Image: Front view of the wiiyii P17 HUD showing its dimensions and button layout. The image highlights the Power button, '+' button, '-' button, and Setting button on the top edge of the device.
4.2 Display Modes and Customization
The P17 offers various display modes and customization options:
- Switching Interfaces: Short press the Power button (or a designated setting button, refer to specific model instructions) to cycle through the 9 available display interfaces.
- Changing Colors: Within the settings menu, you can select from 8 different interface colors to match your preference or vehicle's interior lighting.
- Language Settings: The device supports multiple languages. Access the settings menu to change the display language.
- Auto Brightness: The P17 features an automatic brightness adjustment function, adapting the display intensity to ambient light conditions for optimal visibility day and night.

Image: A collage showing 9 different interface designs available on the wiiyii P17 HUD. Each interface presents vehicle data in a unique visual layout, allowing users to choose their preferred display style.
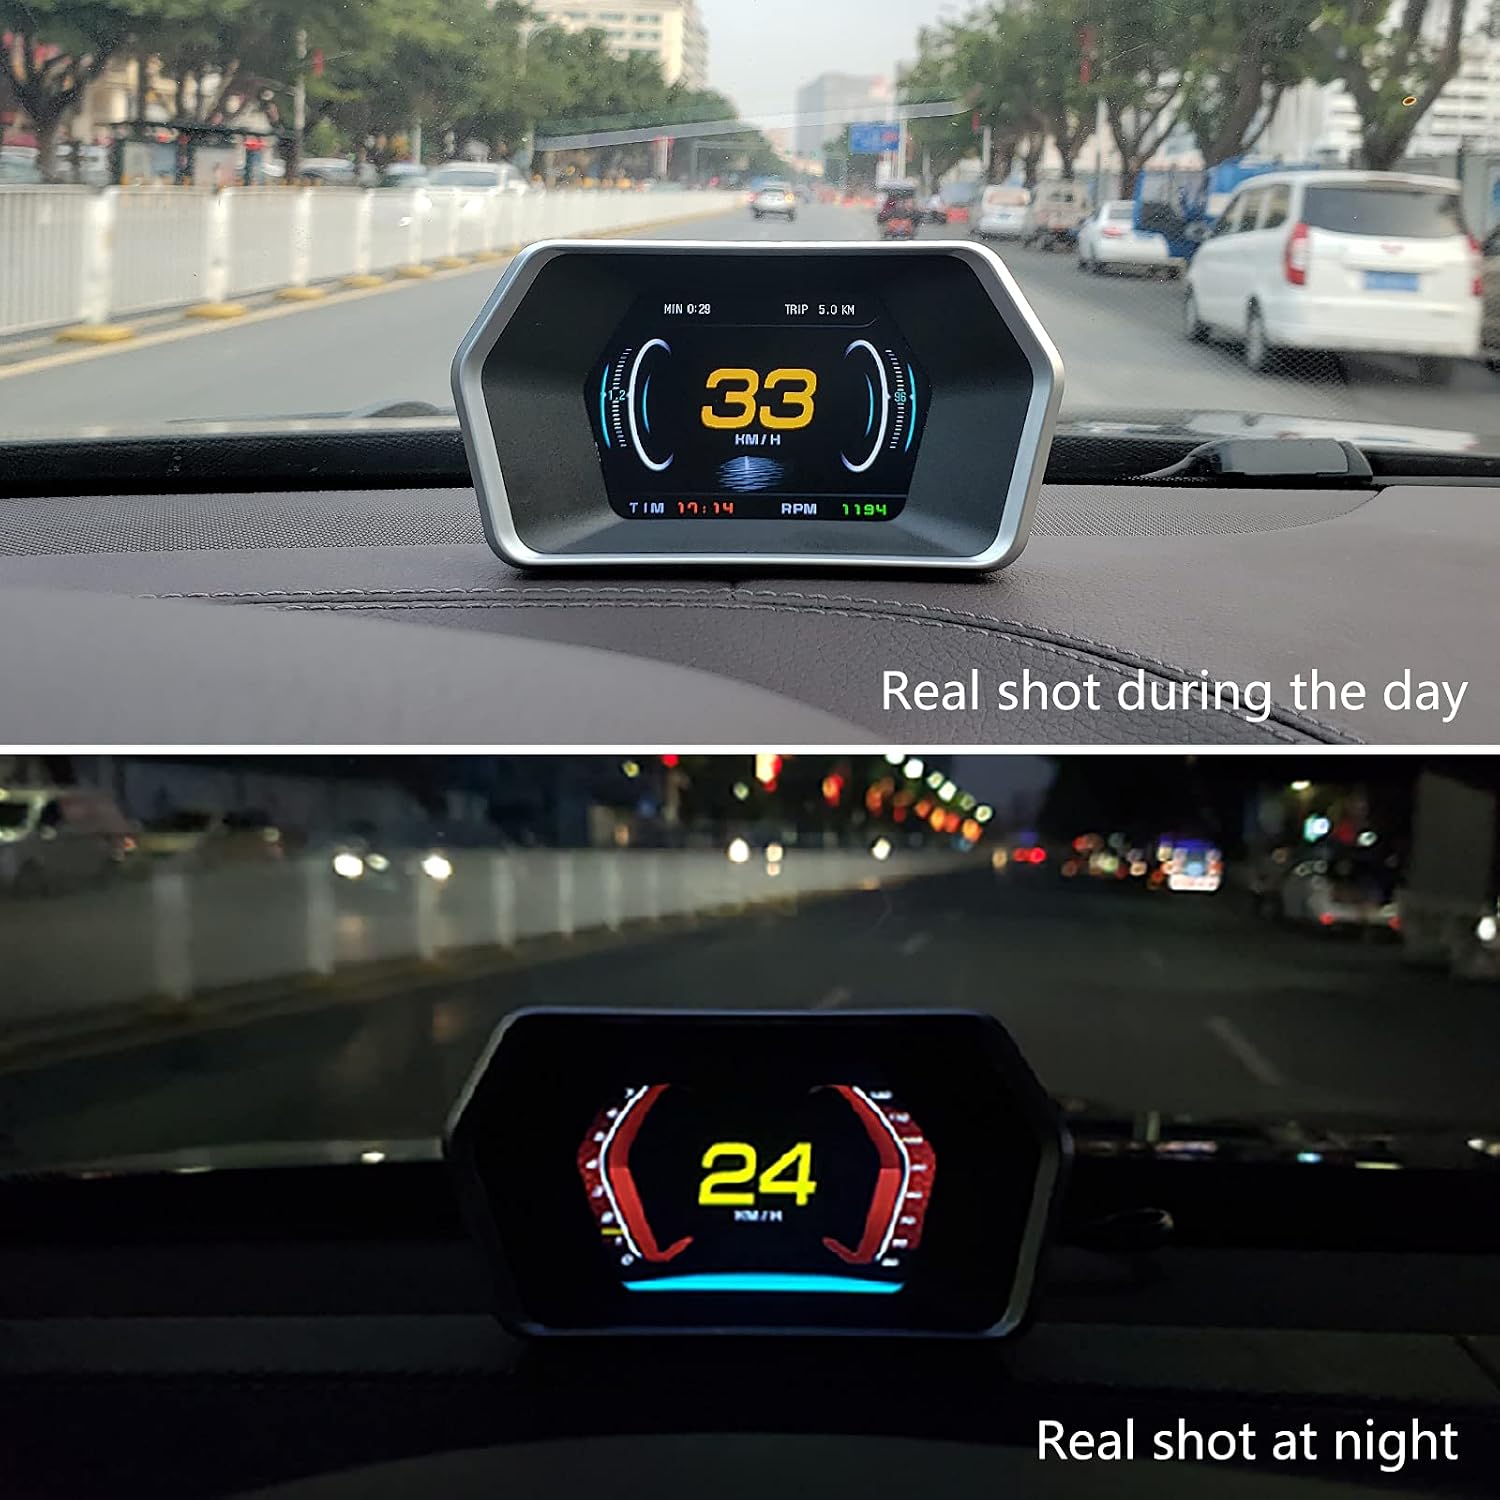
Image: Comparison of the wiiyii P17 HUD display during daytime and nighttime driving. The top image shows a clear, bright display in daylight, while the bottom image demonstrates the adjusted brightness for night driving, ensuring readability without distraction.
5. Troubleshooting
If you encounter issues with your wiiyii P17 Smart Gauge, please refer to the following common problems and solutions:
- Device Does Not Power On:
- Ensure the OBD cable is securely connected to both the P17 unit and the vehicle's OBD-II port.
- Check your vehicle's ignition. The device typically powers on with the vehicle.
- Verify the vehicle's OBD-II port is functional (you may test with another OBD device if available).
- No Data Displayed / "Not Compatible" Message:
- Some vehicles may have specific OBD protocols. While the P17 supports multiple protocols, ensure your vehicle is fully compatible.
- If in OBD mode, try switching to GPS mode (if available in settings) to display basic speed and time data.
- Restart your vehicle and the P17 unit. Sometimes a re-initialization can resolve connection issues.
- Ensure the OBD cable is not damaged.
- Inaccurate Speed Reading:
- In GPS mode, ensure the device has a clear view of the sky for satellite acquisition.
- Calibrate the speed in the settings menu if there's a consistent discrepancy with your vehicle's speedometer.
- Display is Too Dim or Too Bright:
- The device has an auto-brightness feature. Ensure the light sensor is not obstructed.
- Adjust brightness manually through the settings menu if auto-brightness is not meeting your needs.
- Device Freezes or Malfunctions:
- Disconnect the device from the OBD port, wait a few seconds, and reconnect it.
- Perform a factory reset through the settings menu if the issue persists (note: this will erase custom settings).
6. Specifications
| Specification | Detail |
|---|---|
| Model Number | P17 |
| Brand | wiiyii |
| Product Dimensions (L x W x H) | 12.5 x 6.8 x 3.1 cm (4.92 x 2.68 x 1.22 inches) |
| Item Weight | 306.17 g (10.8 Ounces) |
| Connectivity | OBD-II, GPS |
| Display Type | LCD Meter |
| UPC | 765530748616 |
7. Maintenance
To ensure the longevity and optimal performance of your wiiyii P17 Smart Gauge, follow these maintenance guidelines:
- Cleaning: Use a soft, dry cloth to clean the display and exterior of the device. Avoid using abrasive cleaners, solvents, or harsh chemicals, as these can damage the surface.
- Environmental Conditions: Avoid exposing the device to extreme temperatures, direct sunlight for prolonged periods, or high humidity.
- Cable Care: Ensure the OBD cable is not kinked, pinched, or subjected to excessive tension, which could damage the wiring.
- Storage: If storing the device for an extended period, disconnect it from the vehicle and store it in a cool, dry place.
8. Warranty and Support
For warranty information and technical support, please refer to the documentation provided with your purchase or contact the retailer. Keep your proof of purchase for warranty claims.