
1. Introduction
This manual provides detailed instructions for the installation, operation, and maintenance of your Heaboli HP-68 Dash Cam. Please read this manual thoroughly before using the product to ensure proper function and safety. The HP-68 is designed to record both the road ahead and the vehicle's interior simultaneously, offering comprehensive video evidence for various driving scenarios.

Image 1.1: Heaboli HP-68 Dash Cam and companion app interface.
2. Safety Information
- Ensure the dash cam is installed in a location that does not obstruct the driver's view or interfere with vehicle safety features.
- Use only the original power adapter provided to prevent damage to the device.
- Do not expose the dash cam to extreme temperatures or direct sunlight for prolonged periods, as this may affect performance and longevity.
- For optimal performance, use a U3 level Micro SD card with a capacity between 32GB and 128GB. Avoid using SanDisk brand cards as they may cause compatibility issues.
- Always format the Micro SD card within the dash cam before initial use and periodically thereafter.
3. Package Contents
Verify that all items listed below are included in your package:
- 1x Heaboli HP-68 Dash Cam
- 1x GPS Bracket (Magnetic Mount)
- 1x Car Charger
- 1x User Manual
- 1x Trim Pry Tool
- 5x Cable Fixers
- 2x Electrostatic Film
- 2x Double-sided Adhesive

Image 3.1: All components included in the Heaboli HP-68 Dash Cam package.
4. Product Overview
Familiarize yourself with the main components of your dash cam:
- Front Camera: Records the road ahead in 2K resolution.
- Cabin Camera: Records the vehicle interior in 1080P resolution, equipped with 4 IR LEDs for night vision.
- 2-inch IPS Screen: For live view, menu navigation, and playback.
- Magnetic GPS Bracket: Provides power and GPS functionality, allowing easy attachment and removal of the dash cam.
- Control Buttons: For navigating the menu and controlling recording.
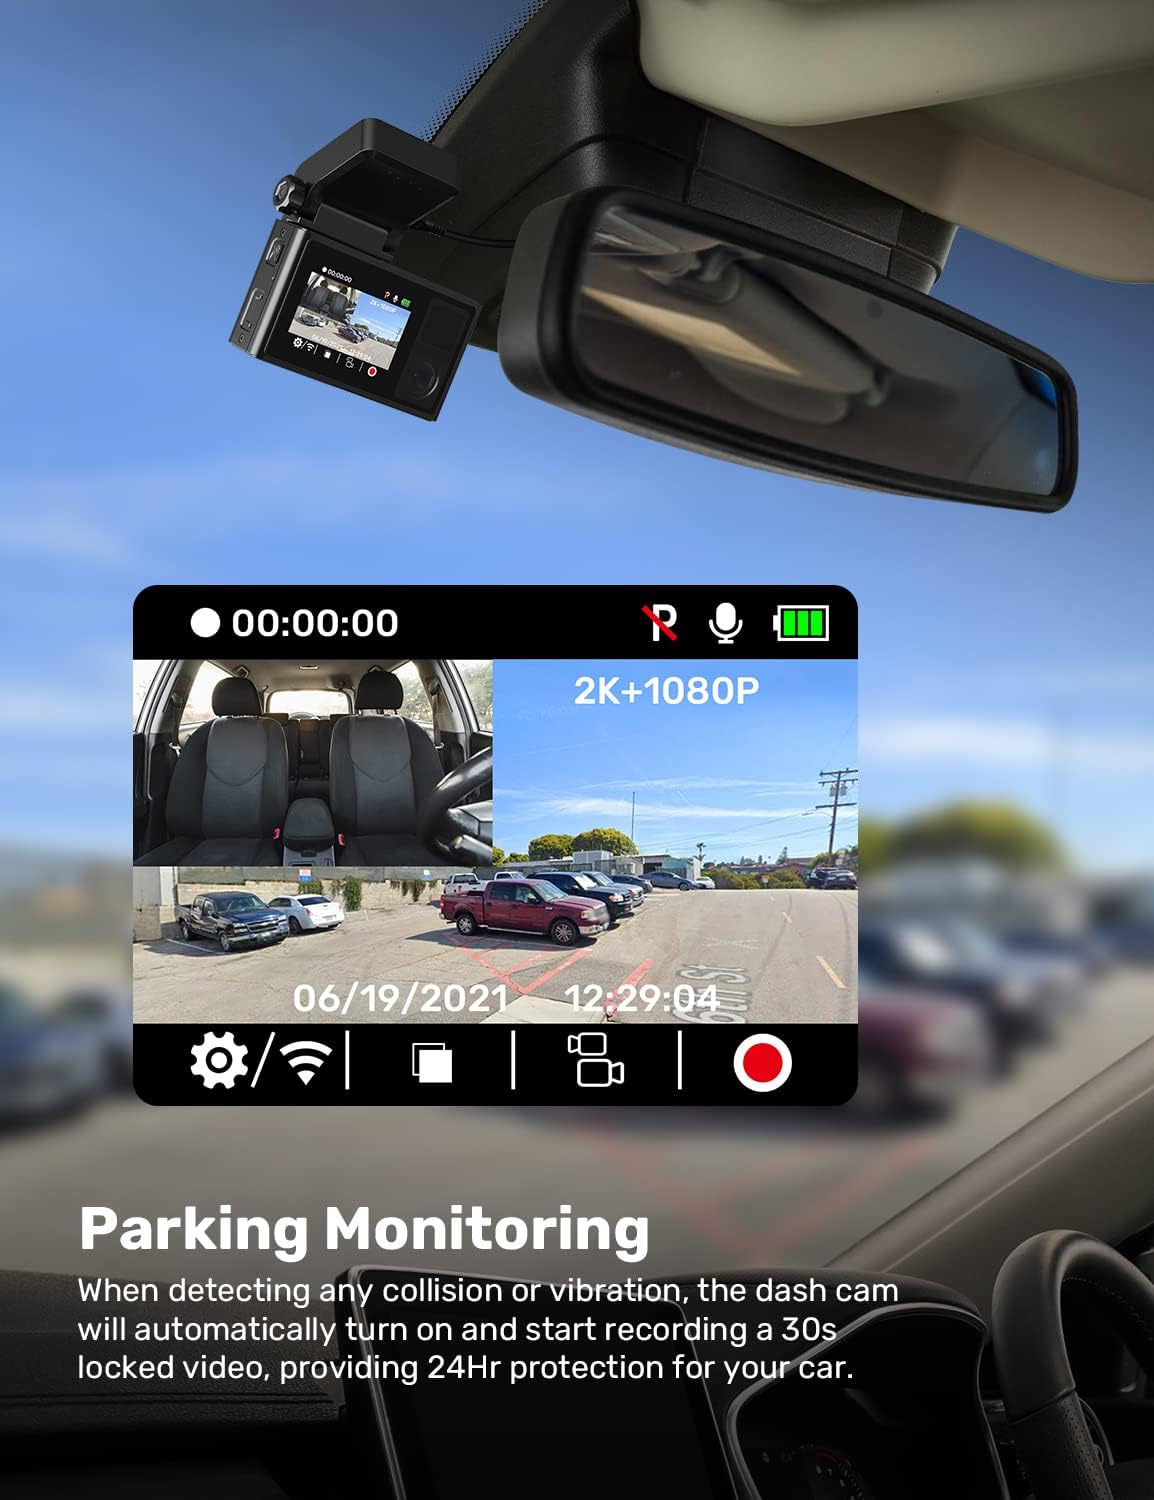
Image 4.1: Key components of the Heaboli HP-68 Dash Cam, including front and cabin cameras, screen, and magnetic bracket.
5. Setup
5.1 Micro SD Card Installation and Formatting
- Insert a U3 level Micro SD card (32GB-128GB recommended) into the dash cam's SD card slot.
- Power on the dash cam.
- Navigate to the system settings menu.
- Select 'Format' and confirm to format the SD card. This prepares the card for recording and ensures compatibility.
Video 5.1: This video demonstrates the process of formatting the Micro SD card on the HP-68 dash cam.
5.2 Dash Cam Installation
- Clean the windshield area where you intend to mount the dash cam.
- Apply the electrostatic film to the cleaned area of the windshield. This helps with adhesion and makes removal easier without leaving residue.
- Attach the magnetic GPS bracket to the electrostatic film.
- Slide the dash cam onto the magnetic GPS bracket until it clicks into place.
- Connect the car charger to the GPS bracket (not directly to the dash cam's mini USB port) and plug it into your vehicle's 12V power outlet.
- Adjust the camera angle to ensure a clear view of the road and cabin.

Image 5.2: Applying the electrostatic film to the windshield for secure and residue-free dash cam mounting.
6. Operating Instructions
6.1 Automatic Recording
The dash cam will automatically power on and begin recording when your vehicle's ignition is turned on. It will automatically power off when the ignition is turned off.
6.2 Loop Recording
The dash cam records video in continuous loops. When the Micro SD card is full, the oldest unlocked files will be overwritten. You can set the duration of these recording segments:
- Access the menu settings on the dash cam.
- Navigate to 'Loop Recording'.
- Select your desired recording duration (e.g., 1, 3, or 5 minutes).
Video 6.1: This video demonstrates how to set the loop recording duration on the dash cam.
6.3 G-Sensor (Emergency Recording)
The built-in G-sensor detects sudden impacts or collisions and automatically locks the current video segment to prevent it from being overwritten. You can adjust the sensitivity of the G-sensor:
- Access the menu settings.
- Find the 'G-Sensor' setting.
- Choose between 'Low', 'Medium', 'High', or 'Off' sensitivity.
Video 6.2: This video illustrates how to adjust the G-sensor sensitivity on the dash cam.
6.4 Parking Monitor
When the parking monitor feature is enabled, the dash cam will automatically turn on and record a 30-second locked video if it detects any collision or vibration while your vehicle is parked. This provides 24-hour protection for your car.

Image 6.3: The dash cam display indicating active parking monitoring.
6.5 Wi-Fi Connectivity and App Usage
The Heaboli HP-68 features built-in Wi-Fi, allowing you to connect to a dedicated smartphone application for live viewing, video playback, downloading files, and adjusting settings.
- Download the 'Heaboli' app from your smartphone's app store.
- Enable Wi-Fi on your dash cam via the menu settings.
- Connect your smartphone to the dash cam's Wi-Fi network (SSID and password usually displayed on the dash cam screen).
- Open the Heaboli app to access features like live view, video management, and settings control.

Image 6.4: The Heaboli app on a smartphone, showing live video from the dash cam and various control options.
6.6 GPS Information
The integrated GPS module records your driving route, speed, and location data. This information can be viewed via the smartphone app or dedicated PC viewer software, providing precise evidence for incidents.
6.7 Infrared (IR) LEDs for Night Vision
The cabin camera is equipped with IR LEDs to enhance night vision in low-light conditions. You can configure their operation:
- Access the menu settings.
- Locate the 'Infrared Light' option.
- Select 'On', 'Off', or 'Auto' based on your preference. 'Auto' mode will activate IR LEDs automatically in low light.
Video 6.5: This video demonstrates how to adjust the settings for the infrared LEDs on the dash cam.
6.8 Setting Camera Resolution
You can adjust the recording resolution for both the front and inside cameras:
- Access the menu settings.
- Select 'Resolution'.
- Choose 'Front Camera' or 'Inside Camera'.
- Select the desired resolution (e.g., 2K for front, 1080P for cabin). The cabin camera can also be turned off.
Video 6.6: This video shows how to select the recording resolution for both the front and inside cameras.
7. Maintenance
7.1 Micro SD Card Management
Regularly formatting your Micro SD card (e.g., once a month) helps maintain optimal recording performance and prevents data corruption. Always back up important files before formatting.
7.2 Cleaning the Dash Cam
Use a soft, dry cloth to clean the dash cam's lens and screen. Avoid using abrasive cleaners or solvents, which can damage the device.
8. Troubleshooting
- Dash cam not powering on: Ensure the car charger is securely connected to both the GPS bracket and the vehicle's 12V outlet. Check the vehicle's fuse for the 12V outlet.
- Recording issues: Format the Micro SD card. Ensure the card is a U3 speed class and within the recommended capacity (32GB-128GB). Replace the SD card if issues persist.
- Wi-Fi connection problems: Ensure Wi-Fi is enabled on the dash cam and your smartphone. Try restarting both devices.
- GPS signal not found: Ensure the GPS bracket is correctly installed and has a clear view of the sky.
- Dash cam restarts repeatedly: This could indicate a power supply issue or a faulty SD card. Try a different power source or replace the SD card.
9. Specifications
| Feature | Specification |
|---|---|
| Front Camera Resolution | 2K (2560x1440P) |
| Cabin Camera Resolution | 1080P (1920x1080P) |
| Screen Size | 2 Inches |
| Connectivity | Wi-Fi, GPS |
| Storage | Micro SD Card (U3, 32-128GB) |
| Mounting Type | Magnetic Mount |
| Special Features | 24Hr Parking Monitor, Super Night Vision (IR LEDs), Loop Recording, G-Sensor |
| Control Method | App, On-device buttons |
| Item Model Number | HP-68 |
| Manufacturer | Heaboli |
10. Warranty and Support
For warranty information or technical support, please refer to the contact details provided with your product packaging or visit the official Heaboli website. Keep your purchase receipt as proof of purchase for warranty claims.