
1. Introduction
This manual provides detailed instructions for the installation, operation, and maintenance of the GEYA GRT8-B1 Delay Off Single Function Time Relay. Please read this manual thoroughly before using the device to ensure safe and correct operation.
2. Safety Information
- Ensure all electrical connections are made by a qualified electrician and comply with local wiring regulations.
- Disconnect power before installation, maintenance, or troubleshooting to prevent electric shock.
- Do not operate the device if it appears damaged.
- Verify the supply voltage matches the device's specifications (AC230V for this model).
3. Product Overview
The GEYA GRT8-B1 is a single-function delay off time relay designed for DIN rail mounting. It features a single pole double throw (1SPDT) output contact with a 16A current rating. The delay time can be set directly via panel knobs, offering a range from 0.1 seconds to 10 days.
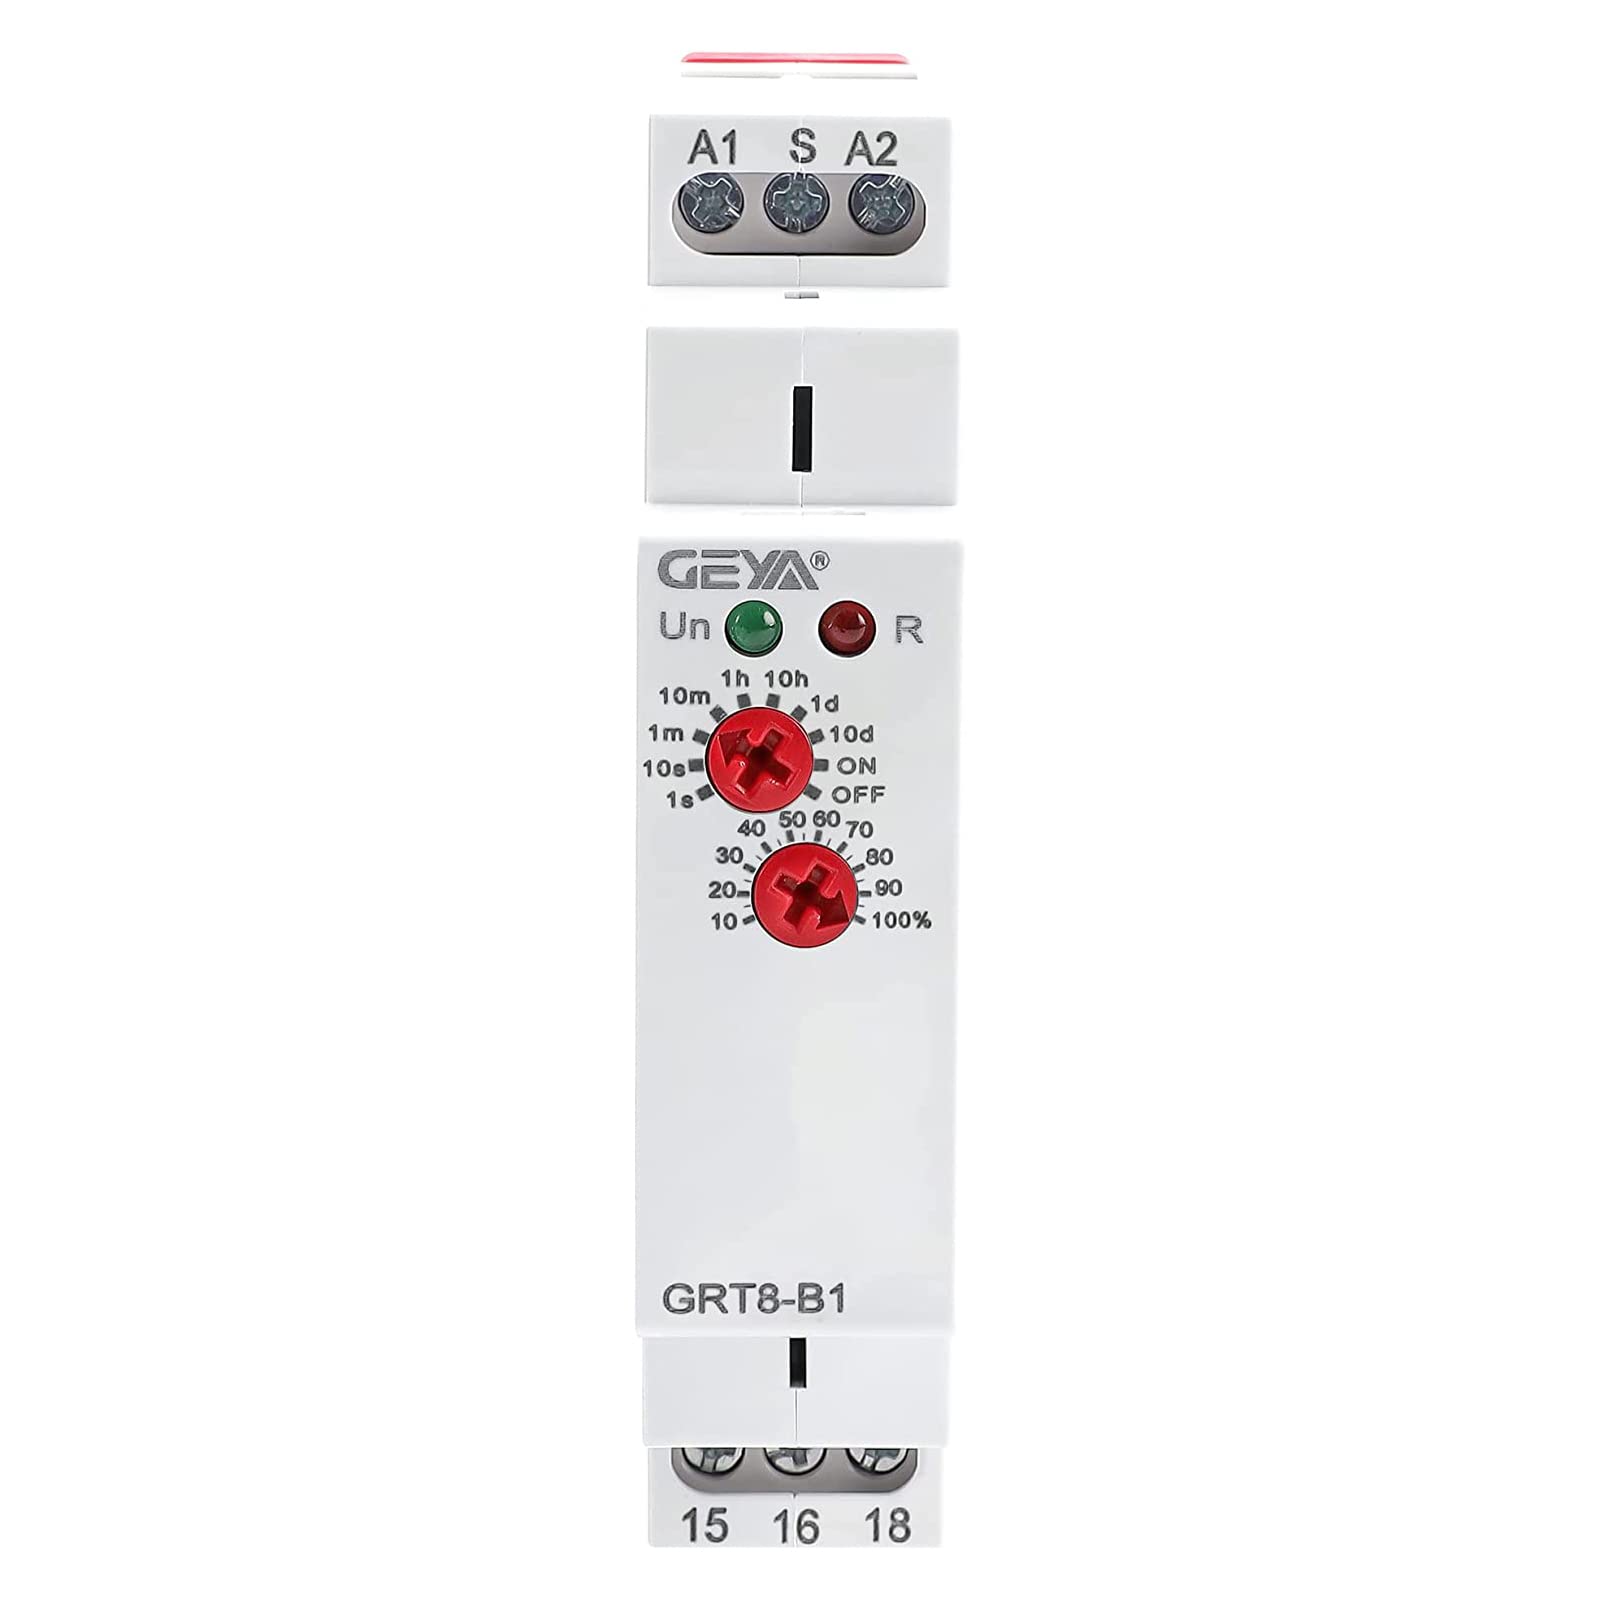
Figure 3.1: Front view of the GEYA GRT8-B1 Delay Off Time Relay, showing the adjustment knobs and terminal labels.
Key Features:
- Adjustable Delay: Delay can be set directly via panel knobs for convenience.
- Function Mode: Specifically designed for 'Delay OFF' operation.
- Time Scale: Offers 10 time ranges from 0.1s to 10 days, including 'only ON' and 'only OFF' options.
- Voltage Support: This model supports AC230V.
- Output Contact: 1SPDT (1 Normally Open, 1 Normally Closed) output contact.
- LED Indication: Relay status is indicated by LED lights (Green for Supply, Red for Output).
- Mounting: 1-MODULE, DIN rail mounting for easy installation.
- Compact Size: Ultra-small size with only 18mm width.
4. Installation
The GRT8-B1 time relay is designed for DIN rail mounting. Follow the wiring diagrams carefully to ensure correct and safe installation.
4.1 Wiring Diagram

Figure 4.1: Wiring diagram for GRT8-B1 (1SPDT) and GRT8-B2 (2SPDT) models, showing connections for supply, trigger, and output contacts. Dimensions are also provided.
4.2 Relay Wiring Example (Delay Off)
This example demonstrates how to wire the GRT8-B1 to control a lamp with a delay off function.

Figure 4.2: Example wiring for a GEYA GRT8-B1 AC230V relay to control a lamp, illustrating the connection of Line (L), Neutral (N), Trigger, and the lamp load.
5. Operating Instructions
The GRT8-B1 operates as a Delay OFF relay. The load turns on immediately with power application and turns off after the set delay time. The delay can be reset using an external button.
5.1 Setting the Time Delay
The delay time is set using two knobs on the front panel:
- Knob 1 (Time Range Selection): Selects the desired time range (e.g., 0.1-1s, 1-10s, 6-60s, 1-10min, 6-60min, 1-10hr, 0.1-1day, 1-10day, only ON, only OFF).
- Knob 2 (Time Percentage Setting %): Fine-tunes the delay within the selected range from 10% to 100%.

Figure 5.1: Illustration of the two adjustment knobs for setting the time delay: one for time range (e.g., 1s, 10s, 1m, 1h, 1d) and another for percentage (10%-100%).
Example: To set a 5-minute delay, select the '10m' range with Knob 1 and set Knob 2 to 50%.
5.2 Delay OFF Function (GRT8-B1)
When power is applied, the output contact immediately closes (load turns ON). The relay then begins its timing cycle. After the set delay time expires, the output contact opens (load turns OFF).

Figure 5.2: Visual representation of the 'Delay OFF' function (Type B) where the load turns on with power and turns off after a set delay.
5.3 Resetting the Delay
An external button connected between terminals A1 and S can be used to reset the timing cycle. If the button is pressed during the timing delay, the load remains on, and the delay timer will not start until the button is released.
Video 5.1: An official GEYA video demonstrating the operation of the GRT8-B1 Delay Off Time Relay, including setting the time and using a reset button. The video shows the light turning on instantly and then off after a set delay, and how holding the reset button affects the timing.
6. Technical Specifications
Below are the detailed technical specifications for the GEYA GRT8-B1 Delay Off Time Relay.

Figure 6.1: Detailed technical parameters for the GRT8-B1 and GRT8-B2 models, including trigger and supply terminals, LED indications, time range selection, and time percentage setting.
| Specification | Value |
|---|---|
| Function | Delay OFF |
| Supply Terminals | A1-A2 |
| Voltage Range | AC230V (50-60Hz) |
| Power Input | AC max.6VA/1.3W |
| Supply Voltage Tolerance | -15%; +10% |
| Supply Indication | Green LED |
| Time Ranges | 0.1s-10days, ON, OFF |
| Time Setting | Potentiometer |
| Time Deviation | 10%-mechanical setting |
| Repeat Accuracy | 0.2%-set value stability |
| Temperature Coefficient | 0.05%/°C, at=20°C (0.05%/°F, at=68°F) |
| Output | 1xSPDT |
| Current Rating | 1x16A (AC1) |
| Switching Voltage | 250VAC/24VDC |
| Min. Breaking Capacity DC | 500mW |
| Output Indication | Red LED |
| Mechanical Life | 1x10⁷ |
| Electrical Life (AC1) | 1x10⁵ |
| Reset Time | max.200ms |
| Operating Temperature | -20°C to +55°C (-4°F to 131°F) |
| Storage Temperature | -35°C to +75°C (-22°F to 158°F) |
| Mounting/DIN Rail | DIN rail EN/IEC 60715 |
| Protection Degree | IP40 for front panel/IP20 terminals |
| Operating Position | Any |
| Overvoltage Category | III. |
| Pollution Degree | 2 |
| Max. Cable Size (mm2) | Solid wire max. 1x2.5 or 2x1.5 with sleeve max. 1x2.5 (AWG 12) |
| Dimensions | 90x18x64mm |
| Standards | EN 61812-1, IEC6947-5-1 |
7. Maintenance
The GEYA GRT8-B1 time relay is designed for reliable operation with minimal maintenance. Regular checks should include:
- Periodically inspect terminal connections to ensure they are secure.
- Keep the device clean and free from dust and debris.
- Ensure proper ventilation around the device to prevent overheating.
- Do not use abrasive cleaners or solvents on the device.
8. Troubleshooting
If you encounter issues with your GRT8-B1 time relay, consider the following common problems and solutions:
- Device not powering on: Check the power supply voltage and ensure all connections are correct and secure. Verify the circuit breaker is not tripped.
- Load not switching: Confirm the output wiring is correct. Check the LED indicators for supply (green) and output (red) status. Ensure the time delay is set appropriately and has elapsed.
- Incorrect timing: Re-check the settings on both time range and percentage knobs. Ensure the knobs are firmly set to the desired values.
- High-pitched tone: Some users have reported a high-pitched tone when operating at lower voltages (e.g., 12V). This may be related to the internal switching power supply and is generally not indicative of a fault, but if excessive, contact support.
- Load remains on indefinitely: If using a reset button, ensure it is not stuck in the pressed position. The delay will not start until the button is released.
If problems persist after checking these points, please contact GEYA customer support.
9. Warranty and Support
GEYA products are manufactured to high-quality standards. For warranty information or technical support, please refer to the official GEYA website or contact your local distributor. Keep your purchase receipt for warranty claims.
Manufacturer: ZHEJIANG GEYA ELECTRICAL CO.,LTD