Introduction
This manual provides essential instructions for the safe and efficient operation, maintenance, and troubleshooting of your SereneLife Smart Automatic Robotic Vacuum Cleaner, Model PUCRC25PLUS.8. Please read this manual thoroughly before using the appliance and retain it for future reference.

Figure 1: SereneLife Smart Automatic Robotic Vacuum Cleaner, top view. This image displays the sleek, circular design of the vacuum with its central power button and 'Pure Clean' branding.
Setup
1. Unboxing and Component Check
Carefully remove all components from the packaging. Verify that all items listed below are present and undamaged.

Figure 2: What's in the Box. This image shows the robotic vacuum, dry mop, HEPA filter, two sets of side brushes, and the power adapter.
- Smart Robot Vacuum
- Rechargeable Battery (pre-installed or separate)
- Power Adapter (US Plug)
- 2 Mop Cloths
- 1 Mop Plate
- 2 Pairs Side Brushes
- 2 Primary Filters
2. Initial Charging
Before first use, fully charge the robotic vacuum. Connect the power adapter to the charging port on the vacuum and plug it into a wall outlet. The charging indicator light will provide status. Average charge time is 2.5-3 hours.

Figure 3: Charging and Run-time. This image highlights the 90-minute run-time and 2.5-3 hour fast charging capability of the device.
3. Side Brush Installation
Turn the vacuum upside down. Align the side brushes with the designated posts on the underside of the unit and press firmly until they click into place. Ensure both brushes are securely attached.
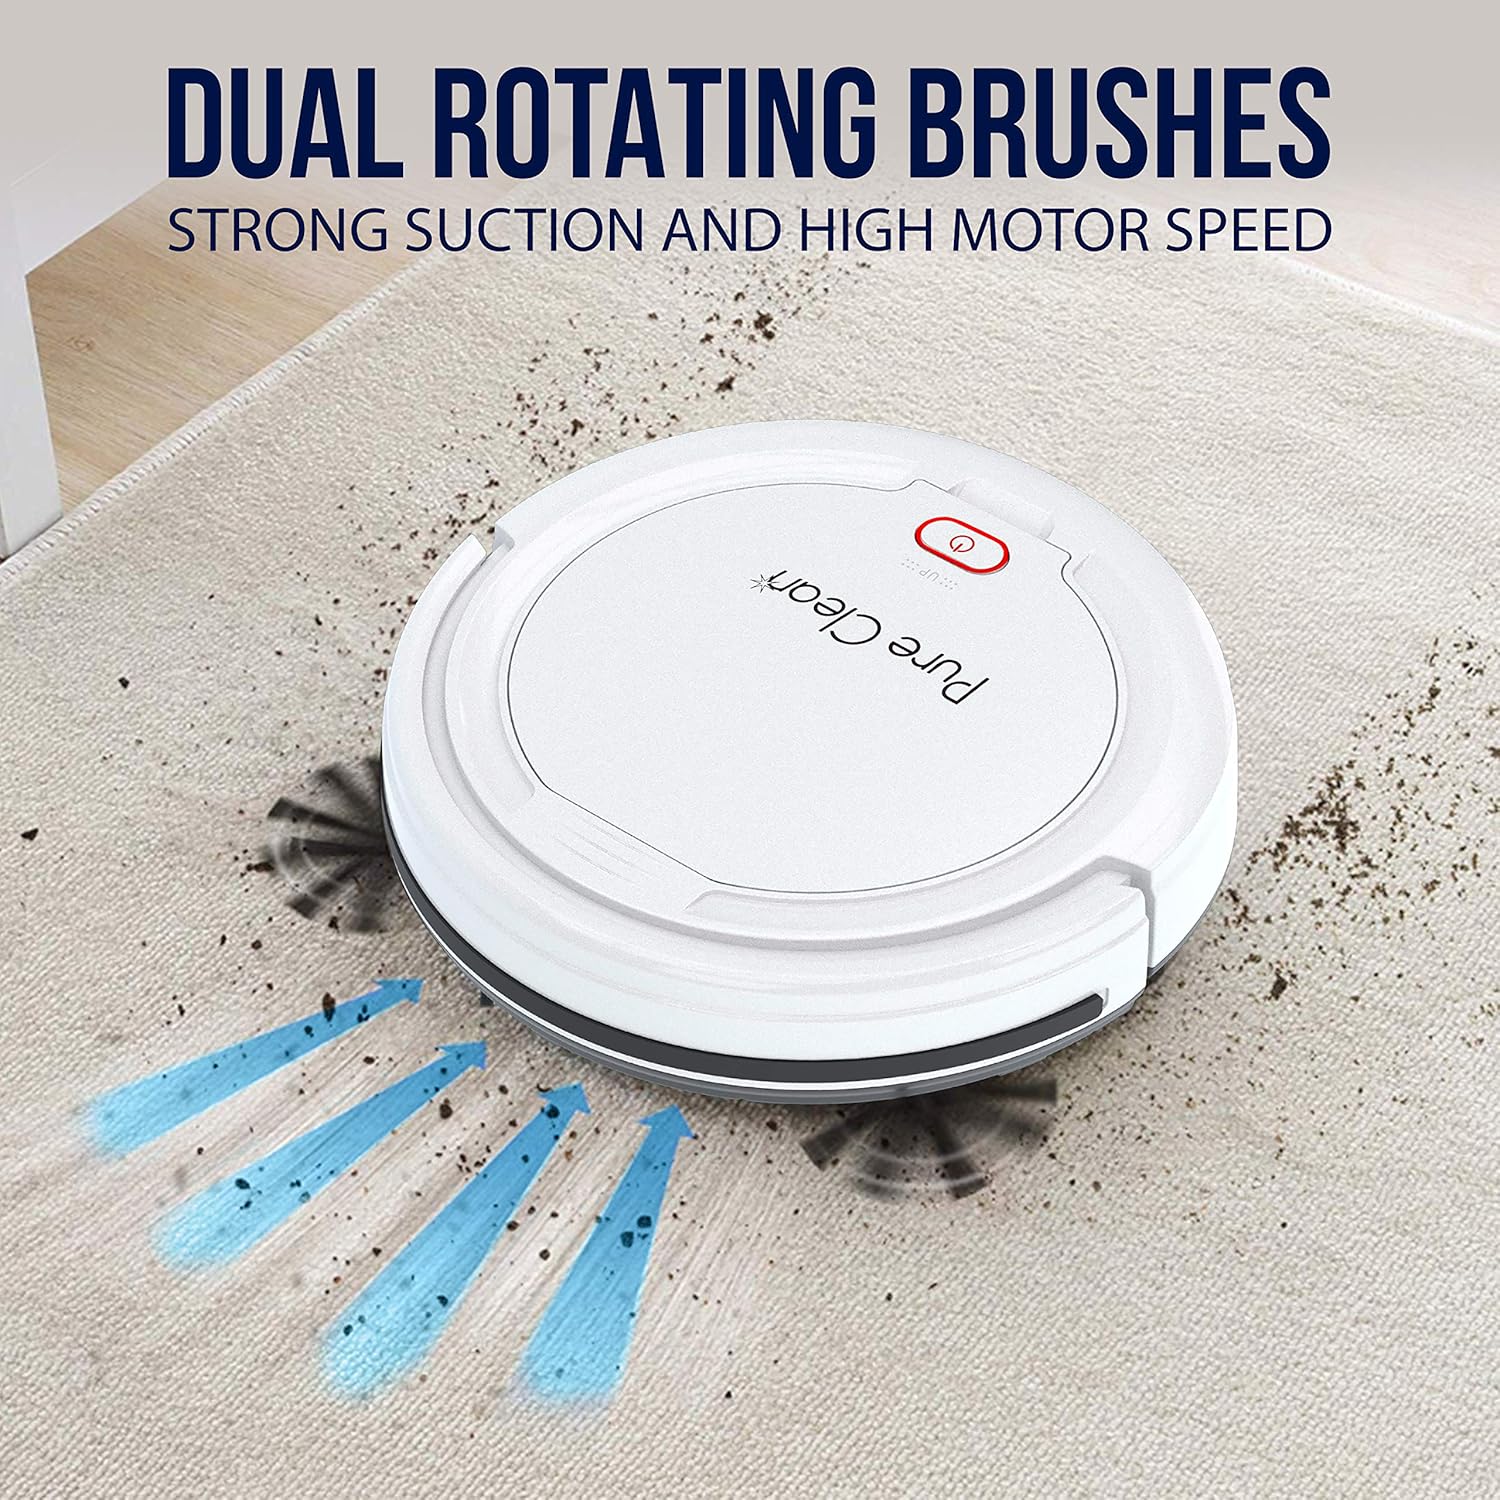
Figure 4: Dual Rotating Brushes. This image shows the underside of the vacuum with its two side brushes designed for edge cleaning.
Operating Instructions
1. Starting and Stopping Cleaning
To start the cleaning cycle, press the power button located on the top of the vacuum. The vacuum will begin its self-programmed cleaning path. To pause or stop the cleaning cycle, press the power button again.

Figure 5: Multi-Surface Cleaning. The robotic vacuum is shown operating on various floor materials including carpet, hardwood, and tile.
2. Navigation and Obstacle Avoidance
The vacuum utilizes smart, self-programmed cleaning path navigation. It is equipped with front bumper sensors to detect and clean around household objects and furniture. Anti-fall stair sensors prevent the unit from falling down stairs or off ledges.

Figure 6: Smart Front Bumper Sensors. The vacuum is depicted navigating around furniture, demonstrating its obstacle avoidance capabilities.

Figure 7: Anti-Fall Stair Sensor. The vacuum is shown approaching a staircase, with an illustration of its sensors detecting the drop-off.
Maintenance
1. Emptying the Dust Collection Bin
The vacuum features a convenient dust collection bin. To empty, open the bin cover, remove the bin, and dispose of collected debris. It is recommended to empty the bin after each cleaning cycle to maintain optimal performance.
2. Cleaning Filters
Regularly clean the primary filters to ensure efficient suction and prevent clogging. Remove the filters from the dust bin and gently tap them to dislodge dust. For thorough cleaning, rinse with water and allow to air dry completely before reinserting.
3. Cleaning Side Brushes
Inspect the side brushes for tangled hair or debris. Carefully remove any obstructions to ensure the brushes rotate freely. Replace worn or damaged brushes with new ones from the provided spare set.
Troubleshooting
| Problem | Possible Cause | Solution |
|---|---|---|
| Vacuum does not turn on. | Battery is not charged or not properly connected. | Ensure the battery is fully charged (2.5-3 hours). Verify the battery is securely connected inside the unit. |
| Vacuum gets stuck frequently. | Obstacles (cables, small rugs) or uneven surfaces. | Clear the cleaning area of loose cables and small, lightweight rugs. The vacuum is designed for hardwood, linoleum, tile, and low/hard carpet floors. |
| Poor suction performance. | Full dust bin or clogged filters/brushes. | Empty the dust bin. Clean or replace the primary filters. Remove any tangled hair or debris from the side brushes. |
Specifications
- Construction Material: ABS, POM
- Dust Bin Capacity: 0.2L
- Average Charge Time: 2.5-3 Hours
- Vacuum Operation Run-Time: 90 Minutes
- Battery Type: 11.1V Li-ion, 1500mAh - 16.65Wh
- Unit Average Power: 15W
- Power Supply: 120/240V, 13V Power Adapter
- Low Noise: 65 dB
- Power Cable Length: 5.02 ft.
- Dimensions (L x W x H): 11.02'' x 11.02'' x 2.95'' inches
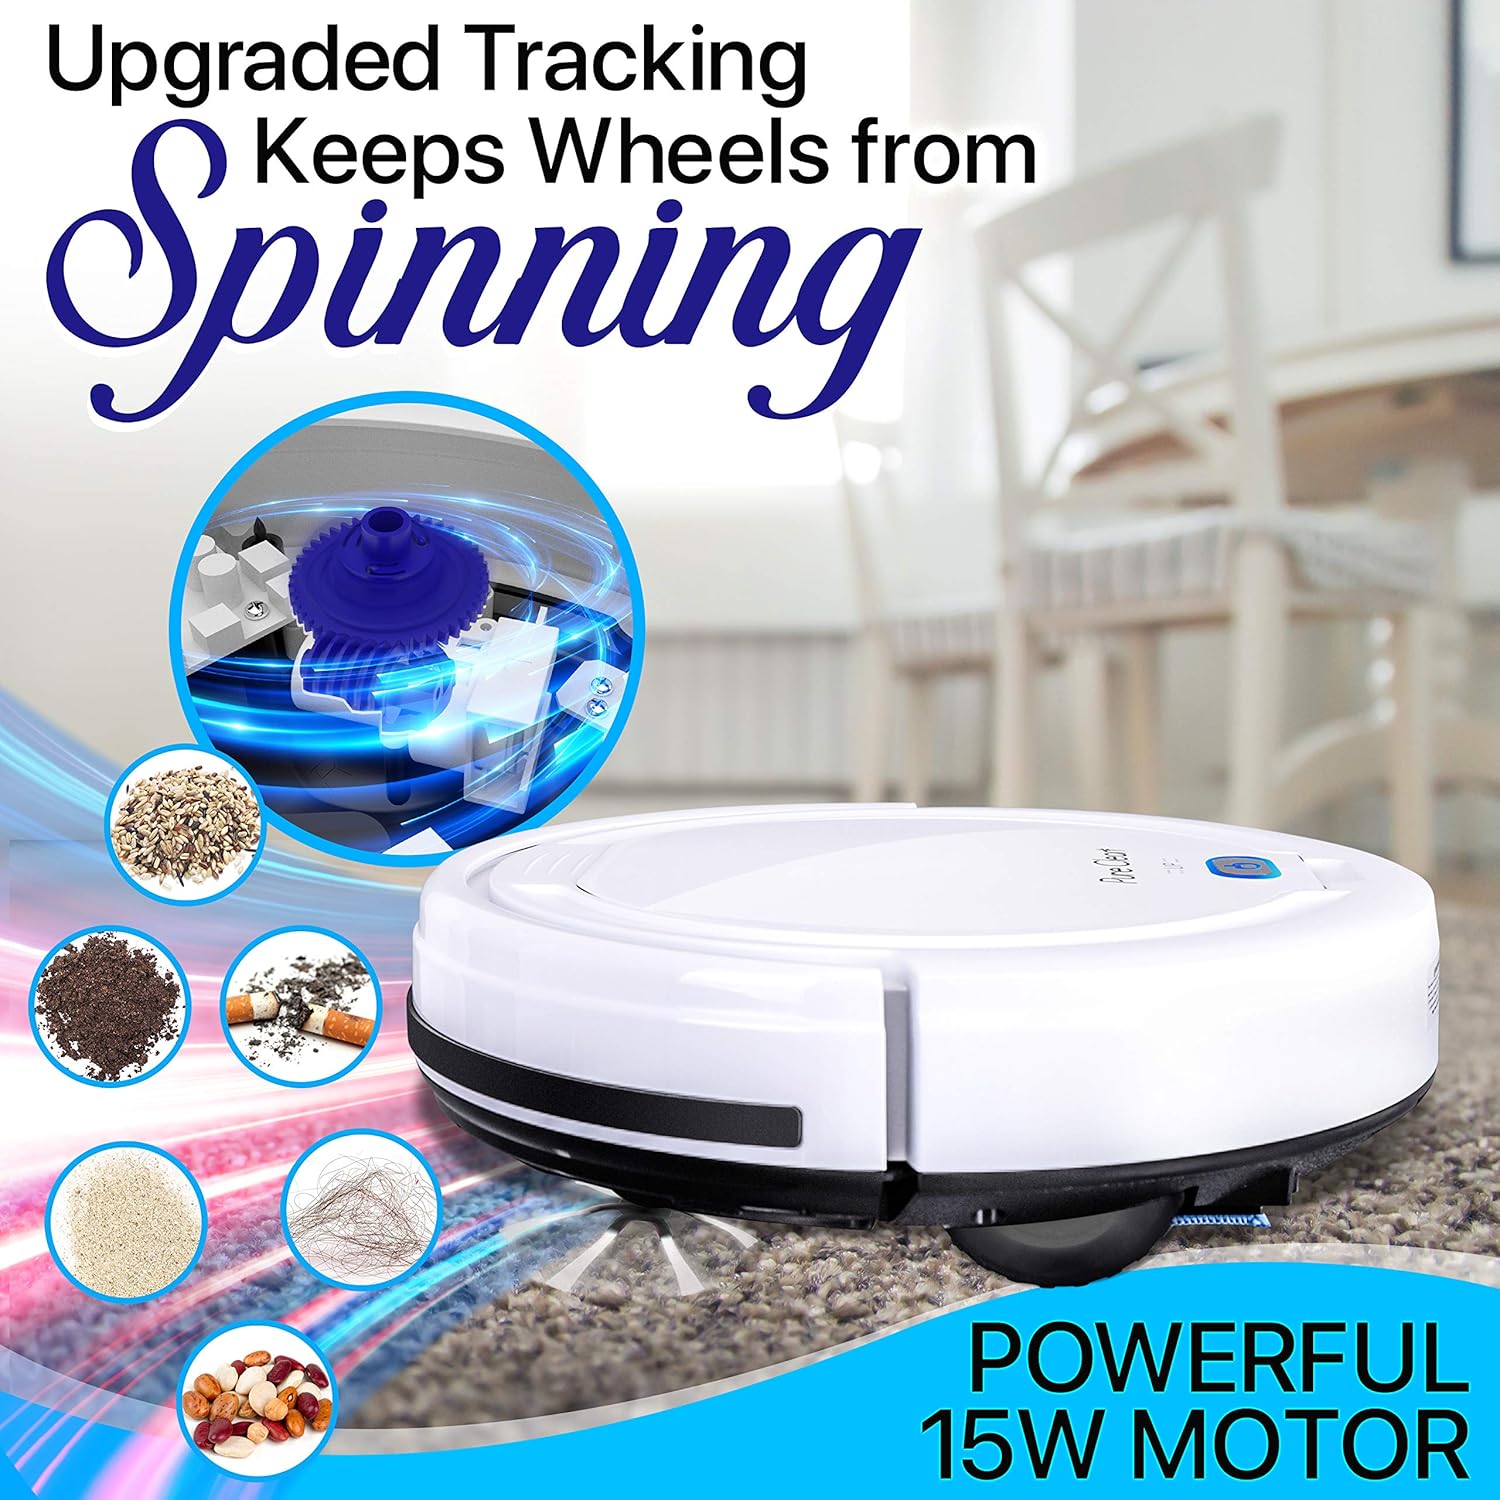
Figure 8: Powerful 15W Motor. This image illustrates the internal mechanism and the types of debris the vacuum is designed to collect, emphasizing its 15W motor.
Warranty Information
This product is covered by a manufacturer's warranty. Please refer to the warranty card included in your packaging for specific terms, conditions, and registration details. Keep your proof of purchase for warranty claims.
Customer Support
For technical assistance, product inquiries, or service requests, please contact SereneLife customer support. Contact details can typically be found on the product packaging, the official SereneLife website, or the warranty card.


