
Introduction
This manual provides essential instructions for the safe and efficient operation, setup, maintenance, and troubleshooting of your Yamata GC-5318-DD Industrial Direct Drive Sewing Machine. Designed for heavy-duty materials such as leather, canvas, and synthetics, this machine features a direct drive motor, 1 needle, and a dual transport system for consistent stitching.
Safety Instructions
- Always disconnect the machine from the power supply before cleaning, servicing, or changing parts.
- Keep fingers away from the needle and moving parts during operation.
- Ensure the machine is placed on a stable, level surface.
- Do not operate the machine with damaged cords or plugs.
- Use only genuine Yamata replacement parts and accessories.
- This machine operates on 110V. Verify your power supply matches this requirement.
Setup
Proper setup is crucial for optimal performance and safety. Please follow these steps carefully.
1. Unpacking and Placement
Carefully remove the machine from its packaging. Place the machine on a sturdy industrial sewing table. Ensure adequate space around the machine for material handling and ventilation.
2. Power Connection
Connect the machine's power cord to a grounded 110V electrical outlet. The machine features a Direct Drive motor, which integrates directly into the machine head.
3. Needle Installation
Use only DPx17 type needles. Loosen the needle clamp screw, insert the new needle with the flat side facing the correct direction (usually away from the operator), and push it up as far as it will go. Tighten the needle clamp screw securely.
4. Bobbin and Shuttle Setup
This machine uses a Jumbo shuttle. Wind the bobbin evenly with the desired thread. Insert the wound bobbin into the bobbin case, ensuring the thread feeds correctly through the tension spring. Place the bobbin case into the shuttle hook assembly.
5. Threading the Machine
Follow the numbered threading path indicated on the machine. Ensure the thread passes through all tension discs, thread guides, and the take-up lever before being threaded through the needle eye.
6. Presser Foot (Calcador) Adjustment
The machine features an adjustable presser foot height, ranging from 6mm to 13mm. Adjust the presser foot height according to the thickness of your material to ensure proper feeding and stitch quality. Refer to the machine's specific adjustment points for this setting.
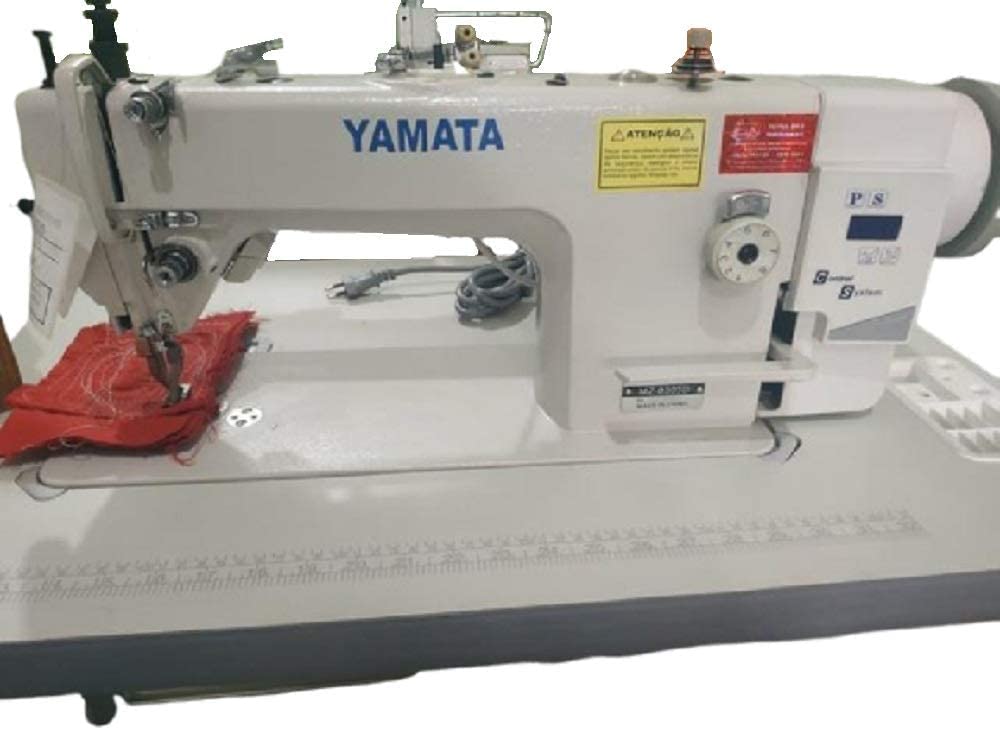
Image: Front view of the Yamata GC-5318-DD Industrial Direct Drive Sewing Machine, showcasing its robust design and control panel.
Operating Instructions
Familiarize yourself with the machine's controls before beginning any sewing project.
1. Power On/Off
Turn the machine on using the main power switch, usually located on the side or front panel. The direct drive motor will be ready for operation.
2. Stitch Length Adjustment
Adjust the stitch length using the stitch length dial or lever. This machine supports a stitch length of up to 8mm, suitable for heavy materials and decorative stitching.
3. Material Handling and Dual Transport
The Yamata GC-5318-DD is equipped with a dual transport system (presser foot and feed dog). This system ensures consistent and powerful feeding of heavy materials like leather, canvas, and synthetics, preventing slippage and ensuring even stitches. Place your material under the presser foot, lower the foot, and begin sewing.
4. Speed Control
The direct drive motor allows for precise speed control, up to 4,000 stitches per minute (ppm). Use the foot pedal to control the sewing speed. Practice to achieve smooth and consistent speed for various tasks.

Image: Close-up view of the Yamata GC-5318-DD sewing machine head, highlighting the needle area and presser foot mechanism.
Maintenance
Regular maintenance ensures the longevity and optimal performance of your sewing machine.
1. Automatic Lubrication
The Yamata GC-5318-DD features an automatic lubrication system. Ensure the oil reservoir is filled to the appropriate level with recommended industrial sewing machine oil. Check the oil level regularly and refill as needed.
2. Cleaning
Regularly clean lint and dust from the feed dogs, bobbin area, and tension discs using a brush or vacuum cleaner. Disconnect power before cleaning.
3. Needle Replacement
Replace needles frequently, especially when sewing heavy materials, to prevent skipped stitches and material damage. A dull or bent needle can cause significant issues.
Troubleshooting
This section addresses common issues you might encounter. For problems not listed here, please contact customer support.
| Problem | Possible Cause | Solution |
|---|---|---|
| Skipped Stitches | Incorrect needle, bent needle, improper threading, incorrect tension. | Replace needle (DPx17), re-thread machine, adjust tension. |
| Thread Breakage | High tension, poor quality thread, burrs on thread path, incorrect needle. | Reduce tension, use quality thread, check thread path for obstructions, replace needle. |
| Uneven Stitches | Incorrect tension, worn feed dogs, presser foot not adjusted correctly for material thickness. | Adjust upper and bobbin tension, clean feed dogs, adjust presser foot height (6-13mm). |
| Machine Not Starting | No power, main switch off, motor issue. | Check power connection (110V), ensure main switch is on. If problem persists, contact support. |
Specifications
- Model: GC-5318-DD
- Brand: YAMATA
- Machine Type: Industrial Direct Drive Sewing Machine
- Needle System: 1 Needle
- Stitch Type: Fixed Point
- Material Compatibility: Heavy materials (leather, canvas, synthetics)
- Motor: Direct Drive
- Voltage: 110V
- Maximum Speed: 4,000 stitches per minute (ppm)
- Maximum Stitch Length: 8mm
- Needle Type: DPx17
- Shuttle Type: Jumbo
- Transport System: Dual Transport (Presser Foot and Feed Dog)
- Presser Foot Height: 6mm / 13mm (adjustable)
- Lubrication: Automatic
- Item Weight: 70 Grams (Note: This value from the product data likely refers to a component, not the entire industrial machine.)
- Power Source: Corded Electric
Warranty and Support
Your Yamata GC-5318-DD sewing machine comes with a warranty against manufacturing defects and technical assistance for 365 days from the date of purchase. This warranty covers operational defects under normal use conditions.
Warranty Service: Labor costs for warranty service are covered if the customer sends or brings the product to our workshop within the warranty period. Transportation costs to and from the workshop are the responsibility of the customer.
Assembly: Please note that initial assembly of the machine is the responsibility of the buyer.
For further support or warranty claims, please refer to your purchase documentation or contact your authorized Yamata dealer.