1. Introduction
This manual provides detailed instructions for the setup, operation, maintenance, and troubleshooting of your Browning BTC-7-4K-EDGE Recon Force 4K Edge Trail Camera. Please read this manual thoroughly before using your camera to ensure proper function and longevity of the device.
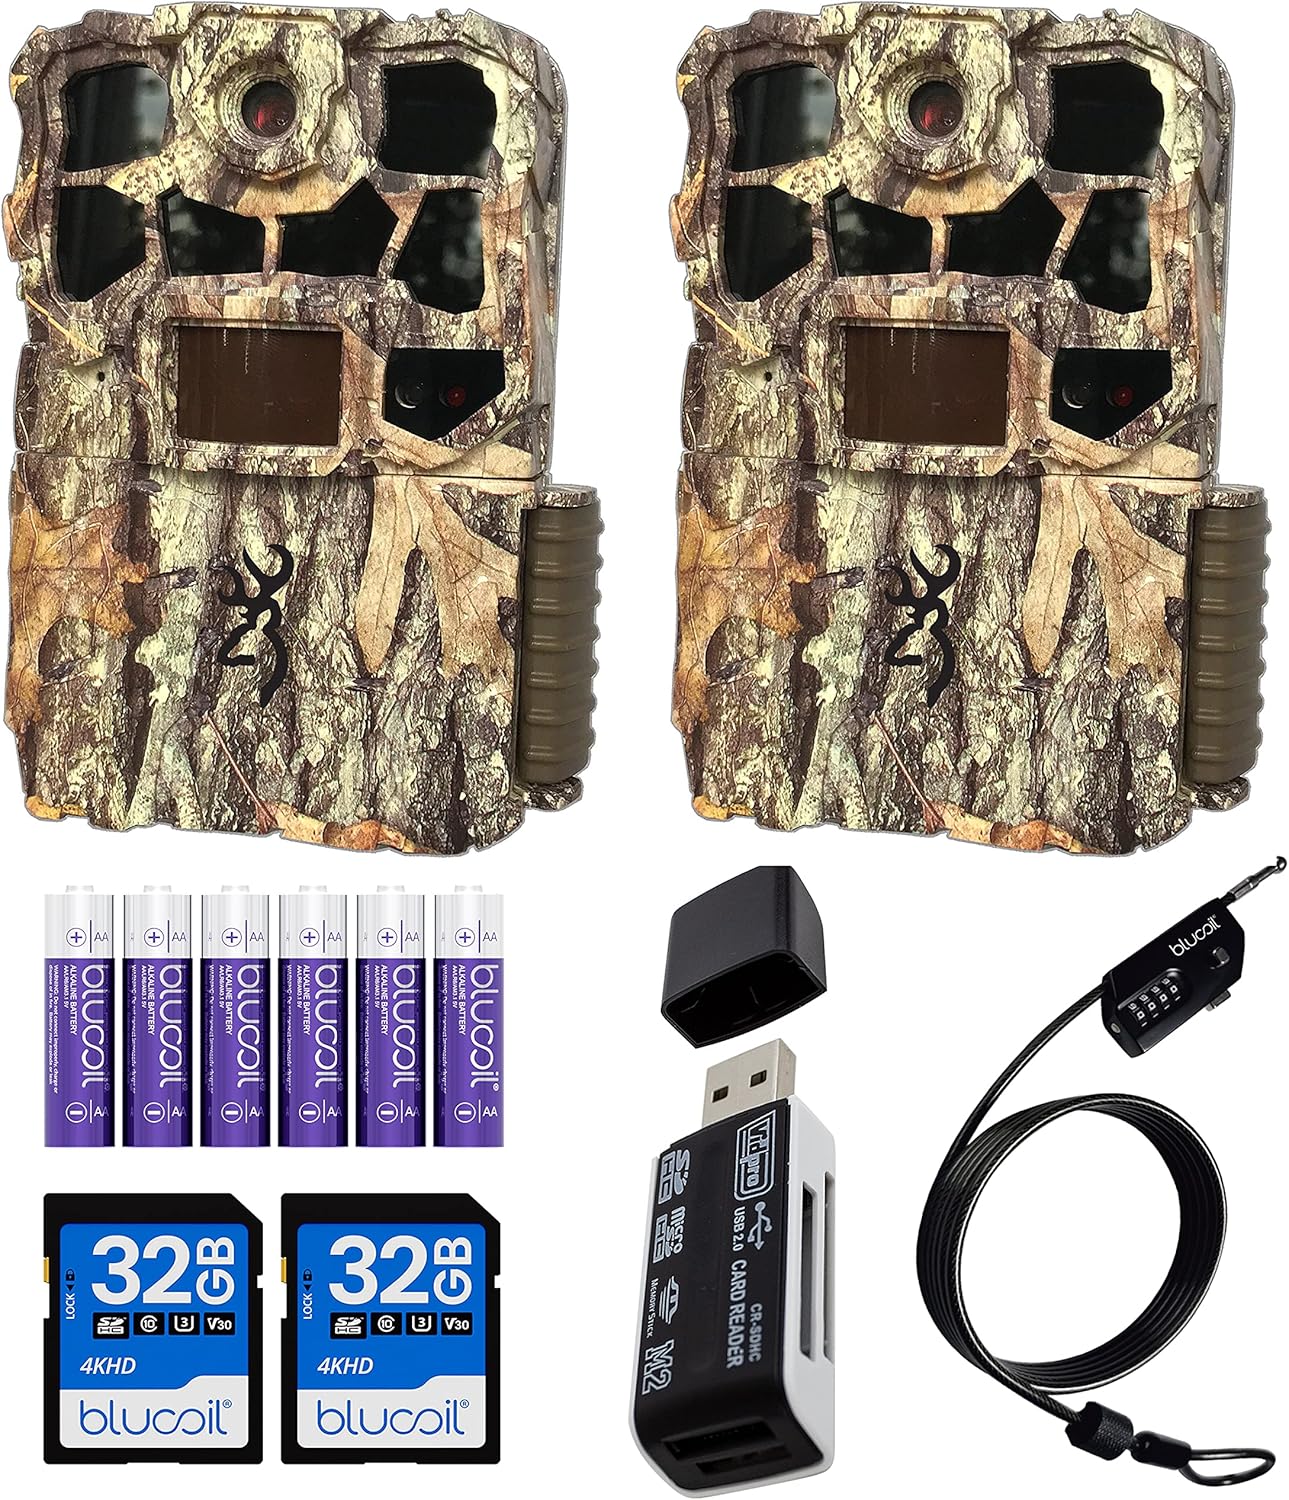
2. Package Contents
Verify that all items listed below are present in your package:
- 2 x Browning BTC-7-4K-EDGE Recon Force 4K Edge Trail Cameras
- 2 x 6-FT Tree Mount Straps
- 1 x Blucoil 6.5-Foot Multi-Functional Combination Cable Lock
- 6 x Blucoil AA Batteries
- 2 x Blucoil 32GB Class 10 SDHC SD Cards
- 1 x VidPro USB 2.0 Card Reader
3. Camera Components
Familiarize yourself with the key components of your trail camera:
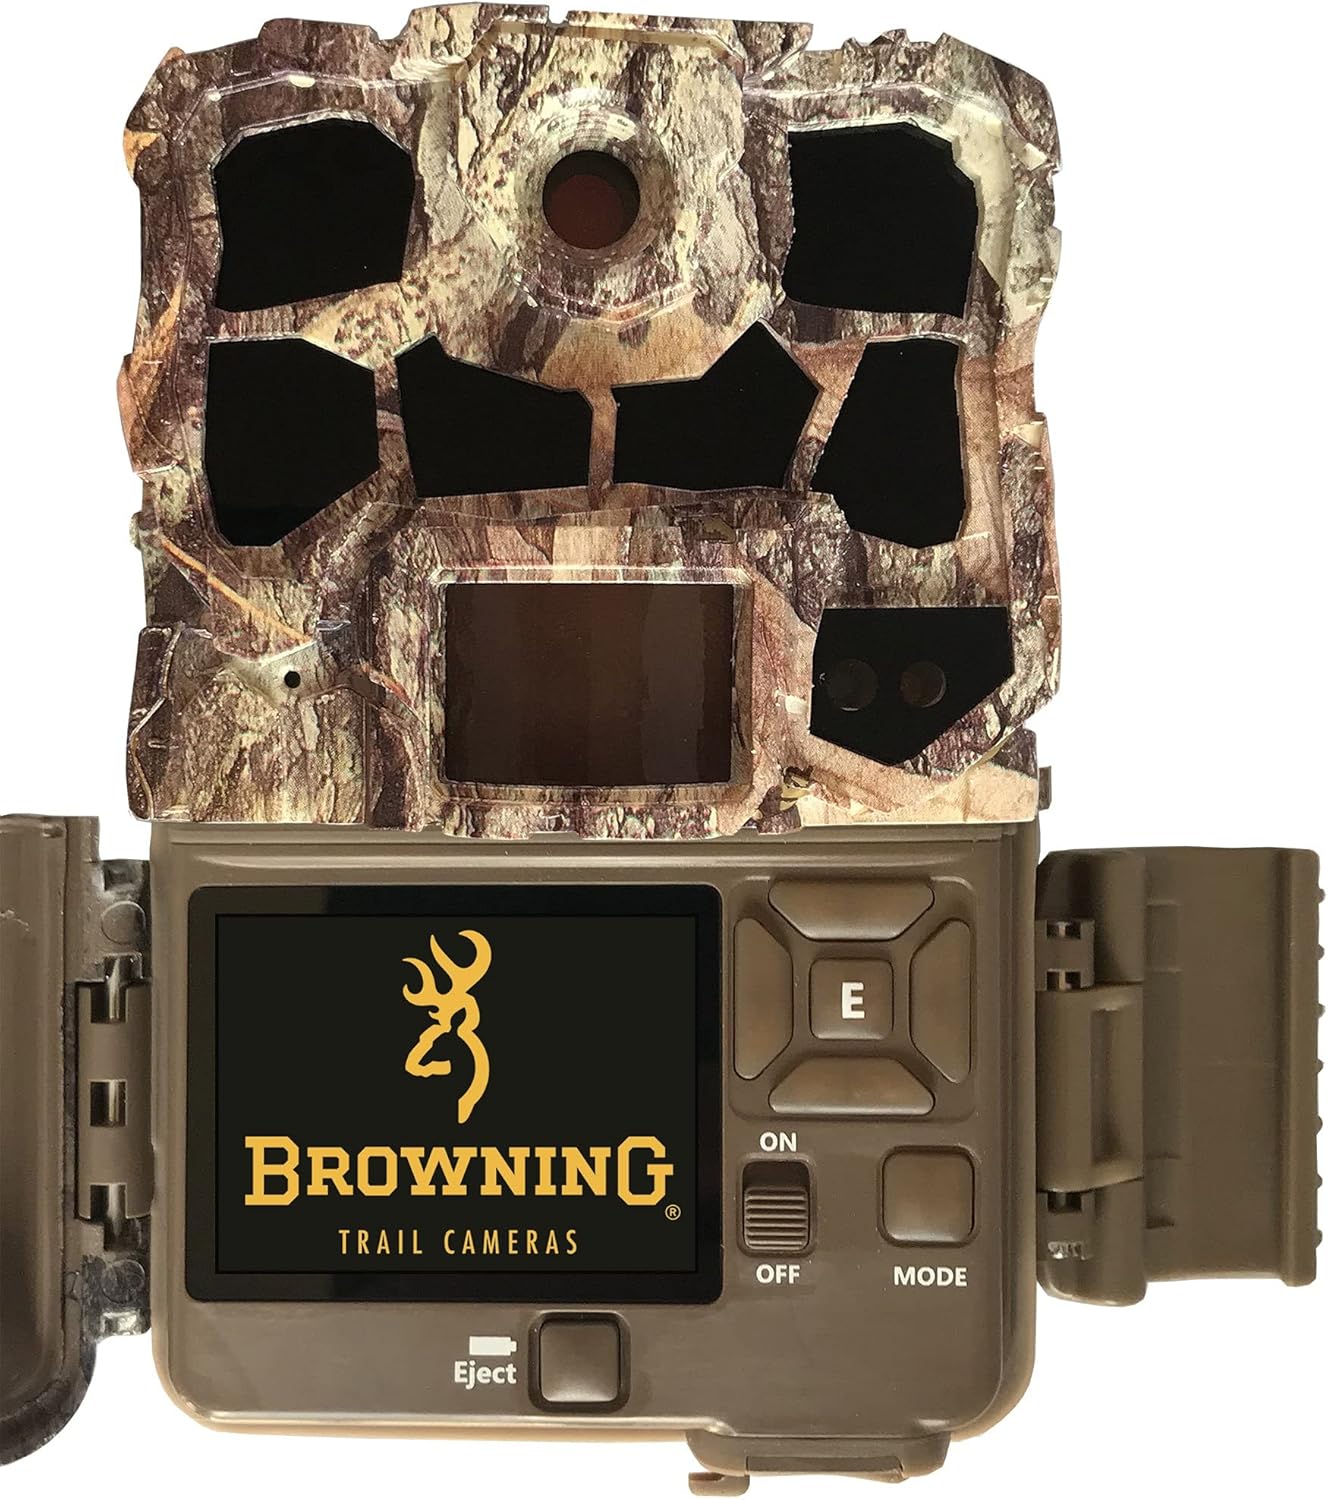
- Lens: Main camera lens for capturing images and videos.
- PIR Sensor: Passive Infrared sensor for motion detection.
- Infrared LEDs: For night vision illumination.
- 2-inch Color LCD Screen: For viewing images, videos, and navigating settings.
- Control Buttons: ON/OFF, MODE, Eject, and navigation buttons for menu interaction.
- SD Card Slot: For inserting the memory card.
- Battery Compartment: Located at the bottom, holds 6 AA batteries.
4. Initial Setup
4.1 Battery Installation
The camera requires 6 AA batteries for operation. For optimal performance, use high-quality alkaline or lithium batteries.
- Open the camera door.
- Locate the battery compartment at the bottom of the camera.
- Insert 6 AA batteries, ensuring correct polarity (+/-) as indicated inside the compartment.
- Close the battery compartment securely.

4.2 SD Card Installation
A Class 10 SDHC or SDXC card (up to 512GB) is required to store photos and videos.
- With the camera powered off, open the camera door.
- Locate the SD card slot.
- Insert the SD card with the label facing forward until it clicks into place.
- To remove, press the card gently until it ejects.
4.3 Basic Settings
After installing batteries and an SD card:
- Slide the power switch to the ON position.
- The camera will display the main menu on the LCD screen.
- Navigate using the control buttons to set the current date, time, and year. This ensures accurate timestamps on your recordings.
- Format the SD card through the camera's menu for optimal performance. This will erase all data on the card.
5. Operating the Camera
5.1 Powering On/Off
Use the ON/OFF switch located inside the camera door to power the device.
5.2 Mode Selection
Press the MODE button to cycle through the available operating modes:
- Trail Camera Mode: Captures photos or videos when motion is detected.
- Timelapse Plus Mode: Captures images at pre-set intervals throughout the day.
- Setup Mode: Allows access to camera settings and menu options.
5.3 Adjusting Settings
In Setup Mode, you can customize various camera parameters:
- Photo Resolution: Up to 32MP.
- Video Resolution: Up to 4K UHD at 30FPS.
- Trigger Speed: Adjustable from 0.4s to 0.7s.
- Detection Range: Adjustable from 55-FT to 80-FT.
- IR Flash Range: Up to 100-FT for clear nighttime images.
- Capture Timer: Set specific times for the camera to be active.
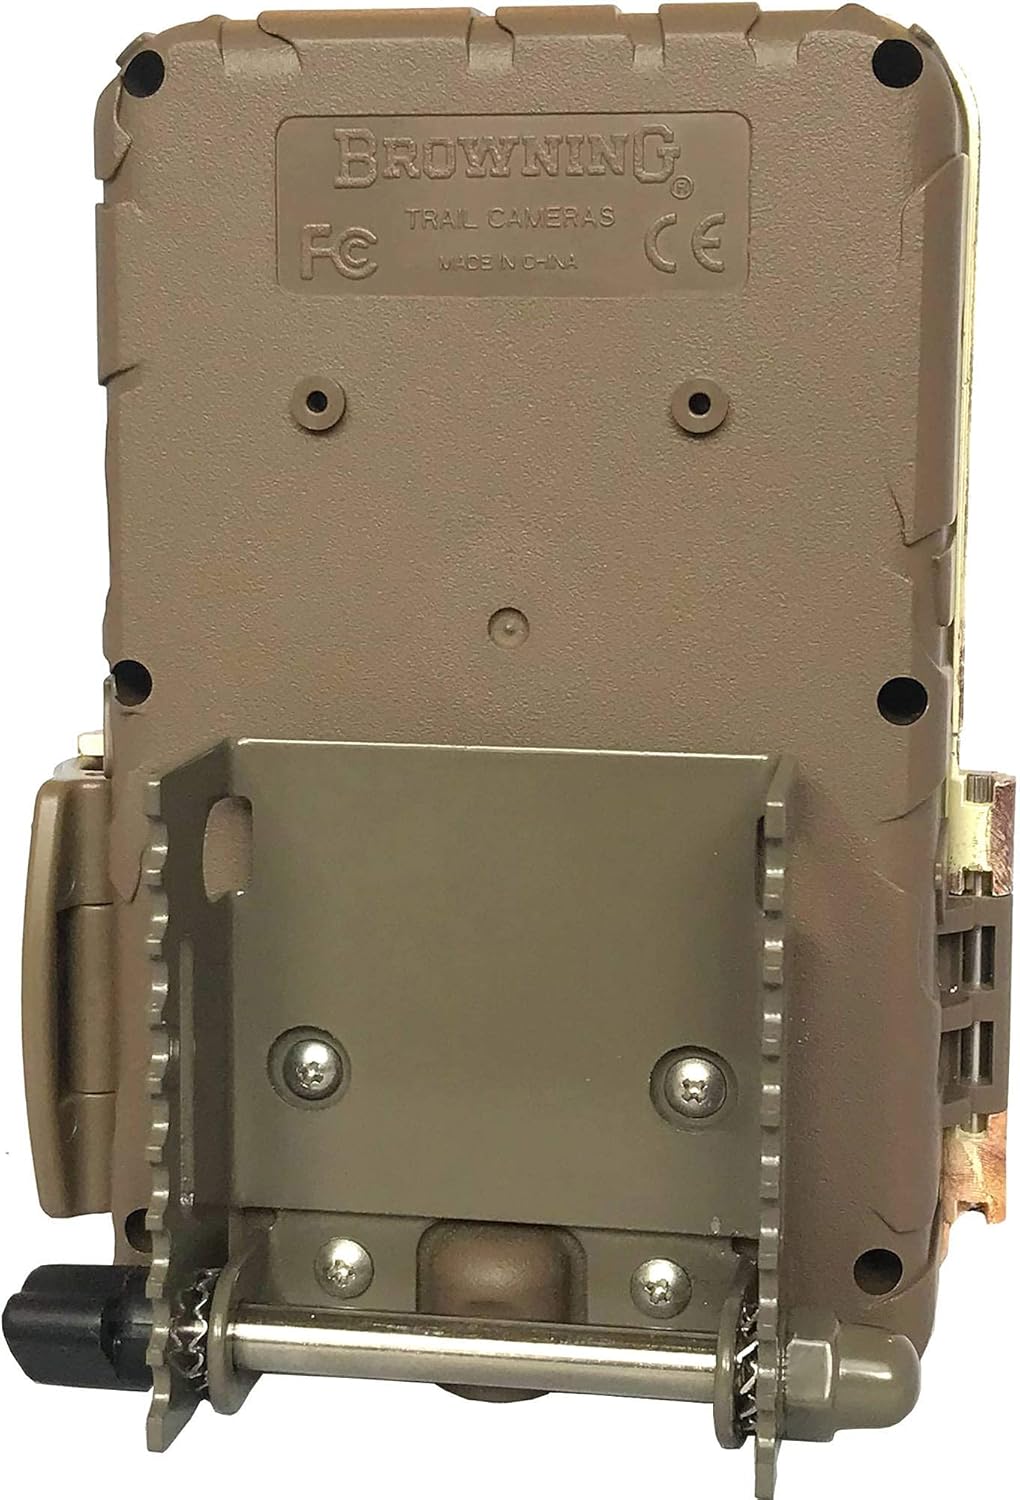
6. Mounting the Camera
Proper mounting ensures optimal performance and security for your trail camera.
- Select a sturdy tree or post at the desired height.
- Thread the provided tree mount strap through the guides on the back of the camera.
- Securely fasten the strap around the tree, ensuring the camera is stable and pointed in the desired direction.
- For added security, use the Blucoil Multi-Functional Combination Cable Lock. Wrap the cable around the camera and the mounting surface, then secure it with your personalized 4-digit code.

7. Viewing and Managing Media
7.1 On-Camera Viewing
The integrated 2-inch color LCD screen allows for immediate review of captured images and video clips. You can also view camera ID, time, date, temperature, and moon phase information.
7.2 Transferring Files
To transfer files to a computer:
- Power off the camera and remove the SD card.
- Insert the SD card into the VidPro USB 2.0 Card Reader.
- Connect the card reader to your computer's USB port.
- Access the files on the SD card through your computer's file explorer.

For Timelapse Plus videos, use the Buck Watch Timelapse Viewer Software (downloadable from Browning's webpage). Note: This software is not compatible with Mac. You may need to change the file extension from TLS to AVI for viewing.
8. Maintenance
Regular maintenance ensures optimal performance and extends the life of your camera.
- Cleaning: Use a soft, dry cloth to clean the camera lens and PIR sensor. Avoid abrasive materials or harsh chemicals.
- Battery Care: Remove batteries if the camera will not be used for an extended period to prevent leakage.
- Storage: Store the camera in a cool, dry place away from direct sunlight and extreme temperatures.
- Firmware Updates: Check the Browning website periodically for any available firmware updates for your camera model.
9. Troubleshooting
Refer to the following table for common issues and their solutions:
| Issue | Possible Cause | Solution |
|---|---|---|
| Camera not powering on | Dead or incorrectly installed batteries | Replace batteries with fresh ones, ensuring correct polarity. |
| Poor image/video quality | Dirty lens, incorrect settings, low light | Clean the lens. Adjust resolution settings. Ensure adequate lighting or proper IR flash activation. |
| No motion detection | PIR sensor obstructed, incorrect sensitivity settings | Clear any obstructions from the sensor. Adjust PIR sensitivity in settings. |
| SD card error | Card not formatted, incompatible card, faulty card | Format the SD card in the camera. Ensure it is a Class 10 SDHC/SDXC card. Try a different SD card. |
10. Technical Specifications
Key technical details for the Browning BTC-7-4K-EDGE Recon Force 4K Edge Trail Camera:
- Model: BTC-7-4K-EDGE
- Photo Resolution: Up to 32 MP
- Video Resolution: 4K UHD at 30 FPS
- Trigger Speed: 0.4s - 0.7s
- Recovery Time: 0.6s
- Detection Range: Up to 80 FT
- IR Flash Range: Up to 100 FT
- Display Screen: 2.0-inch Color LCD
- Power Source: 6 AA Batteries
- Memory Card Support: SD, SDHC, SDXC (up to 512GB)
- Connectivity: Wired (for data transfer via card reader)
- Special Features: Motion Sensor, Night Vision
- Water Resistance: IP54 (Waterproof)
- Dimensions: Approximately 1 x 1 x 1 inches
- Weight: Approximately 1 pound

11. Warranty and Support
For detailed warranty information, please refer to the official Browning Trail Cameras website or the warranty card included with your product. Keep your proof of purchase for any warranty claims.
For technical support or further assistance, please visit the Browning Trail Cameras support page or contact their customer service directly. Contact information can typically be found on the manufacturer's website.


