
ALLIANCE LAUNDRY SYSTEMS 203144P
ALLIANCE LAUNDRY SYSTEMS Mixing Valve Instruction Manual
Model: 203144P | Brand: ALLIANCE LAUNDRY SYSTEMS
1. Product Overview
The ALLIANCE LAUNDRY SYSTEMS 203144P Mixing Valve is a genuine OEM component designed for commercial washer applications. Also known as a water inlet valve, this component is crucial for controlling water flow and temperature within the appliance. It operates at 120V and 60Hz, providing a flow rate of 4.4 Gallons Per Minute (GPM). This valve is compatible with Alliance and Speed Queen brand commercial washers.
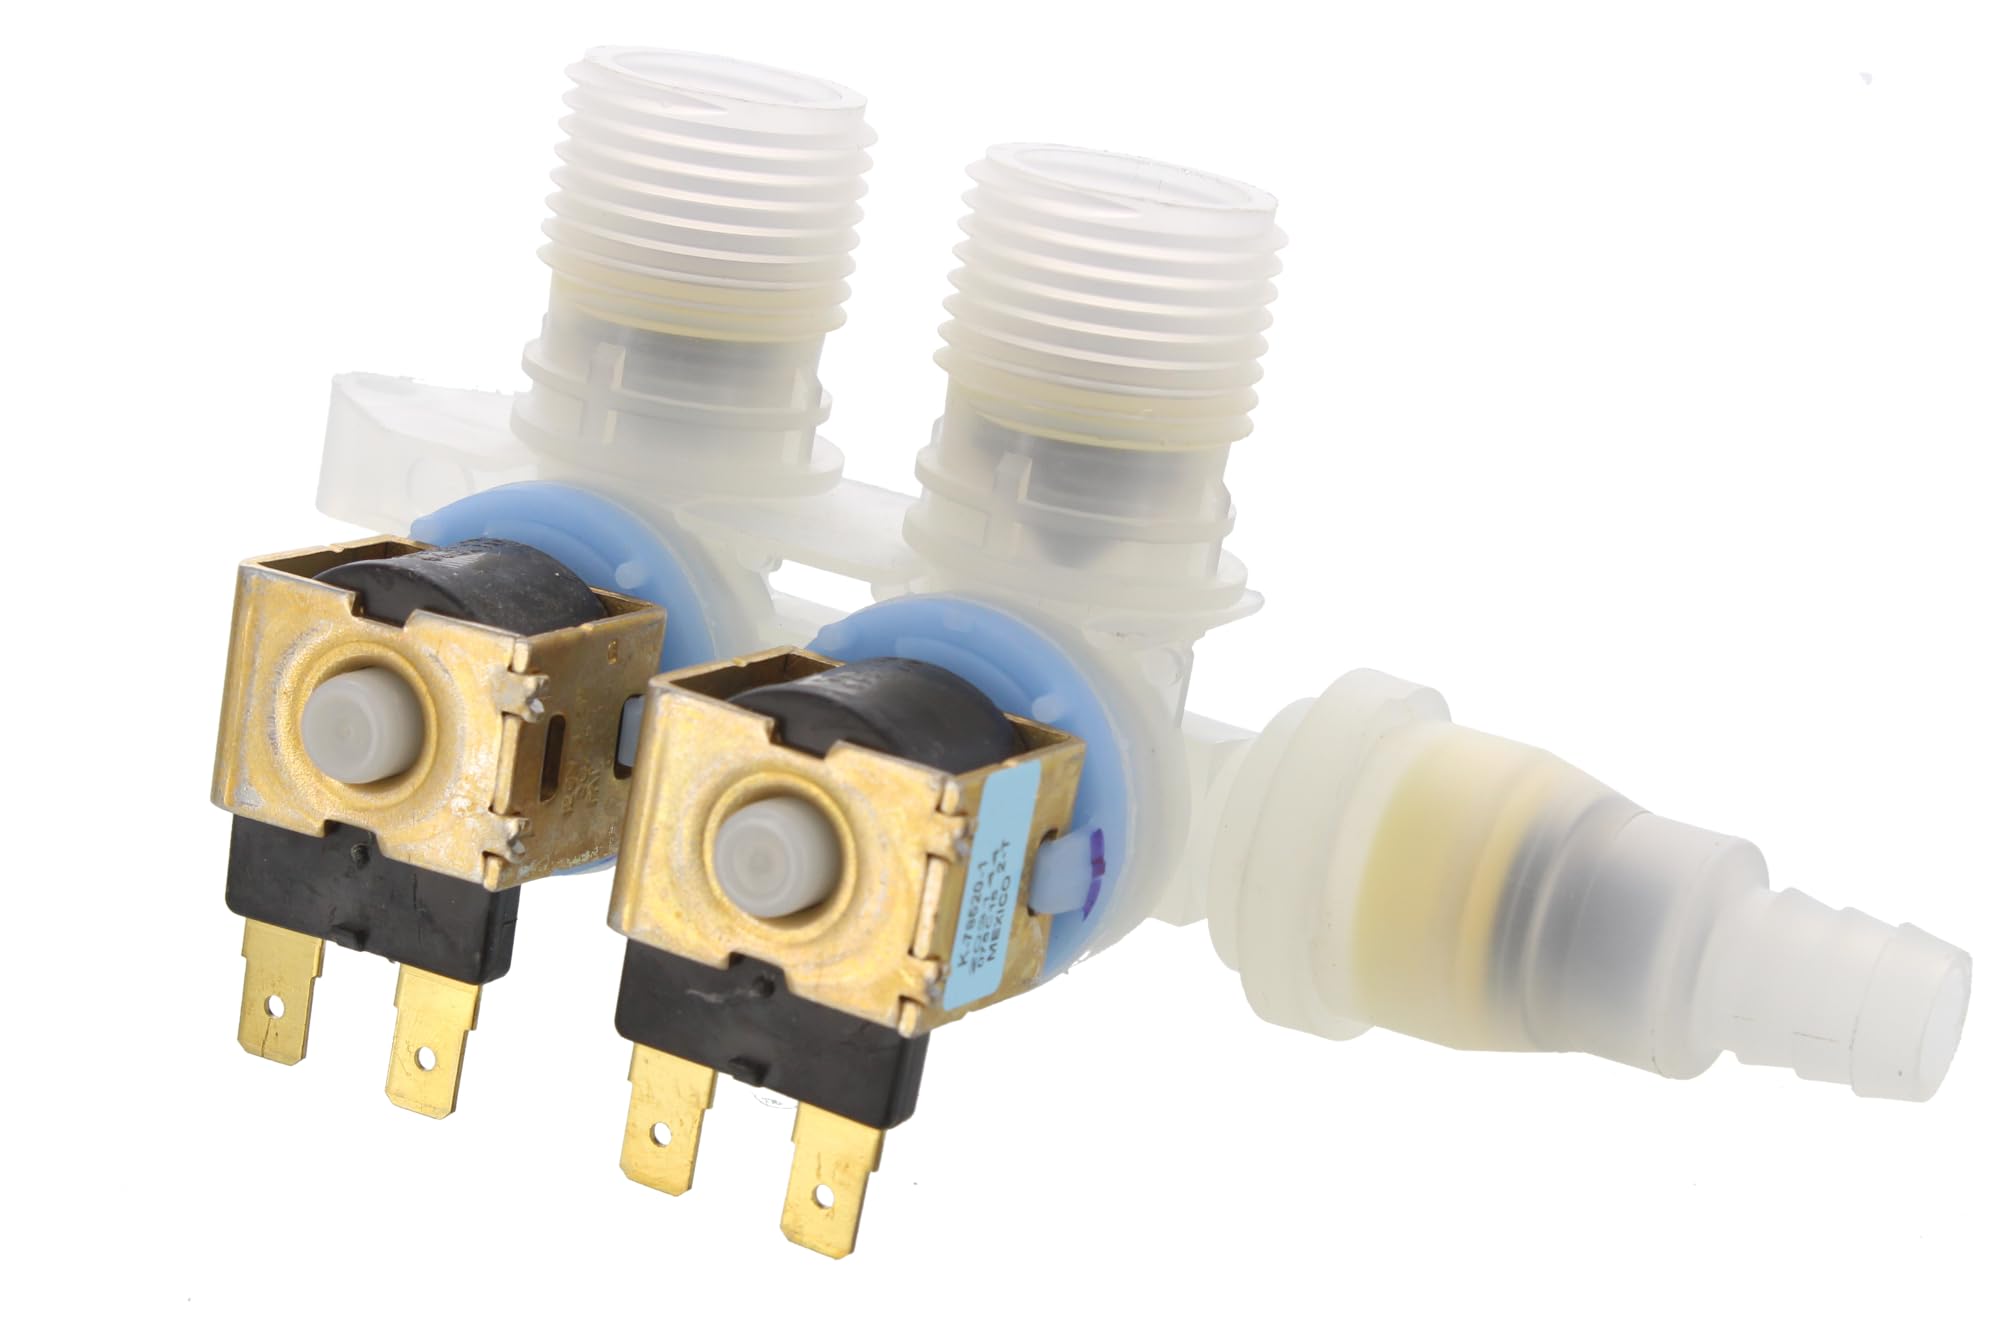
Image: The ALLIANCE LAUNDRY SYSTEMS 203144P Mixing Valve, showing its two threaded inlets, two solenoid coils, and a single outlet connection.
2. Safety Precautions
Before attempting any installation, maintenance, or repair, always prioritize safety. Failure to follow these instructions could result in personal injury or property damage.
- Disconnect Power: Always disconnect the appliance from all electrical utilities before beginning any work. Turn off the circuit breaker for the laundry appliance.
- Turn Off Water Supply: Shut off the water supply to the appliance at the main water valve.
- Wear Protective Equipment: It is recommended to use protective safety equipment, such as gloves and eye protection, during installation.
- Professional Installation: If you are unsure about any step, consult a qualified technician.
- Check for Leaks: After installation, carefully check all connections for water leaks before fully restoring power and water.
3. Package Contents
Verify that all components are present and undamaged upon opening the package.
- 1 x ALLIANCE LAUNDRY SYSTEMS 203144P Mixing Valve
4. Installation Guide
4.1. Before You Begin
- Ensure the appliance is completely disconnected from power and water supply as per Section 2.
- Have appropriate tools ready (e.g., pliers, screwdrivers, towels for water spills).
- Position the appliance to allow easy access to the rear or internal components where the mixing valve is located.
4.2. Installation Steps
- Access the Valve: Depending on your appliance model, you may need to remove the rear panel or top cover to access the existing mixing valve.
- Disconnect Hoses: Carefully disconnect the hot and cold water inlet hoses from the existing valve. Be prepared for residual water to drain.
- Disconnect Wiring: Disconnect the electrical wiring harness from the solenoid terminals on the old valve. Note the orientation if necessary, though most connectors are keyed.
- Remove Old Valve: Unmount the old mixing valve from its housing or bracket. This may involve unscrewing mounting screws or releasing clips.
- Install New Valve: Position the new ALLIANCE LAUNDRY SYSTEMS 203144P Mixing Valve in the same location and secure it using the original mounting hardware.
- Connect Wiring: Reconnect the electrical wiring harness to the solenoid terminals on the new valve. Ensure connections are secure.
- Connect Hoses: Reattach the hot and cold water inlet hoses to the corresponding threaded inlets on the new valve. Hand-tighten first, then use pliers for a snug fit, being careful not to overtighten.
- Restore Water Supply: Slowly turn on the water supply to the appliance. Check all connections for leaks. Tighten any leaking connections as needed.
- Restore Power: Once confident there are no leaks, restore electrical power to the appliance.
- Test Operation: Run a short cycle on the appliance to verify proper water fill and temperature mixing.
- Reassemble Appliance: Reattach any panels or covers removed during installation.
5. Operation
The ALLIANCE LAUNDRY SYSTEMS 203144P Mixing Valve operates automatically as part of your commercial washer's control system. When the washer calls for water, the control board sends electrical signals to the valve's solenoids, which open to allow hot and/or cold water to flow into the wash tub at the specified rate and temperature. No direct user interaction is required for the valve's operation once installed correctly.
6. Maintenance
As an internal component, the mixing valve typically requires minimal maintenance. However, periodic checks can help ensure its longevity and proper function:
- Inspect for Leaks: Periodically check the water inlet hoses and valve connections for any signs of leaks or drips. Address any leaks promptly to prevent water damage.
- Check Inlet Screens: Some water inlet valves have small screens at the hose connections to filter out sediment. If water flow is restricted, these screens may need to be cleaned or replaced. (Refer to your appliance's specific manual for details on accessing these).
- General Cleanliness: Keep the area around the valve clean and free of dust or debris.
7. Troubleshooting
If your commercial washer is experiencing water fill issues, the mixing valve may be a contributing factor. Here are some common symptoms and potential solutions:
| Symptom | Possible Cause | Solution |
|---|---|---|
| No water filling the washer. | Clogged inlet screens, faulty valve solenoids, no water supply. | Check water supply. Inspect and clean inlet screens. Test valve solenoids for continuity (requires multimeter and technical knowledge). Replace valve if solenoids are faulty. |
| Washer fills slowly. | Partially clogged inlet screens, low water pressure. | Clean inlet screens. Check household water pressure. |
| Water continuously fills or overflows. | Faulty valve (stuck open), pressure switch issue. | Disconnect power immediately. Replace the mixing valve if it's not closing properly. Consult appliance manual for pressure switch troubleshooting. |
| Incorrect water temperature (e.g., only cold water). | Faulty hot water solenoid on the valve, hot water supply issue. | Check hot water supply to the appliance. Test the hot water solenoid. Replace valve if solenoid is faulty. |
Note: For complex issues or if you are uncomfortable performing these checks, it is recommended to contact a certified appliance technician.
8. Technical Specifications
| Model Number | 203144P |
| Part Number | 203144P (Replaces 203144) |
| Brand | ALLIANCE LAUNDRY SYSTEMS |
| Valve Type | Mixing Valve (Water Inlet Valve) |
| Voltage | 120V |
| Frequency | 60Hz |
| Flow Rate | 4.4 GPM (Gallons Per Minute) |
| Material | Stainless Steel (for certain components) |
| Item Dimensions (L x W x H) | 6 x 3 x 2.5 inches |
| Item Weight | 6.2 ounces |
| Inlet Connection Type | Threaded |
| Outlet Connection Type | Threaded |
| Number of Ports | 2 (Inlet) |
| Outlet Connection Size | 1.5 Inches |
| Compatible Brands | Alliance, Speed Queen |
9. Warranty and Support
For specific warranty information regarding your ALLIANCE LAUNDRY SYSTEMS 203144P Mixing Valve, please refer to the documentation provided with your original appliance or contact ALLIANCE LAUNDRY SYSTEMS directly. As an OEM part, warranty coverage typically aligns with the manufacturer's standard parts warranty.
For technical support or assistance with installation, it is recommended to contact a qualified appliance technician or the customer service department of ALLIANCE LAUNDRY SYSTEMS.
Related documents203144P


Ask a question about this manual
Ask about setup, troubleshooting, compatibility, parts, safety, or missing instructions. Manuals+ will review the question and use this page’s manual context to help answer it.