
1. Introduction
This manual provides detailed instructions for the installation, operation, and maintenance of your Zonerich AB-F820 Thermal Barcode Printer and Barcode Scanner combo. Please read this manual thoroughly before using the devices to ensure proper functionality and to prevent damage.
2. Safety Information
Observe the following safety precautions to prevent injury or damage to the devices:
- Do not expose the devices to water or excessive humidity.
- Use only the power adapter supplied with the printer.
- Avoid placing the devices in direct sunlight or near heat sources.
- Do not attempt to disassemble or repair the devices yourself. Contact qualified service personnel.
- Keep the devices away from strong electromagnetic fields.
3. Package Contents
Verify that all items are present in the package:
- Zonerich AB-F820 Thermal Barcode Printer
- Zonerich 1D Barcode Scanner
- Power Adapter for Printer
- USB Cable for Printer
- USB Cable for Scanner (or PS2 cable, depending on model)
- Barcode Scanner Stand
- User Manual (this document)
4. Product Overview
4.1 Thermal Barcode Printer
The Zonerich AB-F820 is an 80mm thermal label and sticker printer designed for high-speed barcode printing. It supports a wide range of adjustable printing sizes and offers popular data connection options for easy integration.
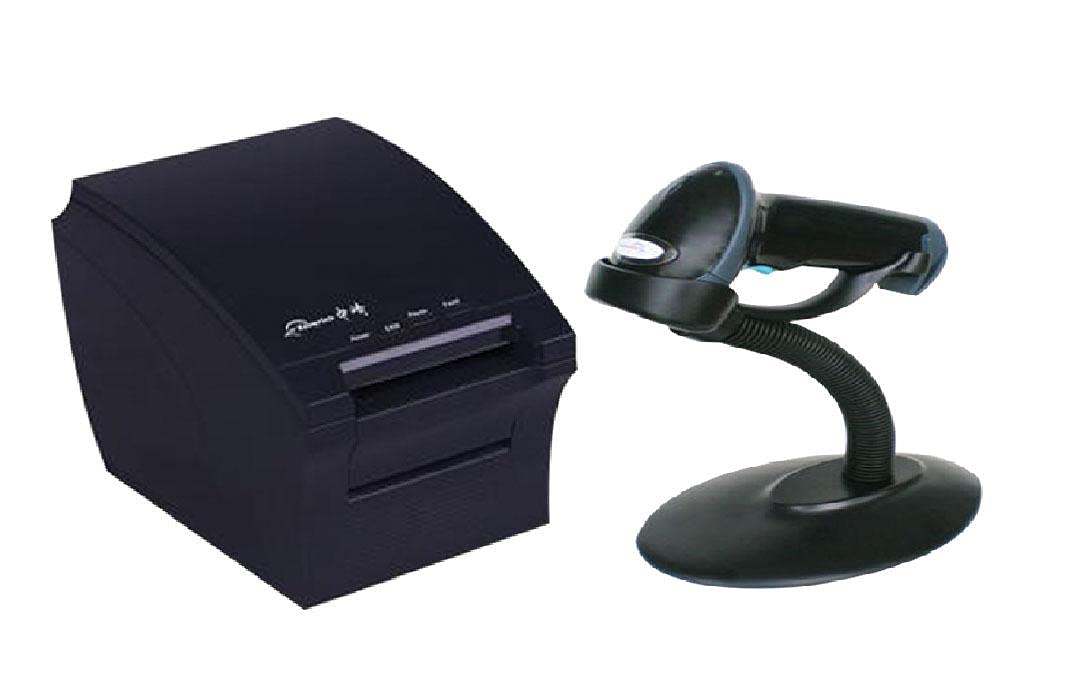
Image 1: Zonerich AB-F820 Thermal Barcode Printer. This image shows the compact, black thermal printer with its power, pause, and feed buttons visible on the top panel, along with the Zonerich logo.
Printer Components:
- Power Button: Turns the printer on or off.
- Feed Button: Advances the label paper.
- Status Indicators: LEDs for power, error, and paper status.
- Paper Compartment: Holds the thermal label roll.
- Interface Ports: USB, Power input.
4.2 Barcode Scanner
The Zonerich 1D Barcode Reader offers a high recognition rate and supports automatic scanning, making it suitable for various applications. It comes with a hand-free stand for convenience.

Image 2: Zonerich 1D Barcode Scanner with Stand. This image displays the black handheld barcode scanner mounted on its flexible gooseneck stand, ready for hands-free operation.
Scanner Components:
- Scan Window: Area where barcodes are read.
- Trigger Button: Activates the scan beam (for manual scanning).
- Cable Port: Connects the scanner to the host device (USB/PS2).
- Hand-Free Stand: Allows for automatic scanning.
5. Setup
5.1 Printer Setup
- Unpack the Printer: Carefully remove the printer and all accessories from the packaging.
- Load Thermal Labels:
- Open the printer's top cover.
- Place the 80mm thermal label roll into the paper compartment, ensuring the labels feed from the bottom and the printable side faces up.
- Pull a small length of labels out past the print head and close the cover firmly until it clicks.
- Connect Power: Plug the power adapter into the printer's power port, then plug the adapter into a wall outlet.
- Connect to Computer: Connect one end of the USB cable to the printer's USB port and the other end to an available USB port on your computer.
- Install Drivers: Insert the driver CD (if provided) or download the latest drivers from the Zonerich website. Follow the on-screen instructions to install the printer drivers.
5.2 Scanner Setup
- Assemble the Stand: If using the hand-free stand, assemble it according to the included instructions. Place the scanner securely in the stand.
- Connect to Computer: Plug the scanner's USB (or PS2) cable into an available port on your computer. The computer should automatically detect and install the necessary drivers.
- Test Scan: Open a text editor or spreadsheet program and scan a known barcode. The barcode data should appear in the document.
6. Operating Instructions
6.1 Printer Operation
- Power On: Press the Power button on the printer. The power indicator LED should illuminate.
- Print Test Page: After driver installation, you can usually print a test page from your computer's printer settings to confirm connectivity.
- Printing Labels: Use your label design software or application to create and send print jobs to the Zonerich AB-F820 printer. Ensure the label size and orientation settings in your software match the physical labels loaded in the printer.
- Feed Button: Press the Feed button to advance a single label or a small length of paper.
6.2 Scanner Operation
- Manual Scanning: Hold the scanner, point the scan window at the barcode, and press the trigger button. A red scan line will appear. Ensure the entire barcode is covered by the scan line.
- Automatic Scanning: Place the scanner in its stand. When a barcode is presented within the scan area, the scanner will automatically activate and read the barcode without needing to press the trigger.
- Supported Barcode Types: The scanner supports various 1D barcode types including EAN8, EAN13, EAN128, Code 39, Code 93, and Code 125.
7. Maintenance
7.1 Cleaning the Printer
- Print Head: Regularly clean the print head with an alcohol swab or a specialized print head cleaning pen to ensure optimal print quality. Turn off the printer and allow the print head to cool before cleaning.
- Exterior: Wipe the exterior of the printer with a soft, damp cloth. Do not use harsh chemicals.
7.2 Cleaning the Scanner
- Scan Window: Use a soft, lint-free cloth to gently wipe the scan window. Avoid scratching the surface.
- Exterior: Clean the scanner's body with a soft, slightly damp cloth.
8. Troubleshooting
8.1 Printer Troubleshooting
- Printer Not Printing:
- Check if the printer is powered on and connected correctly.
- Ensure there is thermal paper loaded correctly and the cover is closed.
- Verify that the printer drivers are installed and the printer is selected as the default printer in your software.
- Check for any error indicator lights on the printer.
- Poor Print Quality:
- Clean the print head as described in the Maintenance section.
- Ensure you are using high-quality thermal labels.
- Adjust print density settings in your printer driver if available.
8.2 Scanner Troubleshooting
- Scanner Not Reading Barcodes:
- Ensure the scanner is properly connected to the computer.
- Clean the scan window.
- Verify that the barcode type is supported by the scanner.
- Ensure the barcode is not damaged or poorly printed.
- Check ambient lighting conditions; excessive glare can affect scanning.
- Incorrect Data Read:
- Ensure the scanner is configured for the correct barcode symbology.
- Scan the barcode from different angles.
9. Specifications
9.1 Thermal Barcode Printer (Model: AB-F820)
- Brand: Zonerich
- Model Number: AB-F820
- Printer Type: Black & White Thermal Label/Sticker Printer
- Resolution: 8 dots/mm
- Printing Speed: Up to 100mm/s (max)
- Printing Width: 80mm (adjustable)
- Label Speed: 76 to 100 Labels per Minute
- Connectivity: USB (and other popular data connection options)
9.2 Barcode Scanner
- Type: Powerful 1D Barcode Reader
- Scan Speed: 74 Scans/Second
- Reading Accuracy: 0.10-0.852mm
- Barcode Types Supported: EAN8, EAN13, EAN128, Code 39, Code 93, Code 125
- Ports: USB, PS2
- Features: High recognition rate, Automatic Scan, Hand-free stand
9.3 General
- Item Weight: Approximately 11 grams (Note: This weight may refer to a component, not the entire package. Refer to product packaging for accurate shipping weight.)
- ASIN: B0971LF5XL
10. Warranty and Support
For warranty information and technical support, please refer to the documentation provided with your purchase or contact your retailer. Keep your proof of purchase for warranty claims.
