
Introduction
Thank you for choosing the BRPOM BM500-ES Car Jump Starter. This device is a portable, high-capacity power bank designed to jump start vehicles with 12V batteries, and also functions as a power source for electronic devices, an emergency flashlight, and includes additional safety features. Please read this manual thoroughly before use to ensure proper operation and safety.
Safety Instructions
Always observe the following safety precautions when using the BRPOM BM500-ES Car Jump Starter:
- Do not allow the red and black clamps to touch each other, as this may cause sparks, short circuits, or damage.
- Do not jump start a vehicle if the battery voltage is below 10V.
- Do not attempt to jump start a vehicle if the jump starter's battery level is below 20%.
- Do not use the jump starter to charge vehicle batteries. It is designed for jump starting only.
- Do not expose the product to extreme temperatures (above 60°C or below -20°C), direct sunlight, or moisture.
- Do not disassemble, modify, or attempt to repair the unit yourself. Contact customer support for assistance.
- Keep out of reach of children.
- Ensure proper ventilation during use.
- Remove the jump starter from the vehicle battery within 30 seconds after the vehicle starts.
Package Contents
Verify that all items are present in your package:
- BRPOM BM500-ES Car Jump Starter Unit
- Smart Jump Cables with Clamps
- USB-C Charging Cable
- User Manual
- Storage Case

Image: All components of the BRPOM BM500-ES Car Jump Starter package, including the main unit, smart jump cables, USB charging cable, user manual, and a protective carrying case.
Product Overview
Familiarize yourself with the components of your jump starter:
- Main Unit: Contains the battery, control buttons, LED indicators, and various ports.
- Smart Jump Cables: Feature intelligent protection against reverse polarity, over-current, short-circuit, over-charge, and over-temperature. They have a connector that plugs into the jump starter and red/black clamps for the vehicle battery.
- USB Output Ports: For charging mobile phones, tablets, and other USB-powered devices.
- USB-C Input Port: For recharging the jump starter unit.
- LED Flashlight: Integrated light with multiple modes (steady, strobe, SOS).
- Emergency Hammer: A hardened tip for breaking glass in emergencies.
- Compass: Integrated for navigation assistance.

Image: A close-up view of the red and black smart jump cables, highlighting their robust construction and safety features.
Setup: Charging the Jump Starter
Before first use, fully charge the jump starter. It is recommended to recharge the unit every 3-6 months to maintain battery health, even if not used.
- Connect the provided USB-C charging cable to the USB-C input port on the jump starter.
- Connect the other end of the USB-C cable to a 5V/2A or higher USB wall adapter (not included).
- The LED indicators on the jump starter will illuminate and flash to show the charging progress. All LEDs will be solid when fully charged.

Image: The BRPOM BM500-ES jump starter connected to a wall adapter via its USB-C port for recharging. The LED indicators show charging status.
Operating Instructions: Jump Starting a Vehicle
Follow these steps carefully to jump start your vehicle:
- Ensure the jump starter is at least 20% charged.
- Turn off your vehicle's ignition and all accessories (lights, radio, AC).
- Connect the blue end of the smart jump cables to the jump starter's 12V output port. Ensure a firm connection.
- Attach the red positive (+) clamp to the positive (+) terminal of your vehicle's battery.
- Attach the black negative (-) clamp to the negative (-) terminal of your vehicle's battery.
- Check the indicator light on the smart jump cable.
- Solid Green: Connection is correct and safe. Proceed to start the vehicle.
- Solid Red with Beeping: Reverse polarity detected. Disconnect clamps and reattach correctly.
- Flashing Green: Battery voltage is too low. Press the "BOOST" button on the smart cable if available, then start the vehicle within 30 seconds.
- No Light: Check connections or if the vehicle battery is severely damaged.
- Once the indicator is solid green, start your vehicle's engine.
- After the engine starts, immediately remove the smart jump cables from the jump starter, then disconnect the black negative (-) clamp, followed by the red positive (+) clamp from the vehicle battery.
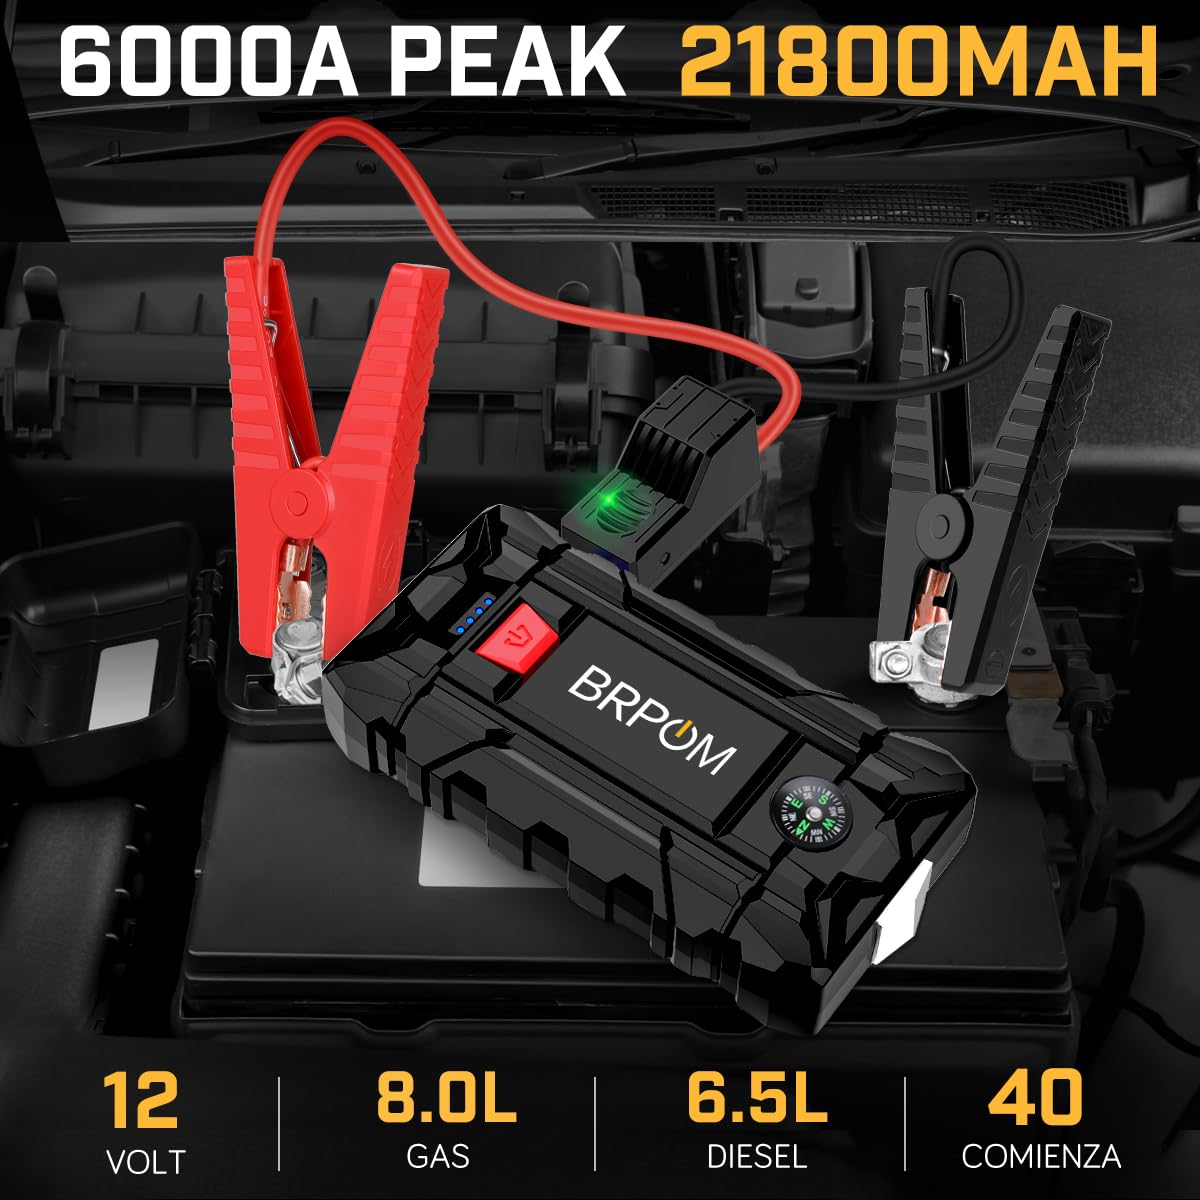
Image: The BRPOM BM500-ES jump starter unit connected to a vehicle battery via its smart jump cables, ready for operation. The green indicator light on the cable connector is visible.
Other Functions
Power Bank Function
The jump starter can charge your electronic devices:
- Connect your device's USB charging cable to one of the USB output ports on the jump starter.
- The jump starter will automatically begin charging your device.
- The unit features Quick Charge 3.0 technology for faster charging of compatible devices.

Image: A BRPOM BM500-ES jump starter unit being used to charge a tablet via its USB output port, demonstrating its power bank capability.
LED Flashlight
The integrated LED flashlight offers multiple modes:
- Press and hold the power button for 3 seconds to turn on the steady flashlight.
- Press the power button again to cycle through modes: Strobe, SOS, and Off.
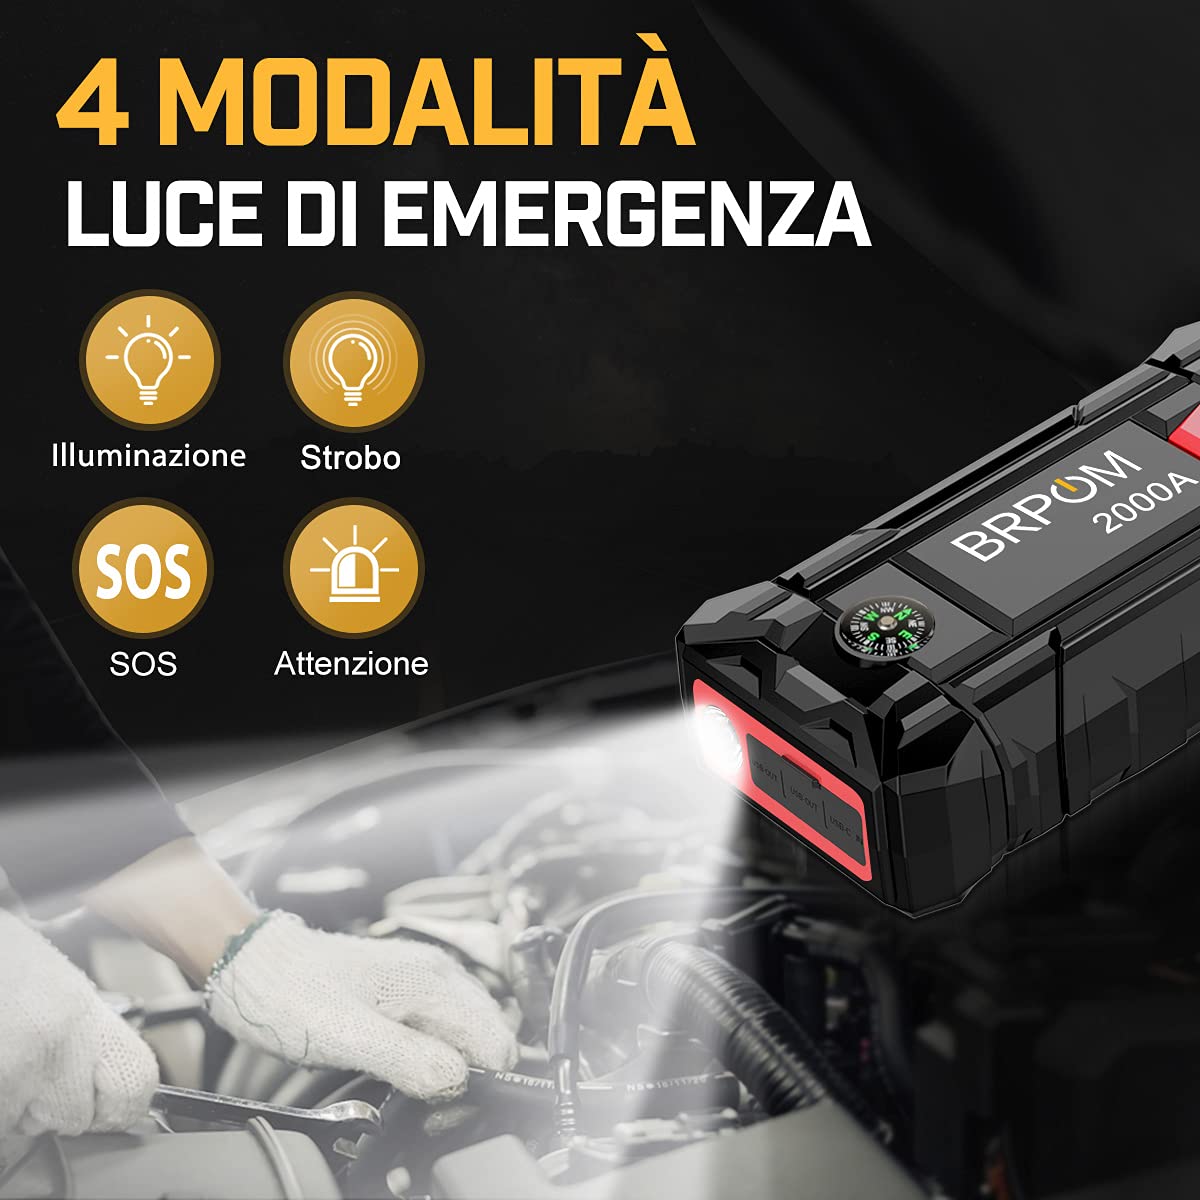
Image: The BRPOM BM500-ES jump starter unit with its LED flashlight illuminated, demonstrating its various lighting modes including steady, strobe, and SOS.
Emergency Hammer
The jump starter includes a hardened tip for emergency glass breaking:
- In an emergency, use the pointed metal tip located on the side of the unit to break vehicle windows.
- Caution: Use only in genuine emergencies.
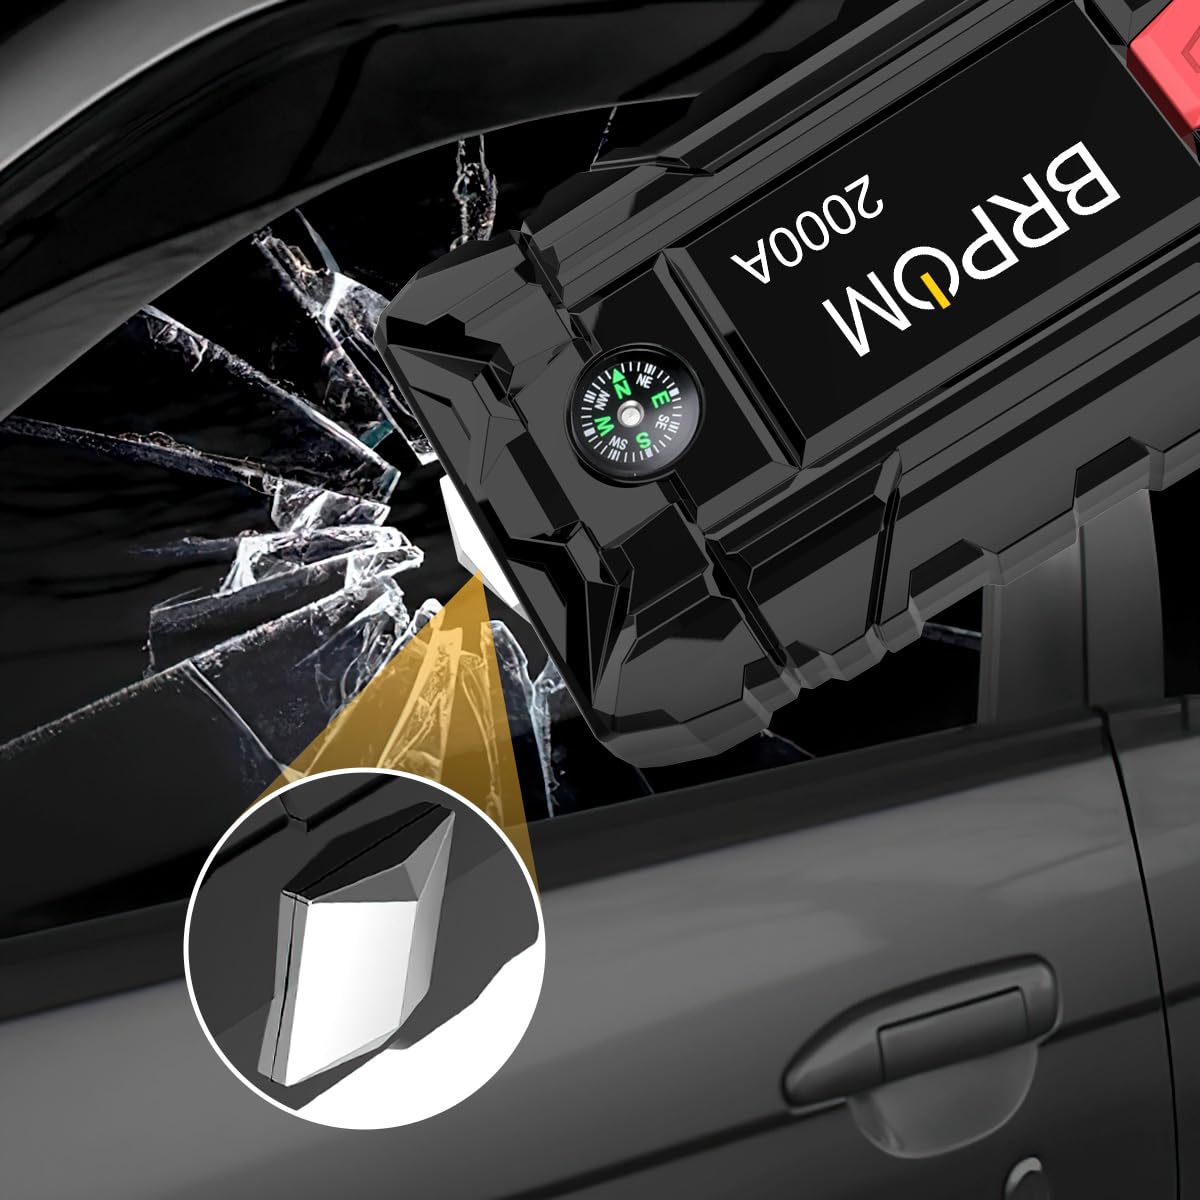
Image: A close-up of the BRPOM BM500-ES jump starter unit highlighting its integrated emergency hammer feature, shown breaking a car window.
Compass
A small compass is integrated into the unit for basic directional guidance.
Maintenance and Storage
- Store the jump starter in a cool, dry place, away from direct sunlight and moisture.
- Recharge the unit at least once every 3-6 months to prolong battery life, even if not used.
- Clean the unit with a soft, dry cloth. Do not use harsh chemicals or abrasive cleaners.
- Keep the smart jump cables clean and free of corrosion.
Troubleshooting
| Problem | Possible Cause | Solution |
|---|---|---|
| Jump starter does not turn on. | Battery is completely discharged. | Charge the jump starter fully. |
| Vehicle does not start. | Incorrect clamp connection; Jump starter battery too low; Vehicle battery severely damaged. | Check smart cable indicator light and re-connect; Recharge jump starter; Consult a mechanic. |
| Smart cable indicator is red and beeping. | Reverse polarity (clamps connected incorrectly). | Disconnect clamps and reattach red to positive (+), black to negative (-). |
| Smart cable indicator is flashing green. | Vehicle battery voltage is very low. | Press the "BOOST" button on the smart cable (if present) and start the vehicle within 30 seconds. |
| Jump starter not charging devices. | Jump starter battery low; Incorrect cable. | Recharge jump starter; Ensure correct USB cable is used. |
Specifications
| Brand | BRPOM |
| Model | BM500-ES (Also referred to as BM1500, BM200-IT) |
| Peak Output Current | 2500 Amps (Product Title) / 2000 Amps (Specifications) |
| Battery Capacity | 15800mAh |
| Battery Cell Composition | Lithium Polymer |
| Voltage | 12 Volts |
| Engine Compatibility | Up to 7.0L Gas or 5.5L Diesel Engine |
| Product Dimensions | 10.2D x 17.8W x 12.7H Centimeters |
| Item Weight | 970 g |
| UPC | 725423034080 |
Note: Specifications are subject to change without notice.
Warranty and Support
For warranty information and customer support, please refer to the documentation included with your product or visit the official BRPOM website. Keep your purchase receipt as proof of purchase for warranty claims.
If you encounter any issues not covered in this manual, please contact BRPOM customer service for assistance.


