
1. Introduction
The Creality CR-30 3DPrintMill is an innovative 3D printer featuring an infinite Z-axis for continuous and batch printing. Its stable Core-XY structure and specialized conveyor belt enable efficient production of long or multiple parts. This manual provides essential information for setting up, operating, and maintaining your CR-30 3D Printer.
Key Features:
- Infinite-Z-axis for Endless Printing: Equipped with a rolling conveyor belt, the CR-30 allows for continuous printing on the Z-axis, ideal for large prints or production lines.
- Rolling Conveyor Belt: The wear-resistant conveyor belt ensures excellent layer adhesion, and prints automatically detach at the belt ends for a smoother workflow.
- Stable Core-XY Structure: A robust Core-XY precision structure with isosceles right triangle support provides a stable and reliable printing experience.
- Dual-gear Metal Extruder: High-quality dual-gear metal extruder offers superior grip and filament pushing force, supporting over 200 hours of continuous printing with its 45-degree slanting nozzle.
- Exclusive Printing Software: Utilizes Creality Belt, a dedicated slicing software optimized for continuous 3D printing, featuring a user-friendly interface.

Figure 1.1: The Creality CR-30 3DPrintMill with its unique conveyor belt design.
2. Setup Guide
Follow these steps to assemble your Creality CR-30 3D Printer. Ensure all components are present before beginning assembly.
2.1 Install the Profile Support Frame
Attach the two front profile support frames to the main base of the printer. The rail with the filament detector should be installed on the right side (when facing the front of the printer), and the plain rail on the left. Secure them using the provided M5x12 bolts. Do not fully tighten the bolts at this stage to allow for minor adjustments later.
2.2 Install X/Y Axis Belt Assembly
Carefully place the upper X/Y axis belt assembly onto the previously installed front support frames. Ensure all wires are untangled. The assembly should align with the rails and the back of the printer's base. Secure the assembly using M5x18 bolts for the lower connections and M5x45 bolts for the upper connections. Do not fully tighten all bolts until the entire frame is aligned and stable.
2.3 Install the Spool Holder
Mount the filament spool holder on the right side of the printer's frame. It attaches using T-nuts and M5x8 bolts. Ensure the T-nuts are correctly oriented to slide into the frame's groove and lock into place when tightened.
2.4 Install the Display
Connect the display cable to the main unit and then attach the display assembly to the front-right side of the printer using M5x8 bolts and T-nuts. Ensure the cable is routed correctly to avoid interference.
2.5 Cable Connection
Connect all remaining cables according to the provided diagrams. This includes connecting the Y-axis motor cable, the filament detector cable, and the PTFE tubing to the hotend. Ensure all connections are secure and properly routed to prevent damage during operation.
Video 2.1: Official product video showcasing the Creality CR-30 3D Printer's features and capabilities.
Video 2.2: A detailed look at the CR-30 3DPrintMill, highlighting its unique design and continuous printing functionality.
3. Operating Instructions
Operating the Creality CR-30 involves preparing your print files, loading filament, and initiating the print process. The unique conveyor belt system allows for continuous printing and automatic part removal.
3.1 Software and Slicing
The CR-30 utilizes Creality Belt slicing software, specifically designed for its continuous printing capabilities. Prepare your 3D models in this software, adjusting settings such as layer height, infill, and print speed. Ensure your model is oriented correctly for the 45-degree print angle.
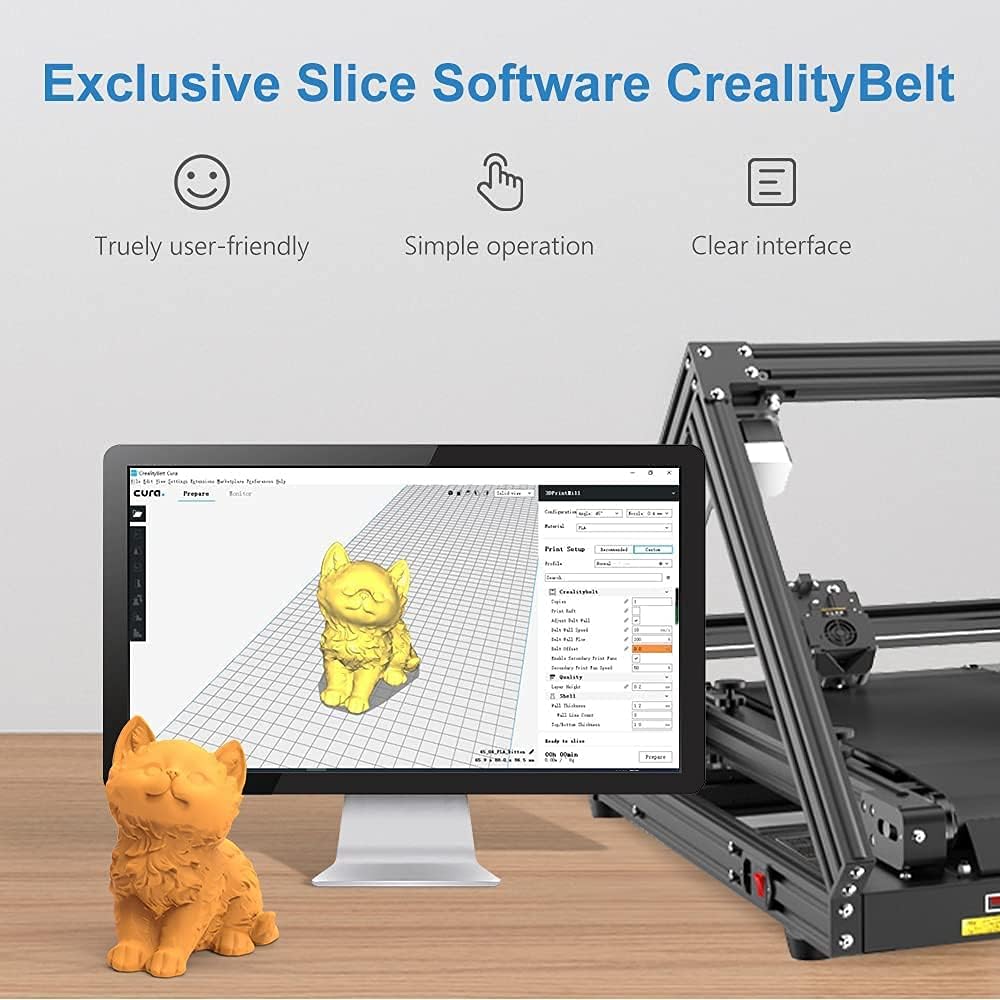
Figure 3.1: The user-friendly interface of Creality Belt slicing software.
3.2 Filament Loading
Place your filament spool on the holder. Feed the filament through the filament detector and into the dual-gear metal extruder. Ensure the filament is properly seated in the extruder gears. Use the printer's menu to initiate the filament loading process, which will heat the nozzle and extrude a small amount of filament.
3.3 Initiating a Print
Once your file is sliced and saved to the SD card, insert the SD card into the printer. Navigate the display menu to select your print file. The printer will preheat the nozzle and bed to the set temperatures before beginning the print. The conveyor belt will move as layers are completed, allowing for continuous output.

Figure 3.2: The resume printing function allows prints to continue after power outages or filament interruptions.
4. Maintenance
Regular maintenance ensures optimal performance and longevity of your Creality CR-30 3D Printer.
- Clean the Conveyor Belt: Periodically clean the conveyor belt to remove any filament residue or debris that may affect adhesion or print quality.
- Inspect the Nozzle: Check the nozzle for clogs or wear. Replace if necessary.
- Lubricate Moving Parts: Apply a small amount of lubricant to the guide rails and lead screws to ensure smooth movement of the print head and belt.
- Check Belt Tension: Ensure the conveyor belt and timing belts are properly tensioned. Adjust if they appear too loose or too tight.
- Tighten Bolts: Over time, some bolts may loosen due to vibrations. Periodically check and tighten all assembly bolts to maintain structural integrity.
5. Troubleshooting
This section addresses common issues you might encounter with your 3D printer.
- Poor First Layer Adhesion: Ensure the print bed is clean and free of oils or debris. Verify that the nozzle height is correctly calibrated to the bed. Adjust the bed temperature as recommended for your filament type.
- Filament Not Extruding: Check for clogged nozzles. Ensure the filament is properly loaded and the extruder gears are gripping it. Verify the hotend temperature is set correctly for the filament.
- Print Quality Issues (e.g., stringing, layer shifts): Adjust retraction settings in your slicing software to reduce stringing. Check belt tension for layer shifts. Ensure the printer is on a stable surface.
- Printer Not Powering On: Verify the power cable is securely connected to both the printer and the power outlet. Check the power switch position.
- Uneven Bed Leveling: The CR-30's unique design requires careful leveling. Ensure the front support frames are securely and evenly installed. Adjust the bed tensioning knobs to achieve consistent nozzle-to-bed distance across the print area.
6. Specifications
| Feature | Specification |
|---|---|
| Product Dimensions | 21.06 x 25.83 x 16.14 inches |
| Item Weight | 36.3 pounds (16.5 Kilograms) |
| Item Model Number | CR-30 |
| Manufacturer | Creality 3D |
| Brand | Comgrow |
| Material | Metal |
| Color | Black |
| On-mode Power Consumption | 350 watts |

Figure 6.1: Dimensions of the Creality CR-30 3DPrintMill.

Figure 6.2: The ultra-silent motherboard ensures quiet operation (below 50dB).
7. Warranty and Support
Comgrow, as the first seller of Creality 3D on Amazon, is committed to providing high-quality products and excellent after-sales service. For any technical support or warranty inquiries, please contact Comgrow's customer service. They have a dedicated team of technical staff to assist with professional support.

