1. Introduction
This manual provides essential instructions for the safe and effective installation, operation, and maintenance of the Mintu Dryer Timer Control Replacement part. This component is designed to replace the original timer control in a wide range of GE dryer models, restoring proper functionality to your appliance. Please read this manual thoroughly before attempting any installation or repair.
Compatible Models Include: PDSR405EH3WW, PDSR405EH4WW, PDSR405EH6WW, PDSR405EH7WW, PDSR405GH1WW, PDSR405GH2WW, PDSR405GH3WW, PDSR405GH4WW, PDSR405GH5WW, PDSR405GH6WW, PDSR405GH7WW, DPSR610EG6WT, DPSR610EG7WT, DPSR610EG8WT, DPSR610GG8WT, DPSR610GG9WT, DRSR495EG1WW, DRSR495EG2WW, DRSR495EG3WW, DRSR495EG4WW, DRSR495EG5WW, DRSR495EG6WW, DRSR495EG7WW, DRSR495EG8WW, DRSR495GG1WW, DRSR495GG2WW, DRSR495GG3WW, DRSR495GG4WW, DRSR495GG5WW, DRSR495GG6WW, DRSR495GG7WW, DRSR495GG8WW, DRSR495GG9WW, GHDP490EF0WW, GHDP490EF1WW, GHDP490EF2WW, GHDP490EF3WW, GHDP490EF4WW, GHDP490EF5WW, GHDP490GF0WW, GHDP490GF4WW, GRDN510EM0WS, PRSR495EH1WW, GRDN510EM1WS, GRDN510EM2WS, GRDN510GM0WS, GRDN510GM1WS, GRDN510GM2WS, GTDN500EM0WS, GTDN500EM1WS, GTDN500EM2WS, GTDN500GM0WS, GTDN500GM1WS, GTDN500GM2WS, GTDP400EM0WS, GTDP400EM1WS, GTDP400EM2WS, GTDP400GM0WS, GTDP400GM1WS, GTDP400GM2WS, GTDP490ED0WS, GTDP490ED1WS, GTDP490ED2WS, GTDP490ED3WS, GTDP490ED4WS, GTDP490ED5WS, GTDP490ED6WS, GTDP490ED7WS, GTDP490ED8WS, GTDP490ED9WS, GTDP490GD0WS, GTDP490GD1WS, GTDP490GD2WS, GTDP490GD3WS, GTDP490GD4WS, GTDP490GD5WS, GTDP490GD6WS, GTDP490GD7WS, GTDP490GD8WS, GTMN500EM0WS, GTMN500EM1WS, GTMN500EM2WS, GTMN500GM0WS, GTMN500GM1WS, GTMN500GM2WS, GTMP400EM0WS, GTMP400EM1WS, GTMP400EM2WS, GTMP400GM0WS, GTMP400GM1WS, GTMP400GM2WS, PBXR495EH3WW, PBXR495GH3WW, PDSR405EH1WW, PDSR405EH2WW, PDSR405GH8WW, PHDSR48EH1WW, PHDSR48EH2WW, PHDSR48EH3WW, PHDSR48EH4WW, PHDSR48EH5WW, PHDSR48EH7WW, PHDSR48GH1WW, PHDSR48GH2WW, PHDSR48GH3WW, PHDSR48GH4WW, PHDSR48GH5WW, PHDSR48GH8WW, PRSR495EH0WW, PRSR495GH0WW, PRSR495GH1WW.
2. Safety Information
- Disconnect Power: Always ensure the dryer is completely disconnected from its power source (unplugged or circuit breaker off) before beginning any repair or installation. Failure to do so can result in serious injury or electrical shock.
- Wear Protective Gear: Use appropriate personal protective equipment, such as gloves and safety glasses, to prevent injury.
- Professional Assistance: If you are unsure about any step of the installation process, or if you lack the necessary tools or experience, consult a qualified appliance repair technician.
- Handle with Care: The timer control contains delicate electronic components. Handle it carefully to avoid damage.
- Proper Disposal: Dispose of the old timer control and any packaging materials according to local regulations.
3. Product Overview
The Mintu Dryer Timer Control is a direct replacement part designed to restore the timing functions of your GE dryer. It controls the duration of drying cycles and other timed operations.

Image 1: Top view of the Mintu Dryer Timer Control replacement part, showing the metal casing and central shaft. The part number '7608230518' is visible on the surface.
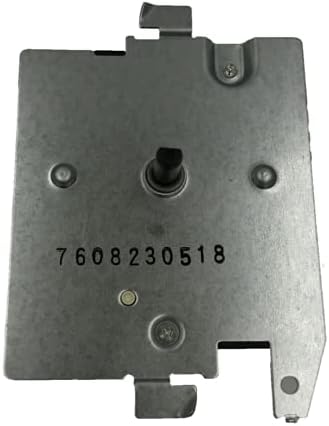
Image 2: Side view of the Mintu Dryer Timer Control, showing the electrical terminals labeled 'A', 'B', 'C', 'D' and the attached wiring harness.

Image 3: Another side view of the Mintu Dryer Timer Control, highlighting the internal mechanism and mounting points for installation.
4. Setup and Installation
The installation process for a dryer timer control typically involves accessing the control panel, disconnecting the old timer, and connecting the new one. Specific steps may vary depending on your exact GE dryer model. Always refer to your dryer's service manual for detailed, model-specific instructions.
General Installation Steps:
- Disconnect Power: Unplug the dryer from the wall outlet or turn off the circuit breaker supplying power to the dryer. Verify power is off before proceeding.
- Access Control Panel: Depending on your dryer model, you may need to remove screws from the rear of the top panel, or pry open the control panel assembly to gain access to the timer.
- Document Wiring: Before disconnecting any wires, take clear photos or draw a diagram of the existing wiring connections to the old timer. This is crucial for correct reassembly.
- Disconnect Old Timer: Carefully disconnect all electrical wires from the terminals of the old timer. Note the position of each wire. Remove any mounting screws or clips holding the old timer in place.
- Install New Timer: Position the new Mintu Dryer Timer Control in the same location as the old one. Secure it with the original mounting screws or clips.
- Connect Wiring: Refer to your photos or diagram and carefully connect each wire to the corresponding terminal on the new timer. Ensure all connections are secure and tight.
- Reassemble Dryer: Reattach the control panel and any other parts removed to access the timer. Ensure all screws are tightened and panels are securely in place.
- Restore Power and Test: Plug the dryer back into the outlet or turn on the circuit breaker. Test the dryer by running a short cycle to ensure the timer functions correctly and advances through the cycle.
5. Operating Instructions
Once the Mintu Dryer Timer Control is correctly installed, it operates as an integral part of your GE dryer's existing control system. There are no separate operating instructions for the timer control itself. The dryer's normal operation, including cycle selection and start/stop functions, will now utilize the newly installed timer.
Refer to your GE dryer's original user manual for specific instructions on selecting drying cycles, setting temperatures, and other operational features.
6. Maintenance
The Mintu Dryer Timer Control is a sealed electronic component and requires no routine user maintenance. It contains no user-serviceable parts. If the timer control malfunctions after installation, refer to the troubleshooting section or seek professional assistance.
To ensure the longevity of your dryer and its components, regularly clean the lint filter and ensure proper ventilation for the appliance.
7. Troubleshooting
If your dryer exhibits issues after replacing the timer control, consider the following troubleshooting steps:
- Dryer Not Starting:
- Ensure the dryer is plugged in and the circuit breaker is on.
- Check that the dryer door is fully closed.
- Verify all wires to the new timer are securely connected.
- Confirm the timer knob is correctly aligned and engaging the timer shaft.
- Timer Not Advancing or Stopping:
- This is a primary symptom of a faulty timer. If the new timer exhibits this, double-check all wiring connections.
- Ensure the dryer is not overloaded, which can sometimes affect cycle progression.
- If the issue persists, the timer itself may be defective, or there could be an issue with another component (e.g., motor, thermal fuse) preventing the cycle from completing.
- No Heat:
- While less common for a timer issue, a timer can sometimes affect heating elements.
- Check other components like the heating element, thermal fuse, or thermostat.
If troubleshooting does not resolve the issue, it is recommended to contact a qualified appliance repair technician for further diagnosis.
8. Specifications
| Brand | Mintu |
| Part Type | Dryer Timer Control Replacement |
| Compatibility | Various GE Dryer Models (e.g., PDSR405EH3WW, PDSR405GH1WW, DPSR610EG6WT) |
| ASIN | B096P9JB6C |
9. Warranty and Support
For information regarding the warranty of your Mintu Dryer Timer Control Replacement part, please refer to the documentation provided with your purchase or contact the seller directly. Specific warranty terms and conditions may vary.
For technical support or further assistance, please reach out to the retailer or manufacturer through the contact information provided at the time of purchase.


